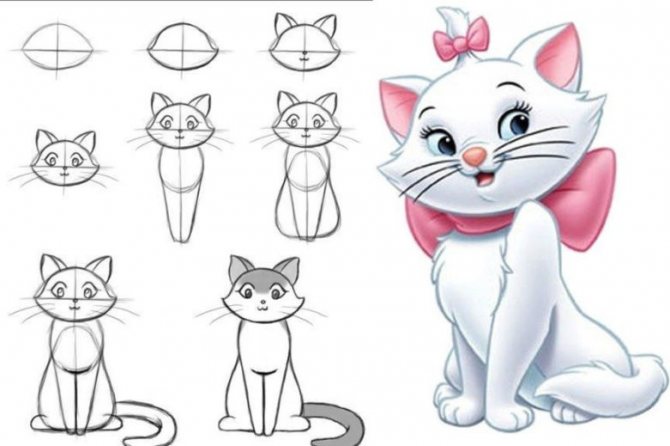
Everyone can learn quickly and easily to draw a sitting cat of any breed, because there are many simple lessons explaining how to do it step by step. Having studied the basic rules and schemes, even young children successfully cope with the task, and then decorate their rooms with beautiful images of favorite pets.

Basic drawing rules
To understand how to draw a cat easily, it is advisable to adhere to several rules:
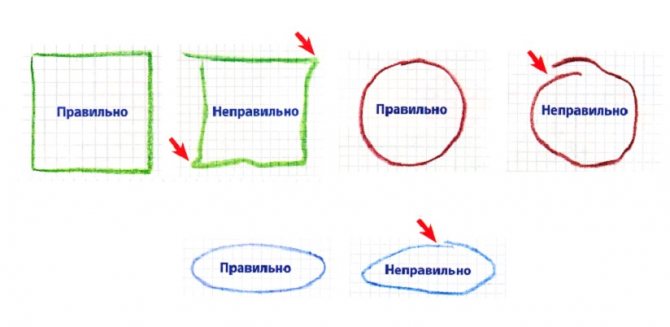
- The basis of most sketches consists of geometric shapes. For them to turn out even, it is desirable to draw them strictly on the squares, it is desirable to practice before drawing.
- It is necessary to explain to a child that the head of an animal should be smaller than the torso, and the paws should be smaller than the tail.
- It is desirable to start drawing any animal from above.
Basic principles used in drawing a cat by children
Drawing, just like other activities (roller skating, music lessons, reading), requires practice. Beginning artists should know that:
- Any drawing is created with the help of basic figures, which are a square, triangle, circle, oval, rectangle. Children 5-6 years old are explained that the lines are drawn clearly on the cells, trying to get even edges, give time to practice on the image of individual figures.

- Each animal or object has certain proportions. Children are told that a cat's head is smaller than its torso and that its legs are shorter than its tail.
- It is more convenient to draw a cat from the head. They study which figures it consists of and try to depict a happy or sad face.
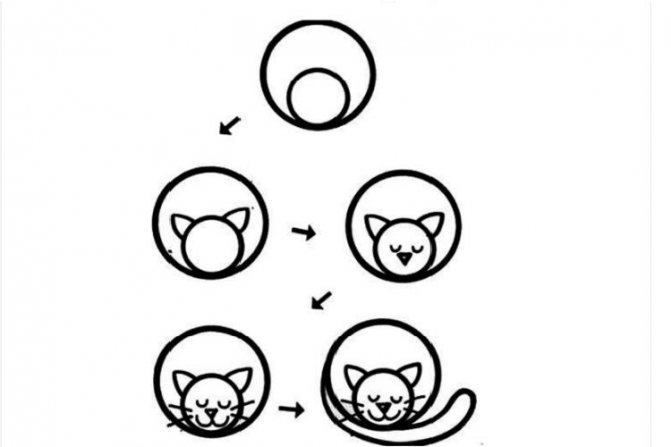
Sleeping cat
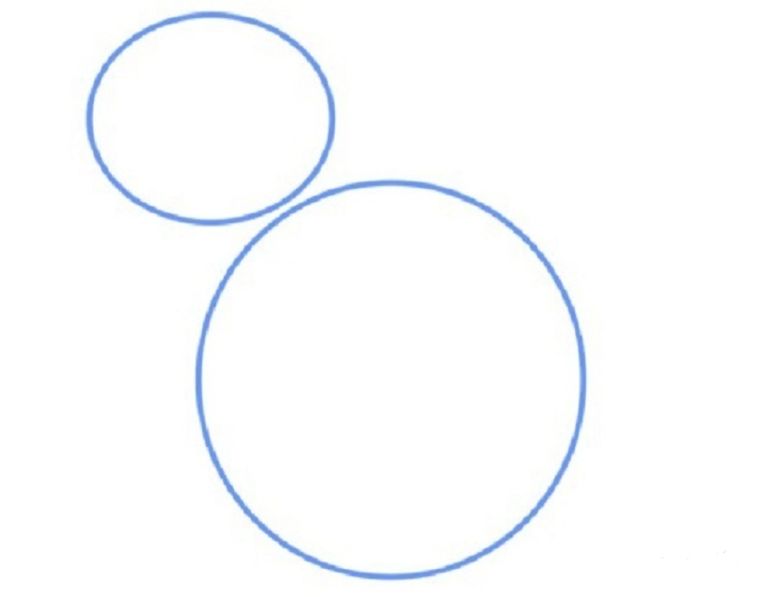
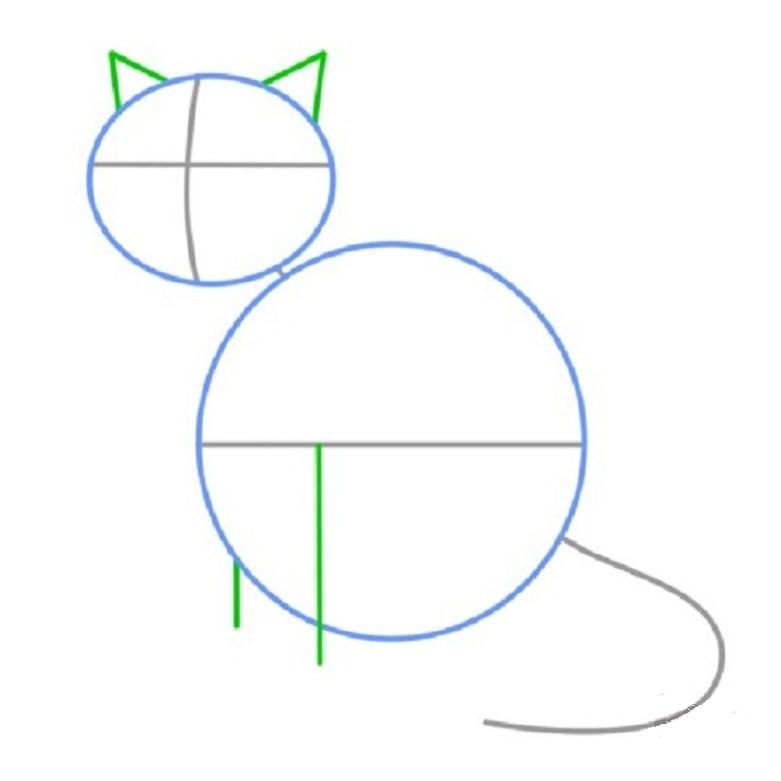
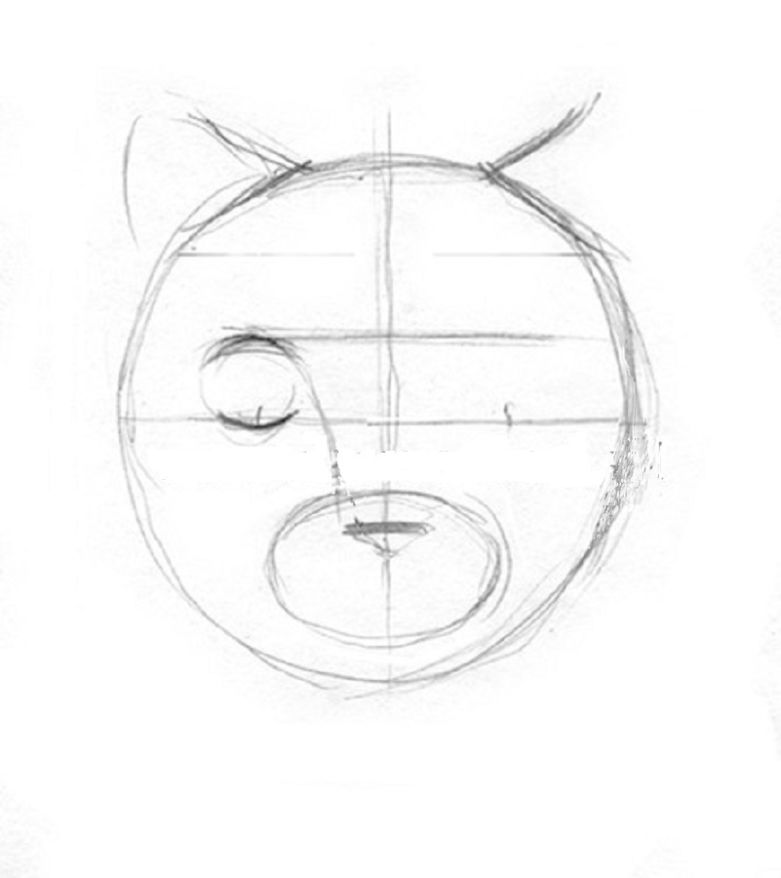
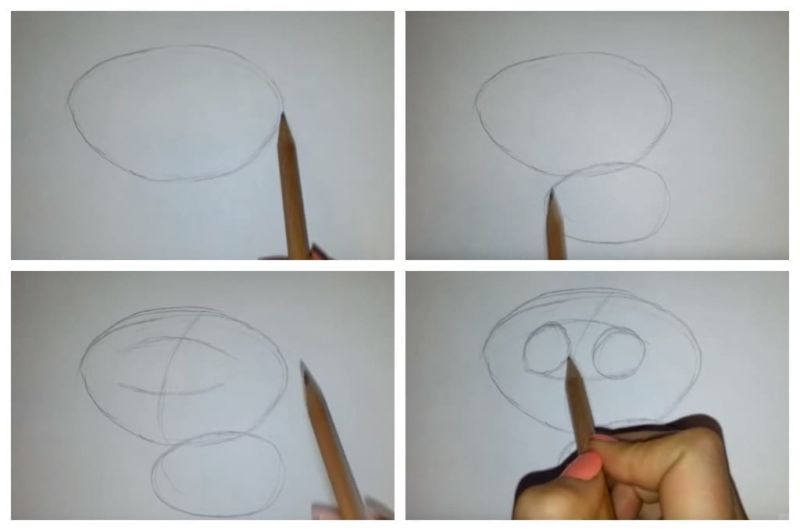
To figure out how to draw a cat for children, it is better to use the following scheme:
- First you need to depict one large circle, and inside it another one. The second circle should be half as big as the first.
- To the second circle finish drawing 2 triangles - these are the ears, then add eyes, nose, mustache.
- In the end, you need to finish drawing the tail of the first circle.
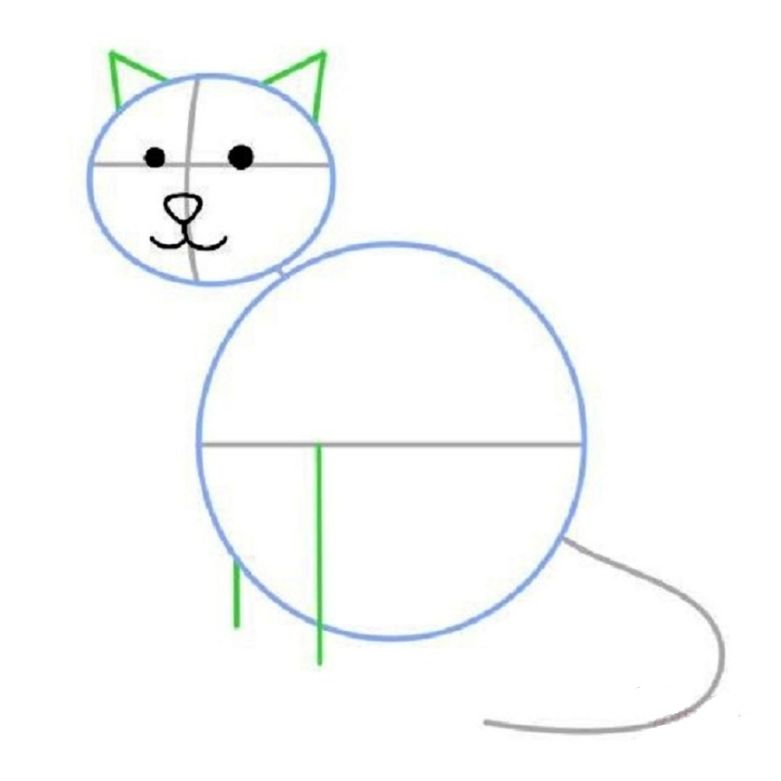
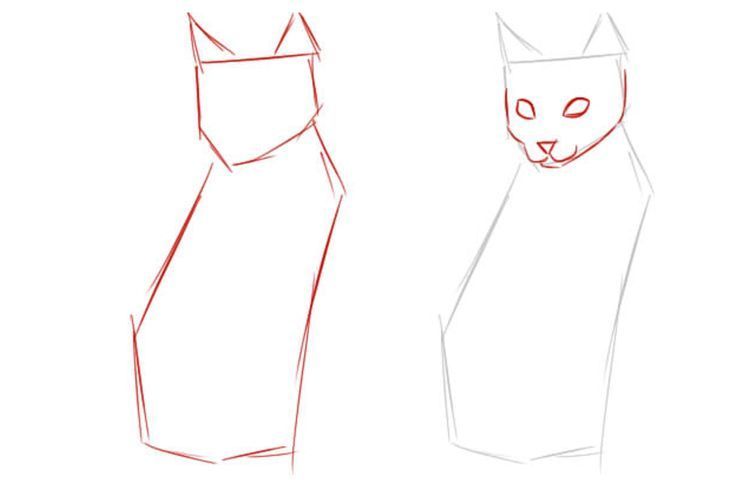
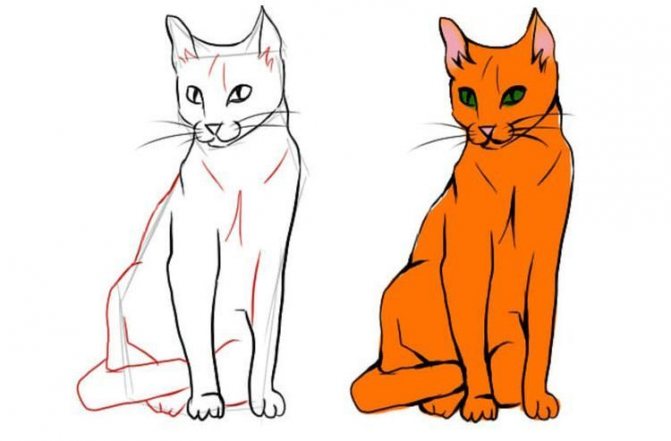
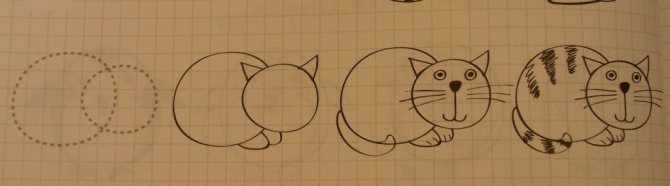
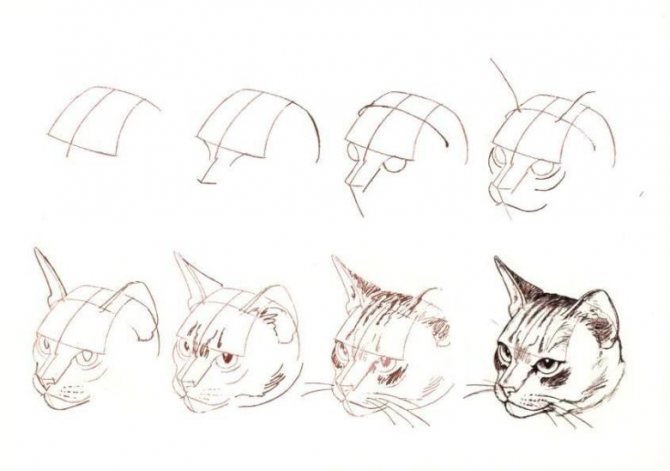
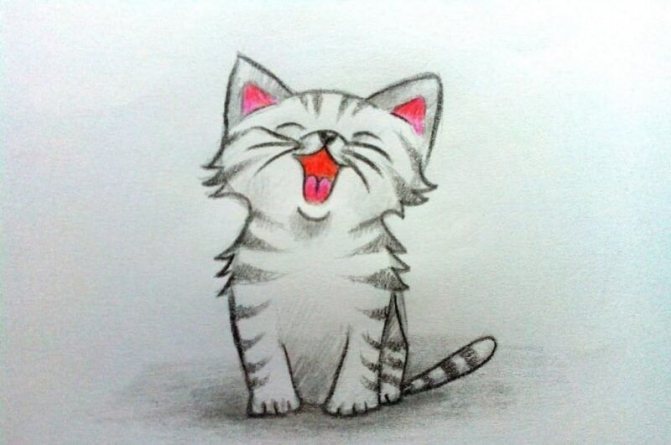
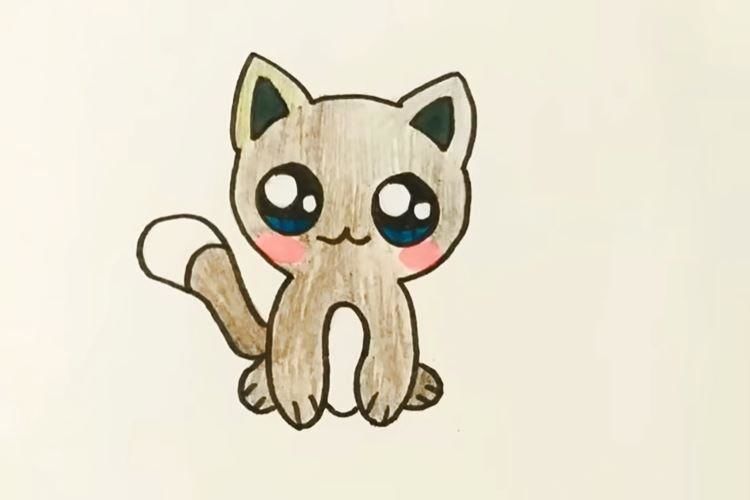
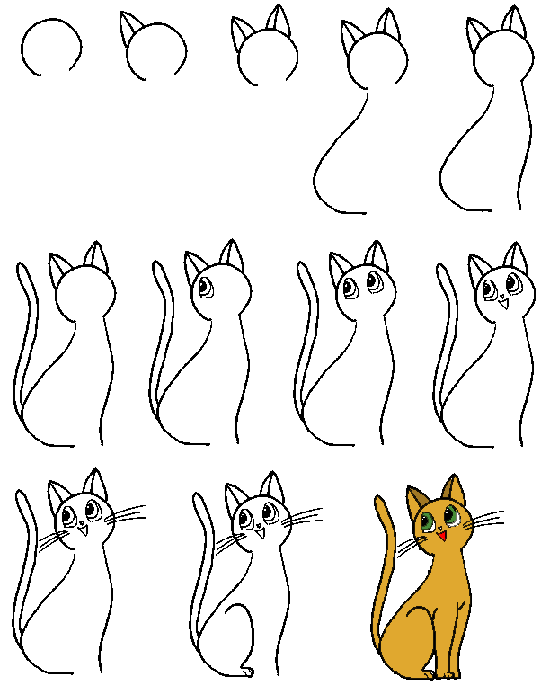
The easiest drawing of a sitting cat
This is the simplest diagram of how to easily draw a sitting cat for beginners. The outlines of any drawing usually visually repeat the outlines of simple geometric shapes - oval, circle, square, triangle. In our case, start with a simple circle, which will be the head. It is better to make a bit pulled out on the sides. From the head down it is necessary to draw 2 curved lines, and from their middle - 2 more semicircular lines, defining the contour of the cat's hind paws.
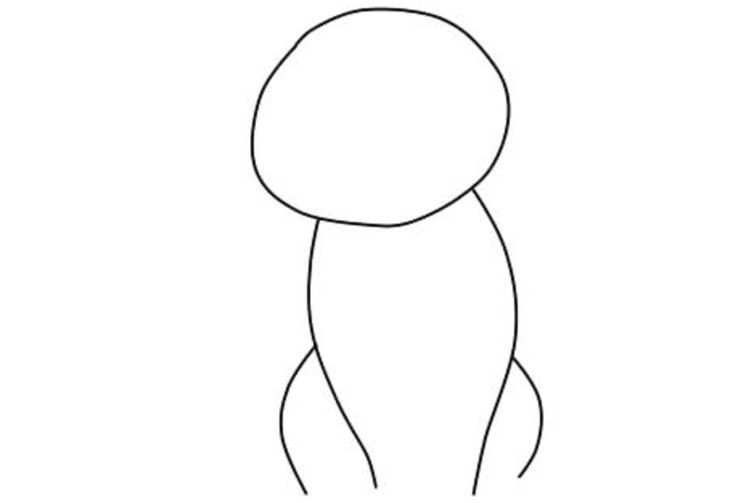
On top of the head draw two ears in the shape of triangles.
At the bottom of the muzzle-circle to draw a triangle - this will be the nose. From him follow 2 scrolls, indicating the mouth. Just above the mouth at the same distance from the edges are eyes. They are usually round, but a little slanted and pointed to the edges. Pupil drawn in darker color.
Draw paws with claws and tail. Tail is drawn at the side. It can be any thickness and length, straight or bent in a crescent, fluffy or smooth.
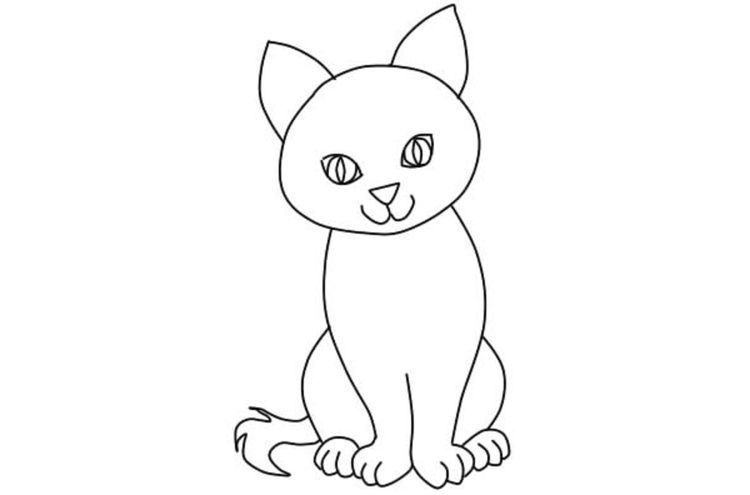
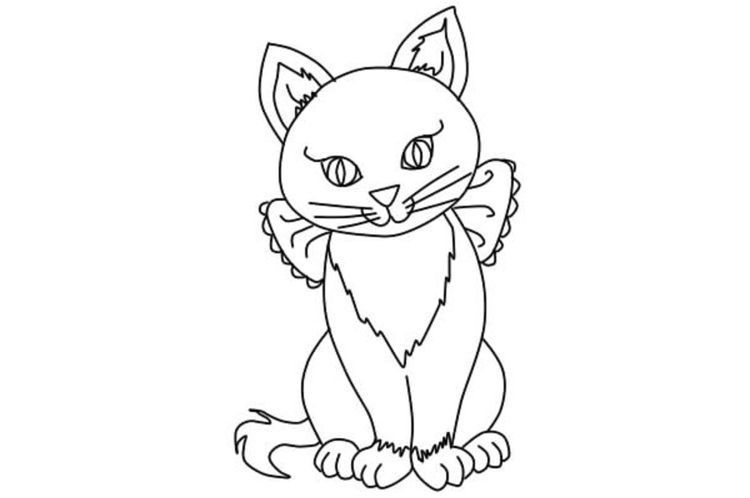
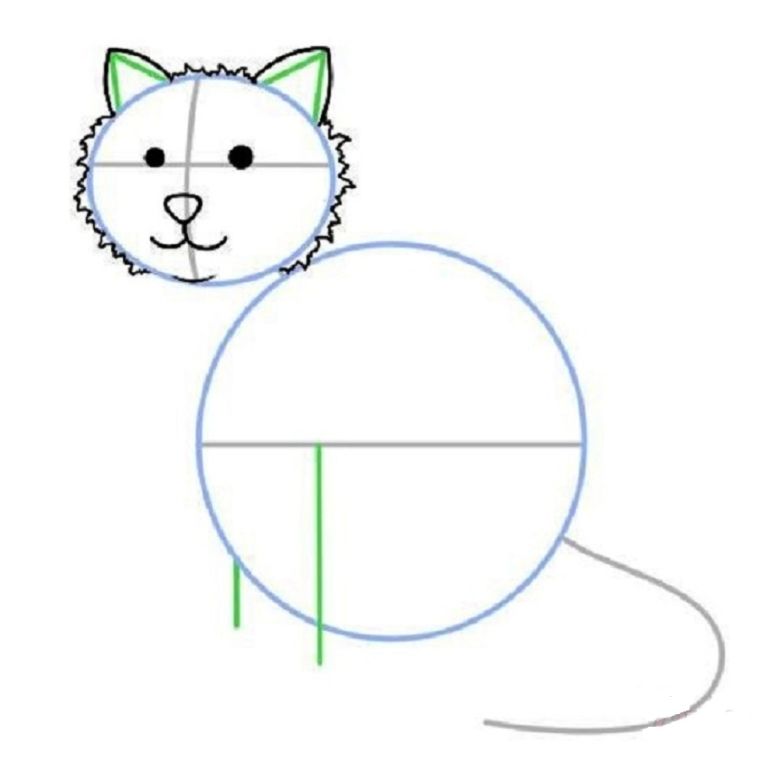
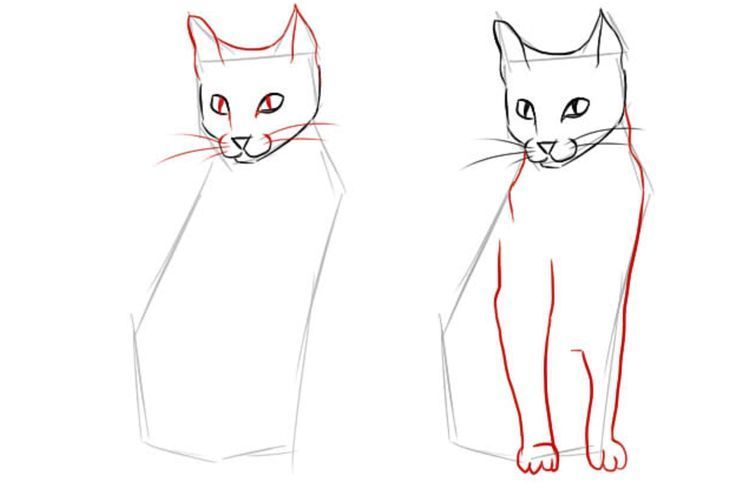
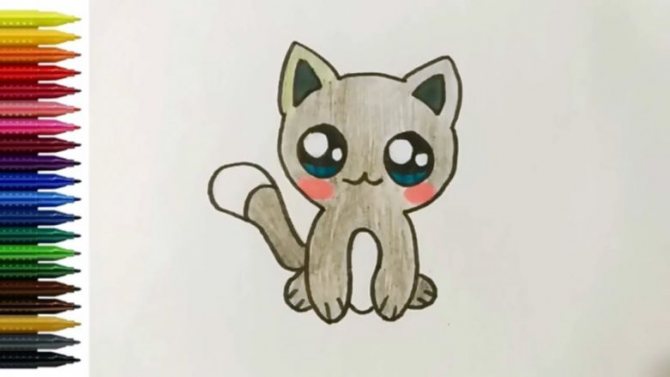
On paws, ears and chest animal can draw a fur to add fluffiness figure. On the front of the chest is a "fluted apron", on the paws - the usual zigzags, and on the ears - repeated internal triangles. If desired, the image of the cat is supplemented with a bow of any size (with or without ruffles), as well as a mustache and tassels on the ears. Sometimes children decorate the drawing of a sitting cat with a mouse or a bowl of milk.
Sad cat
It is very easy to create such a cat on paper. To understand how to draw a cat step by step, it is better to read these recommendations:
- Picture a triangle, divide it into two parts.
- On top represent the ears.
- Erase the extra corners, round them.
- Doris face cat and paws.
- Add details and complete the tail.
Reasons
Cats find themselves in a variety of situations throughout the day. They may encounter a competing kitten on the block or receive a pet from their loved one. All of these interactions require different responses. So, let's delve into why cats can arch their backs and what that means.
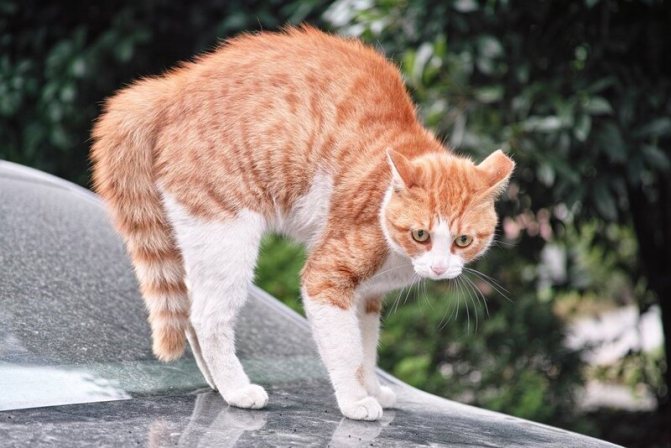
© shutterstock
- After a good night's sleep, a cat archs its back to stretch its muscles. It activates all the muscles that have been inactive because of sleep. Cats are much more flexible than humans.
- When a cat feels threatened by something, any human or any other animal, she starts arching her back to show that they are in attack mode. When a cat feels threatened, its fur starts to stand out specifically on its tail part. Cats do this because it makes them look larger and more aggressive. She may even begin to show her side profile, portraying more aggressive body language to scare off a threat, whether it be a thing, person or animal. When your cat archs its back with its fur up and begins to grind its teeth while hissing at something or someone, it is afraid of that object or person and wants it to go away.
- But cats also arch their backs when they are busy playing or having fun. But this time they won't growl or hiss. Instead, they will begin to jump and pounce on whoever they are comfortable with or feel safe with.
- Cats are very sensitive creatures, so tail heaving and wriggling can be caused by hormonesor muscle strain or unhappiness. Sometimes they get angry when someone invades their territory. Pain is another real factor that causes cats to arch their backs.
- But when a cat feels happy and content, it starts arching its back. When you pet a cat and it feels good, it starts arching its back and sometimes coming closer to you, purring. This is their body language to let you know that they are happy and satisfied with your company.
- When you pet the cat she may think it's time to eat .. Some young cats think that petting is a sign that the owner is going to feed them. Some cats like to eat after petting. They also start arching their backs for the same reason.
- When a cat is in pain, it starts arching its back a lot. If your cat is arching her back for reasons related to pain, she will do it all the time. Whenever she feels pain, she reflexively starts arching her back. The other reasons for arching her back are not constant, but the reasons related to pain are constant.
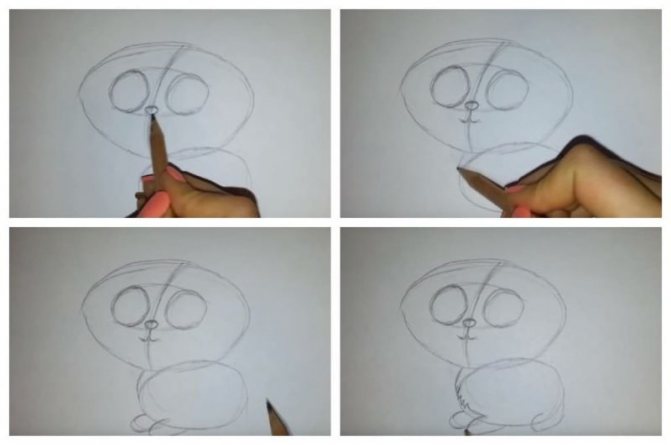
Cat step by step.
- It is necessary to draw an oversized circle on paper.
- On half of the circle, it is advisable to finish drawing a circle half the size.
- In a small circle draw 2 small triangles - the future ears of the kitty.
- In a small circle finish drawing a muzzle.
- At the end of the work, finish drawing the tail.

Division into styles and colors
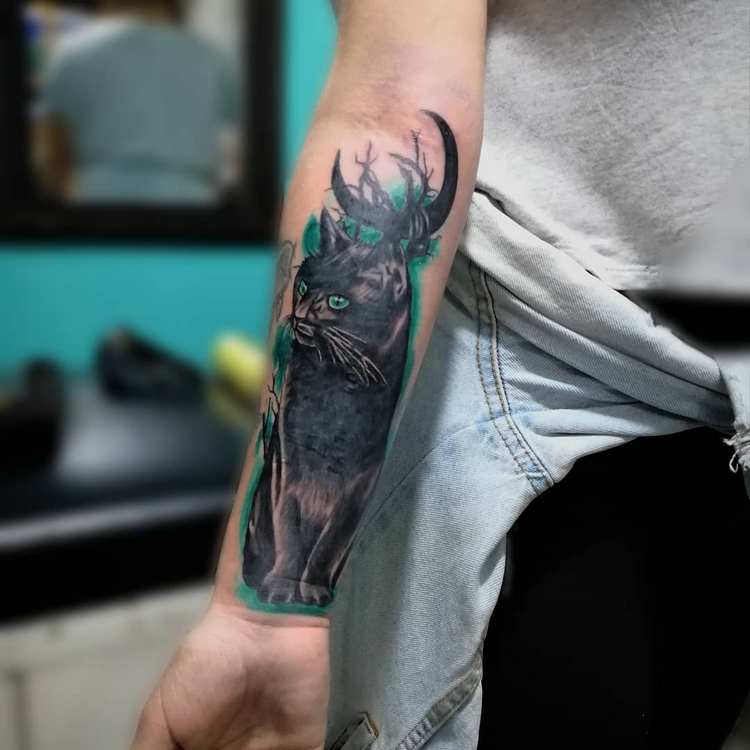
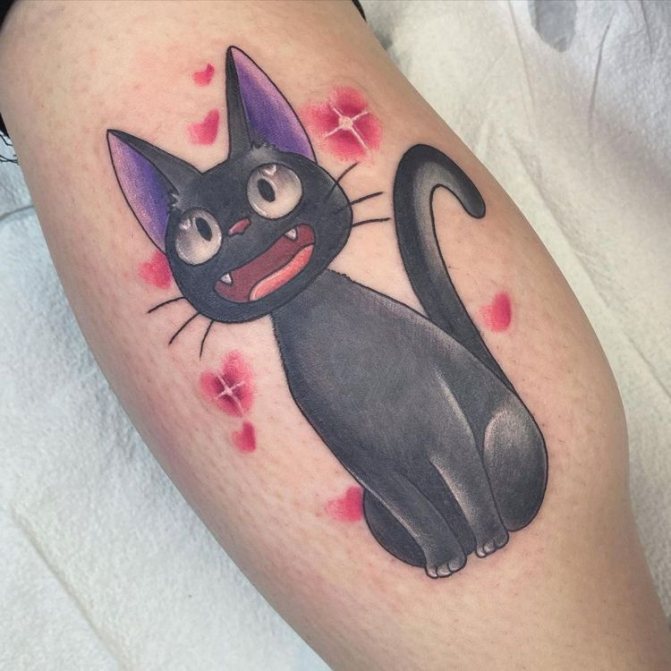
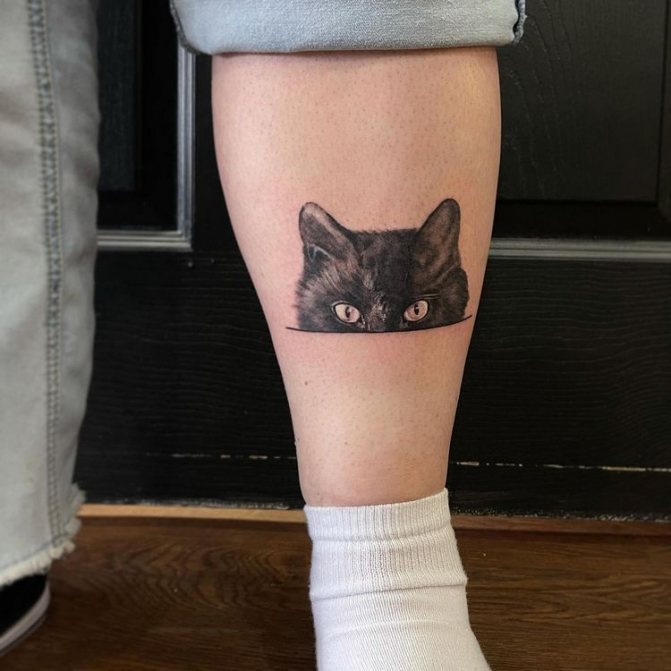
Tattoo black cat does not assume an extensive range of colors and shades. However, additional elements (if there are any) can be performed literally in any color palette.
The animal can be depicted with green eyes, this is the most popular option. However, cat eyes can be blue, yellow, red, brown, in other words, it all depends on personal preference.
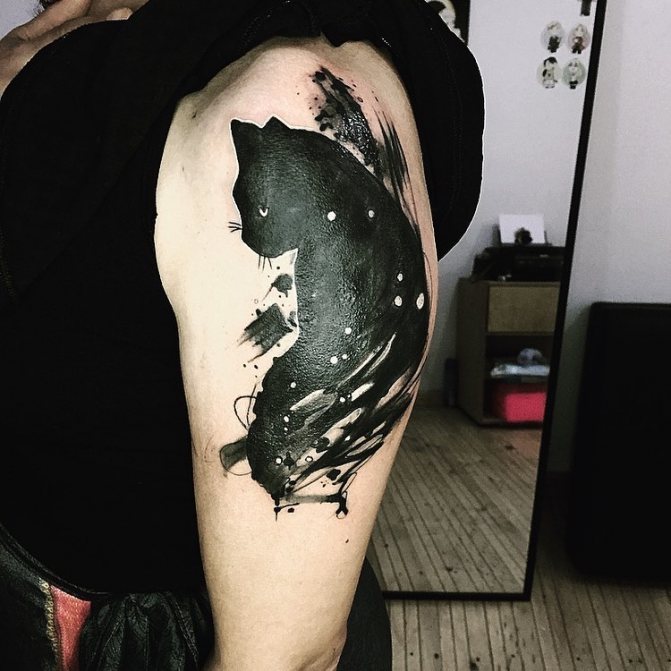
Blackwork cat in Blackwork style
Just the case when the overpowering black is perfectly combined with the mysterious nature of the image. A male black cat tattoo can look very brutal.
However, the Blackwork technique is perfect for creating small, original tattoos that girls will definitely like. In detailed works, inclusions of color are allowed.
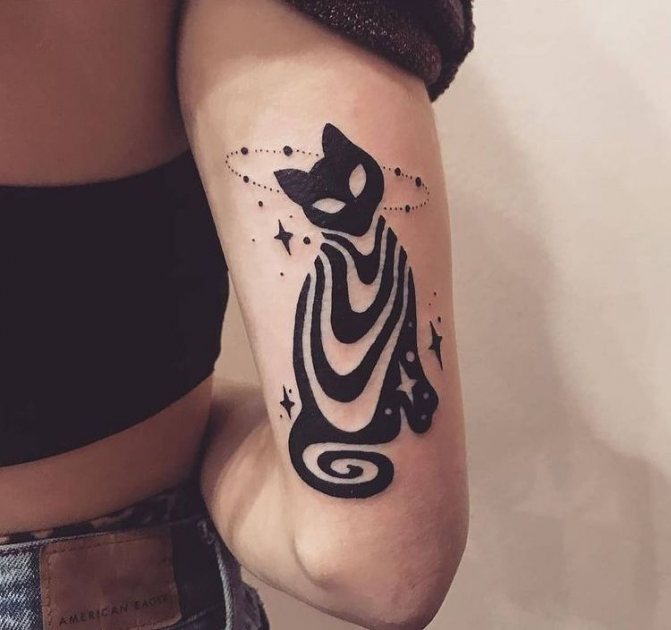
Black cat in the style of Minimalism.
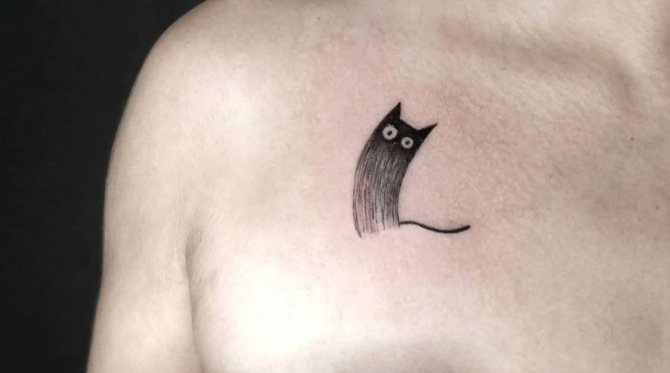
This is cute, interesting and really aesthetic. The subjects can be completely different, as well as the kitty itself. Minimalism is a good solution for your first tattoo, especially if there is a dress code.
Black Cat Oldschool Style
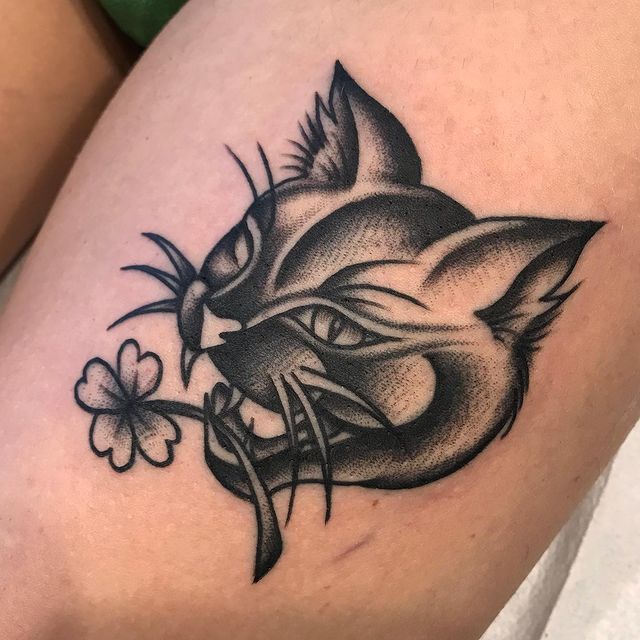
The sentiments of old-school designs tend to be aggressive and monolithic. In this case, the cat can resemble a wild, unbridled animal. Such tattoos are more often applied by men.
Fans of old-school, too, sometimes choose predatory cats, for example, with red or amber eyes and ears. Such compositions are often complemented by bold inscriptions, cold or firearms.
In general, however, the style assumes a traditional palette and roughness of lines. And the preferred plot is discussed with the master.
Black Cat in Watercolor Style
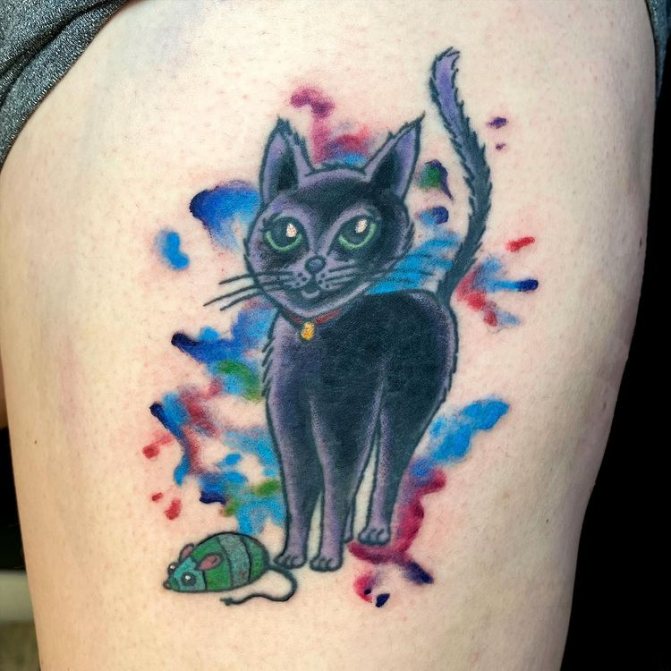
The watercolor technique allows you to make unique tattoos, filled with emotionality, appealing to dreams and soul searching.
A black cat surrounded by a cosmic palette or jumping out of motley colorful splashes - such sketches can only be entrusted to a true master of the tattoo machine.
A small watercolor cat looks very attractive and creates the perfect field for experimenting with additional tattoo details.
Black Cat in Realism Style
Not the most common solution. Large drawings, literally resembling a photograph, are most often applied by owners of furry lumps as a sign of love or memory.
Sometimes a realistic tattooing technique is chosen to apply the black proud sphinx tattoo.
Black cat in the Graphic style

A tattoo in the Graphic style is like jewelry art. This is a multifaceted technique that allows you to create complex images with an incredible amount of detail.
Laconic monochrome does not deprive the black cat of fantasy or sacredness, on the contrary, exposes the essence of the figure. As a rule, a gray gradient is added, and the elements of the composition can be made in contrasting colors.
Black cat in the style of Geometry.
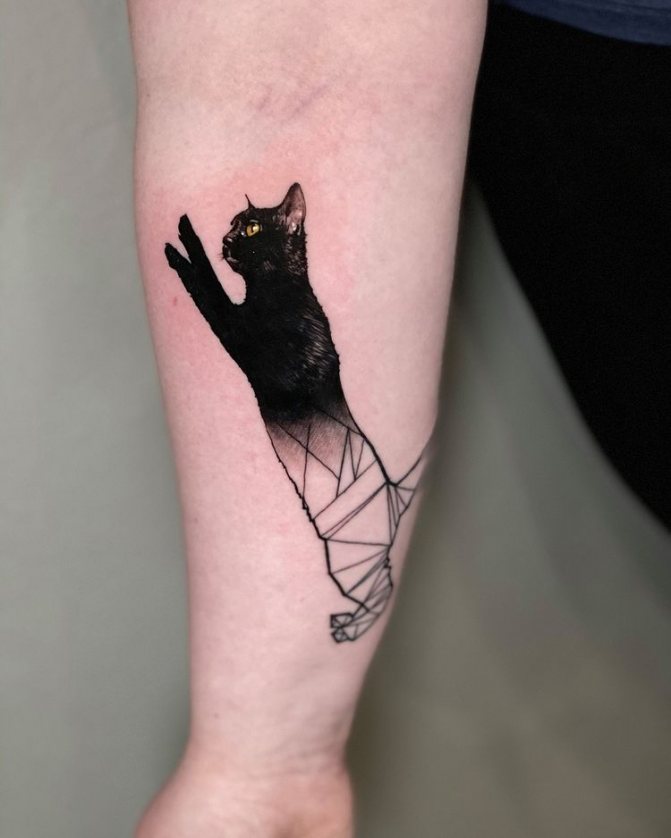
This is minimalism, originality and fashion trend in one bottle. Thin, neat lines are so suited to graceful cat patterns.
Sometimes the geometric style is combined with other techniques to get a complex unique tattoo.
Animation drawing
The first step is to draw a vertical line. This is the future basis. The drawing must be symmetrical, passing through this axis. The following guideline should be followed:
- The cat's body should resemble the likeness of a heart, hence the heart is drawn through the vertical line.
- Above the heart, the upper part is finished, and even higher the head.
- On the muzzle marked eyes, whiskers, nose and other parts. Since the animal animation, it is better to capture it smiling.
- At the bottom, at the base of the heart, depict the number three, upside down. This is the future paws of the kitten.
- Then draw the paws. Number three is also depicted as hind paws.
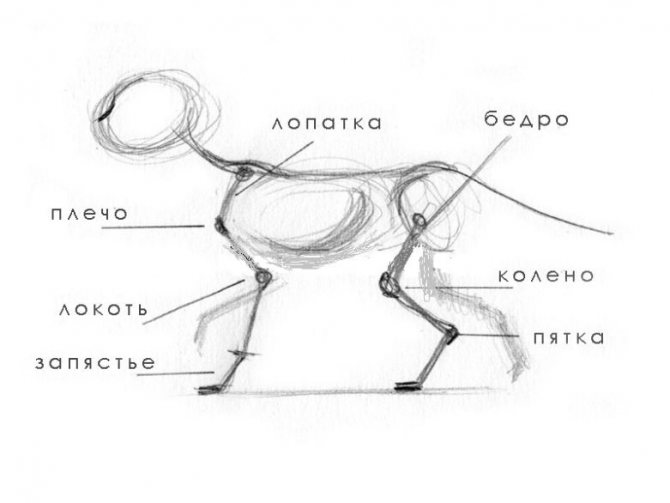
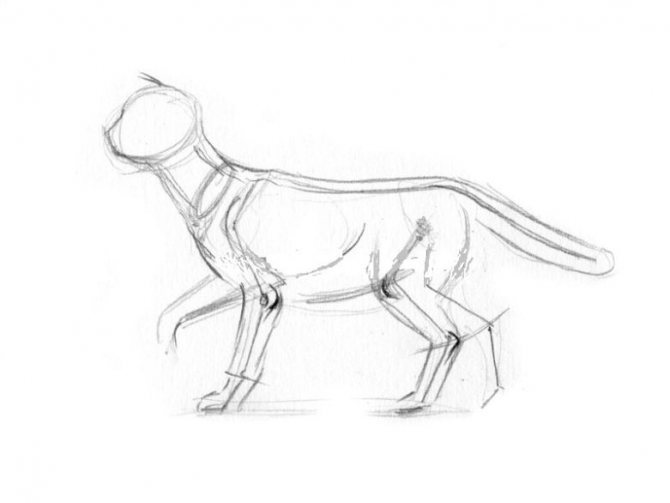
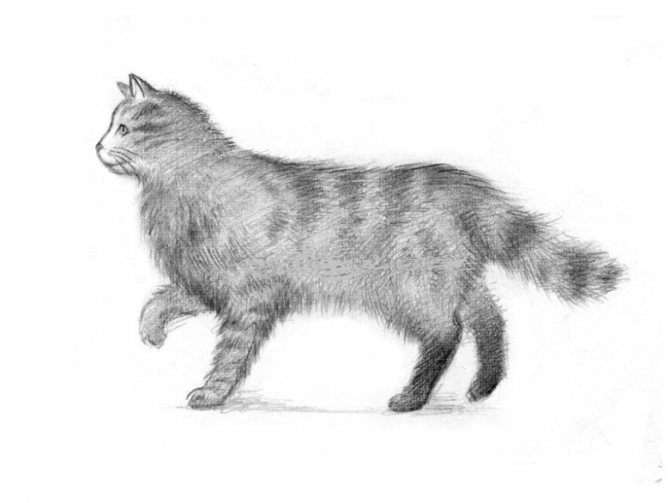
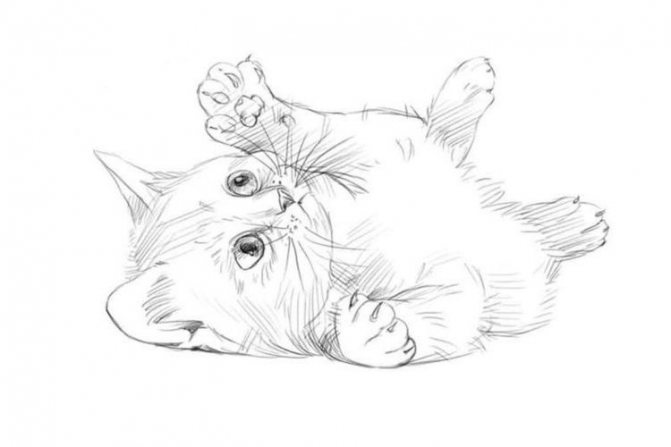
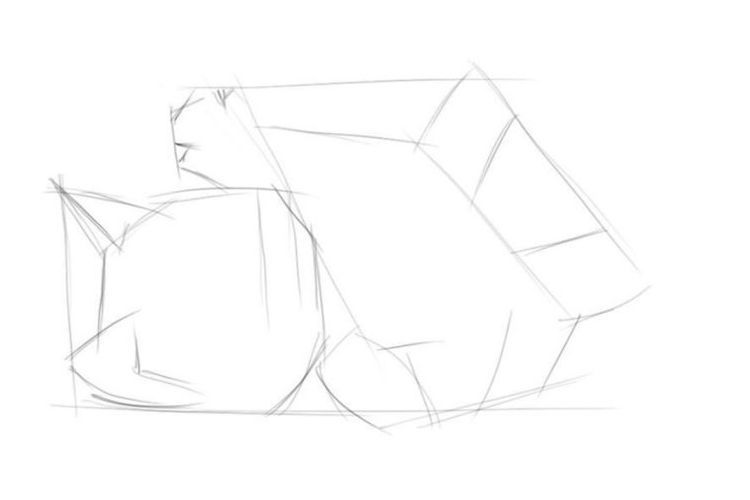
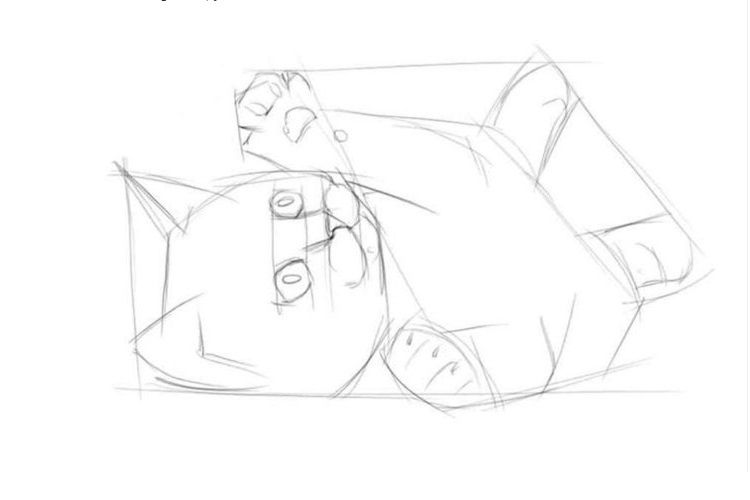
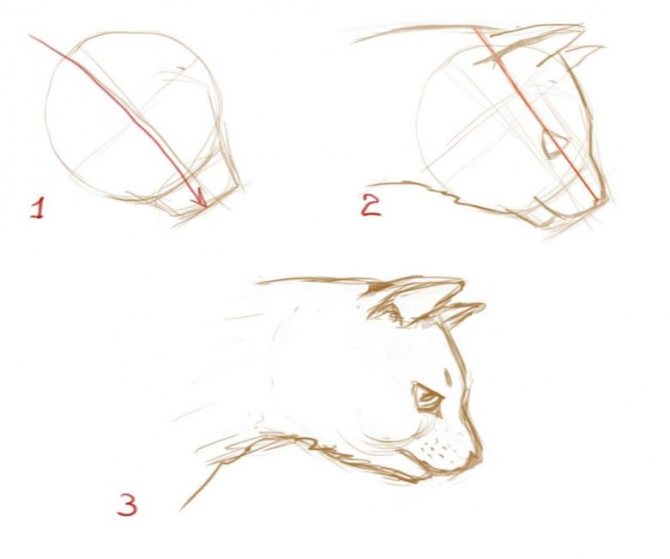
Drawing a full-length cat
There are many diagrams and details, how to draw a sitting cat step by step in pencil or paint, how to correctly bring out a beautiful profile of the animal, to display the image of the pet, its personality and the habits of the animal as realistically as possible.
First of all, repeat the proportions of the cat, highlighting 2 main elements - the head and elongated body with an angular side. The animal's face resembles a rectangle with a pointed bottom. Nose - a standard triangle and slightly above - semicircular eyes.
In the second step, draw triangular ears on his head, mustache, pupils. Below the figure goes paws with 3 fingers.
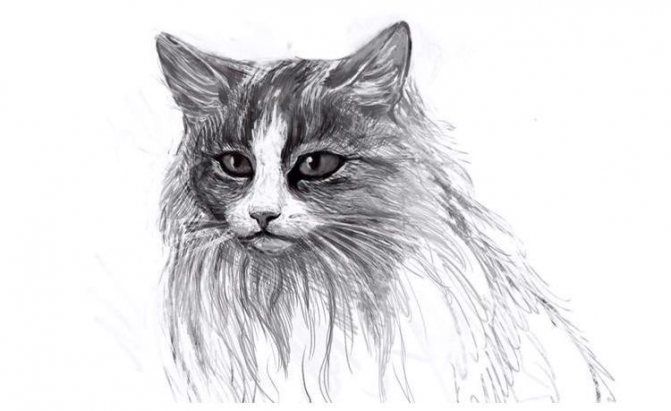
The final step in detail lead tail, hind legs and back of a cat. Add some strokes - in the chest and hind paws. Outline the outer contours and if desired, paint the pet. With light pencil strokes, you can draw the coat, which will give the animal's body extra volume. In long-haired breeds, the fleece smoothly descends downwards. To show this, long thin waves are drawn. And with short-haired cats, it is better to make just a light pencil outline.
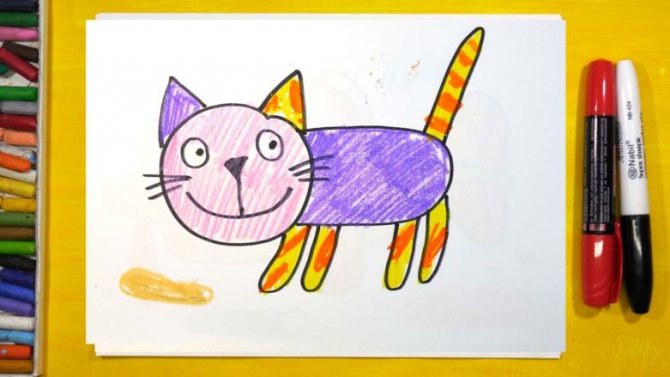
Complicated drawings
If the child can easily draw simple sketches, you can move on to more time-consuming work.
- Draw the body of the animal as an oval.
- Draw a round head to the oval, add paws and ears.
- Doris hind paws.
- Doodle hind paws.
- Color the animal with colored pencils to make the work look realistic.
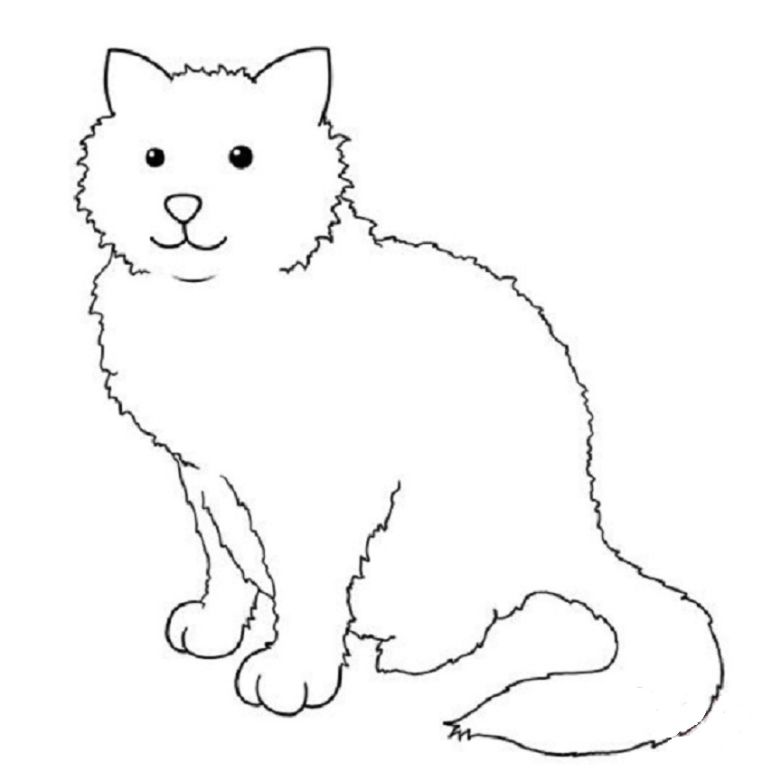
Difficult drawing of a furry cat.
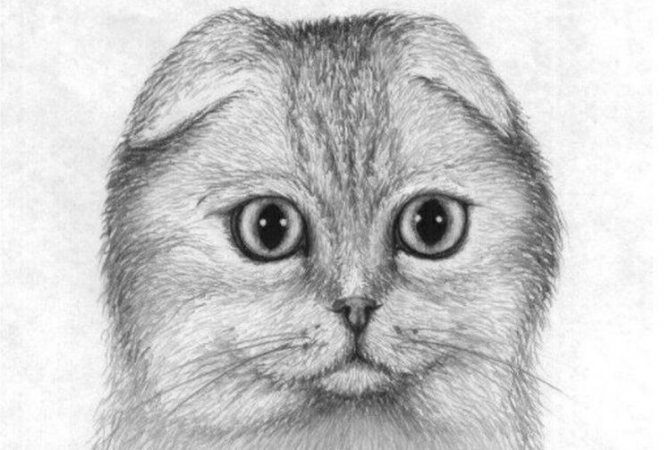
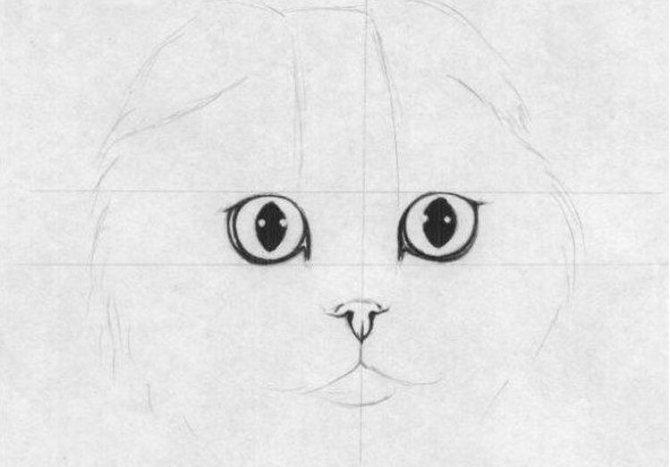
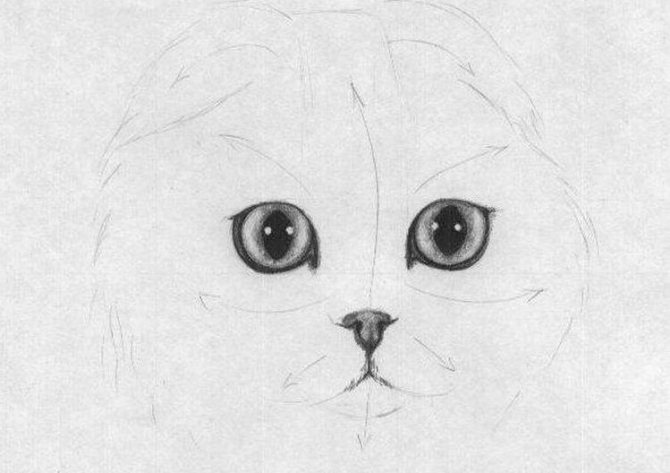
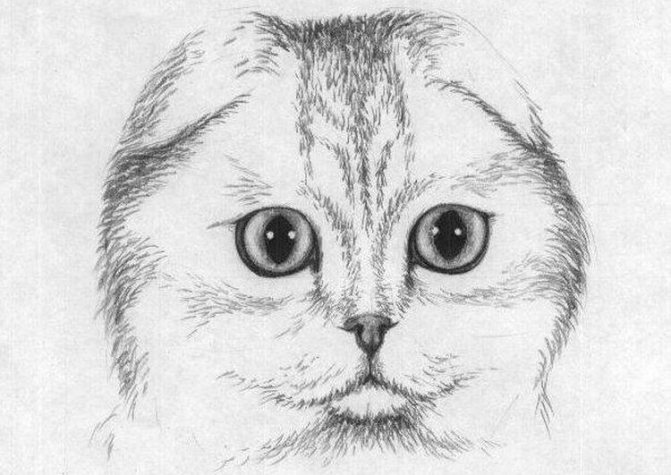
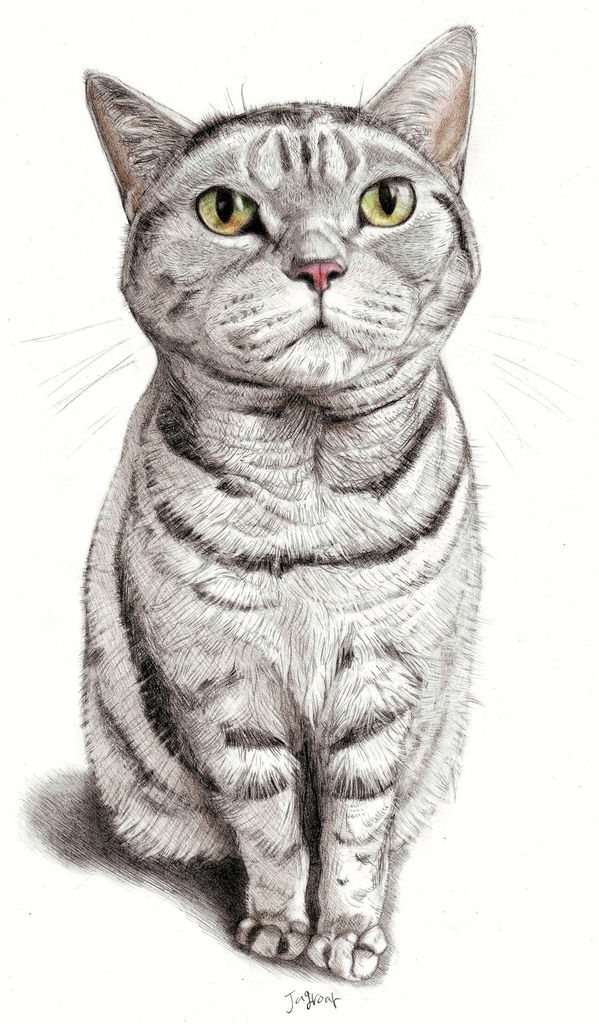
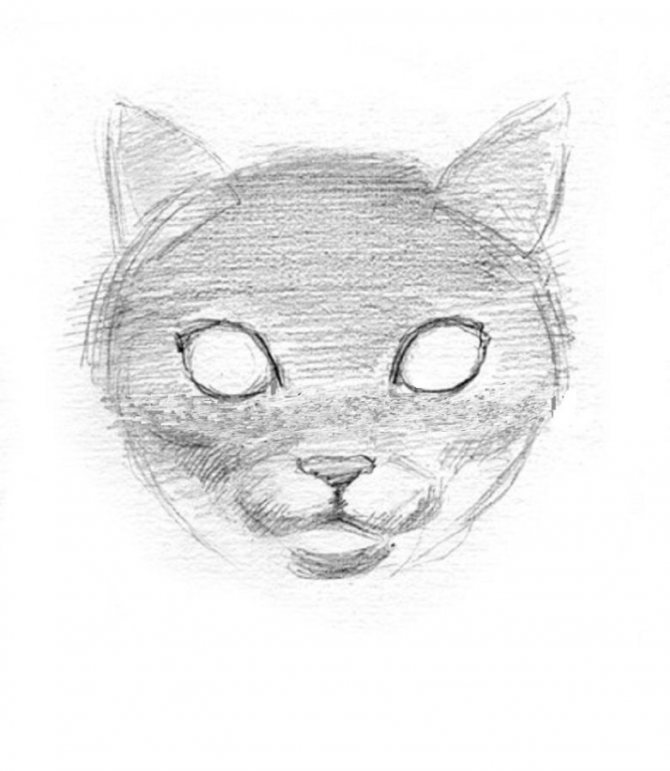
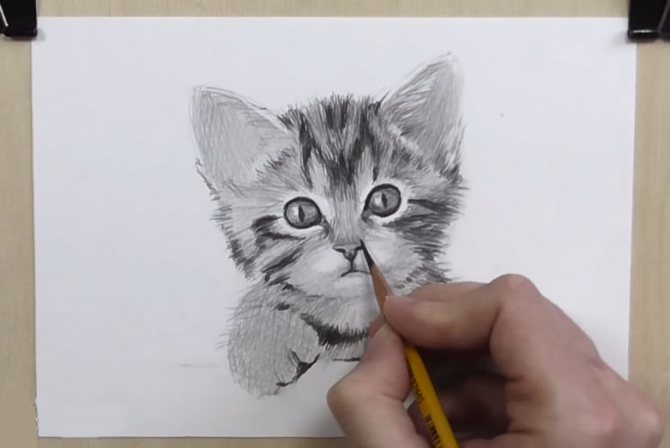
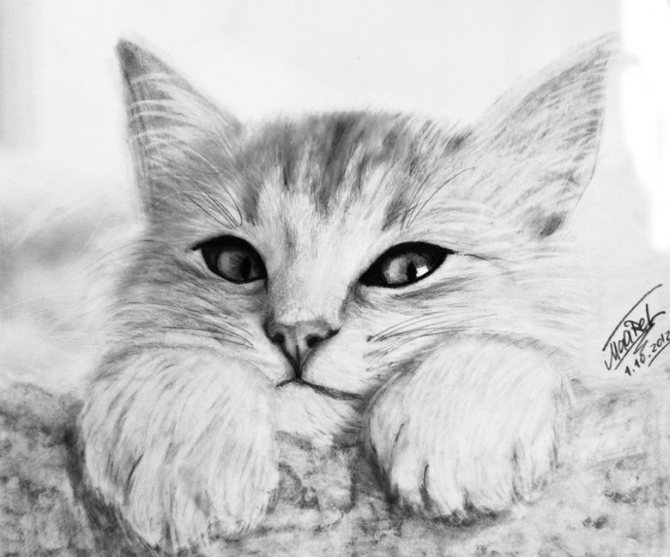
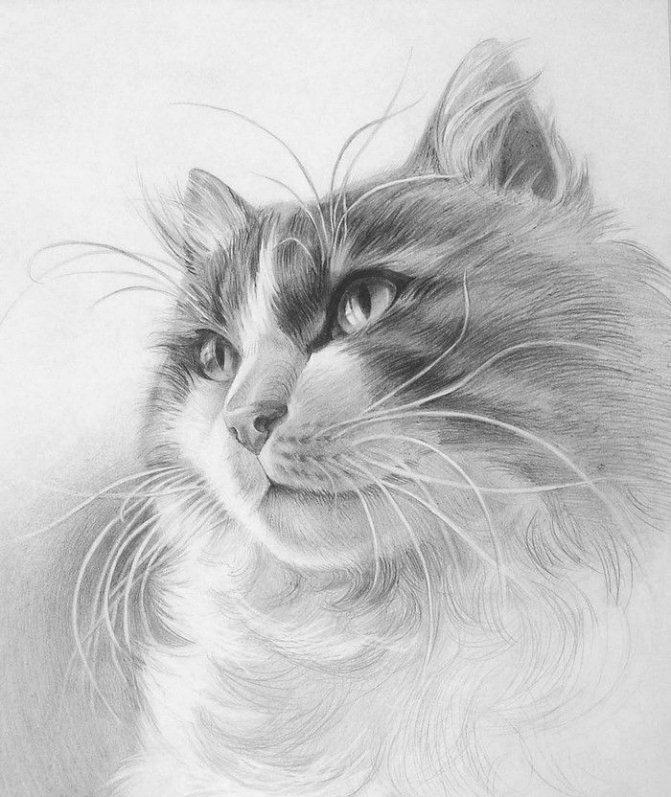
After learning all the rules and practicing how to draw a sitting cat using the simplest diagrams, it is worth considering creating a more realistic image. Although this is a more time-consuming and complicated process, the result is sure to please. To create a mini-masterpiece, you will need several pencils of different softness. Soft pencils highlight the most expressive details of the muzzle, and hard pencils do the toning.
They start drawing by defining the outer contours of the pet - highlighting the ears, the contours of the muzzle and the position of the nose and eyes.
Features muzzle should be outlined so as to show its turn. In the middle of the muzzle draw a cross. It determines the symmetrical location of the nose, mouth, ears, eyes. Eyes should look in the same direction. In order to bring the drawing as close as possible to the original appearance of the cat, the image of the animal and the outlines of the eyes are drawn with darker contrasting lines.

A separate stage is the drawing of the coat and its individual coloring. Light and dark areas on the muzzle and head are drawn by shading. General features are made lighter, more transparent, blurred. Particular attention is paid to the eyes. They are highlighted by the darkest color. Pupils are highlighted with an eraser. The naturalness and liveliness of the eyes is emphasized with light and dark highlights. A complex tonal coloring of a cat is obtained if you go from dark tones down to light tones. It is not necessary to clearly outline the body of the animal. It is better to leave a more transparent and light silhouette.

Fine lines are taken from the muzzle to show the smoothness and softness of the coat. To give volume to the nasolabial triangle, it is lightened a little with an eraser. On the head, between the ears a few darker lines are drawn. Moustache is also left light, light and airy.
Sitting kitty in five steps
Drawing such a kitty should begin with the head.
- It is necessary to depict a circle - the head of the kitten. On the head, you must finish drawing the ears.
- Then you need to finish drawing the body. Under the head to draw an oval, and under it another circle. Lines need to combine with each other.
- After lines to depict the paws of the cat.
- Inside the oval-head to depict the muzzle of the animal.
- To the body dorisovuyut large volumetric tail. Drawing is ready!
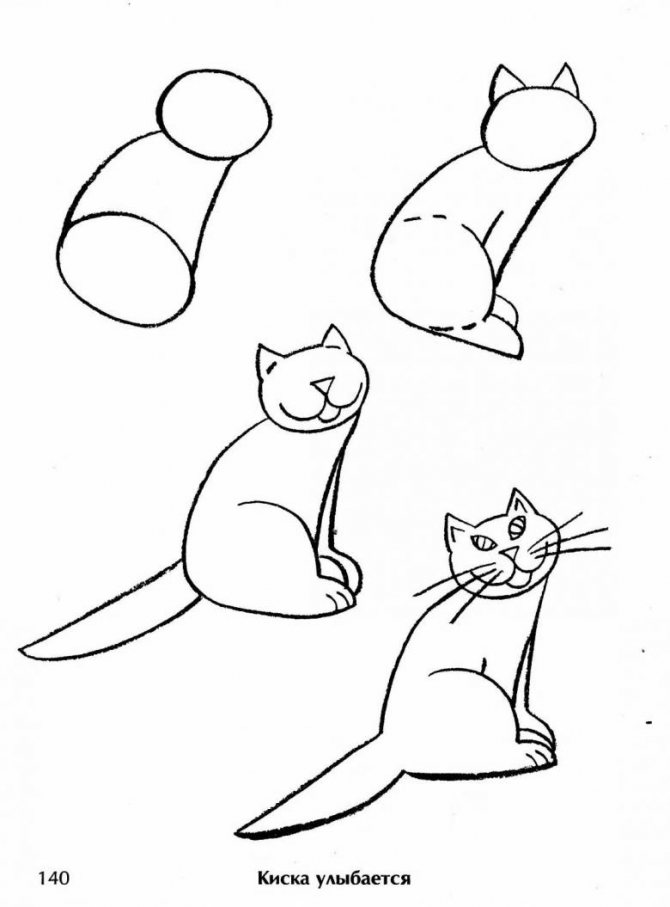
Draw a cat in a sitting position in 5 steps
- First draw a circle. This will be the head of our cat. Next, draw triangles symbolizing the ears.
- Draw the upper and lower parts of the body of the cat. To do this, under the head is drawn another circle, and below it an oval. These figures smoothly connected.
- Ahead draw a line for the front paws of the animal.
- Back to the head of the cat. On the sides draw triangles, so that the muzzle took a slightly elongated shape. Inside the circle depict the eyes, nose, mouth and mustache.
- To the body, draw a fluffy tail. Our beautiful cat is ready.
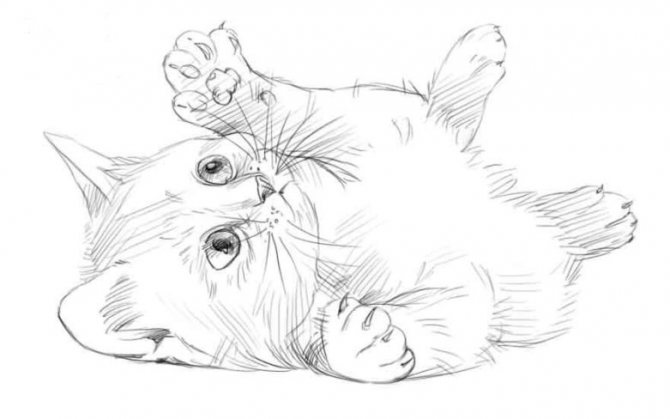
A pampered cat in motion
You can try to depict the animal in motion.
- Just like in the previous cases, start drawing with an oval. Draw the head of the animal with a circle, the torso should be an oval. It is also necessary to mark the surface on which the cat is standing.
- Next, it is necessary to finish drawing the paws.
- Zoology books will tell you exactly what a cat looks like in motion: the size of the body in relation to the size of the paws and head. Mark with dots or dotted lines the points along which you will later need to connect the animal.
- Once the outline is ready, connected on the dots, you need to give a realistic sketch: black pencil mark the shadows.

How to Draw a Satisfied Cat
Offer the child to draw the whole cat. Instructions:
- outline with a dotted line two circles (for the body and the head) of different sizes;
- Draw around the small circle in its entirety and touch up two ears. Large circle partially (as far as small), add two semicircular feet;
- On the paws draw claws, add a tail to the body. Traced muzzle: eyes with pupils, nose, antennae, smile.
On the tail and back hatched stripes.
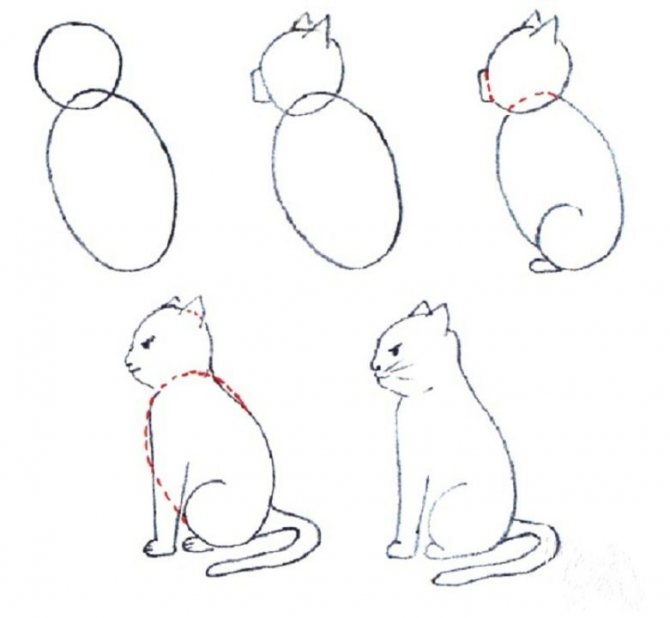
Cat with turned head
To understand how to draw a cat with turned head in pencil, you need to put some effort and patience. You can resort to the following step-by-step guide:
- The small circle will represent the cat's head. The second larger circle will be the kitten's body.
- On the small circle, the profile will need to draw a muzzle and ears.
- Ears should be rounded, the outline of the head to make more wavy. This is done to make the coat look voluminous later.
- Light strokes to finish drawing back, paw left or right, depending on where the animal is turned and tail.
- As a final step, remove the auxiliary dashed lines and lines. Drawing is ready!
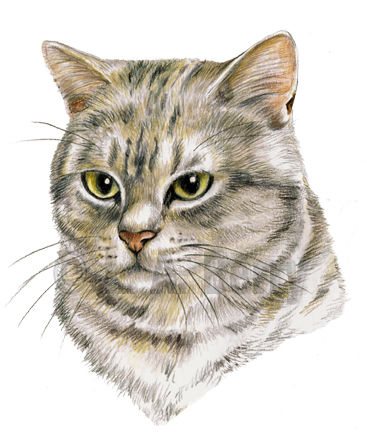
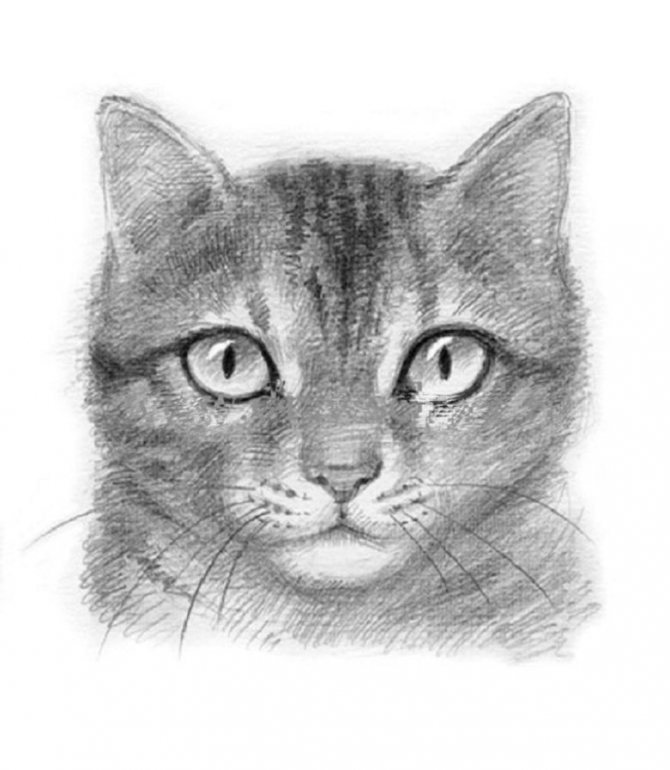
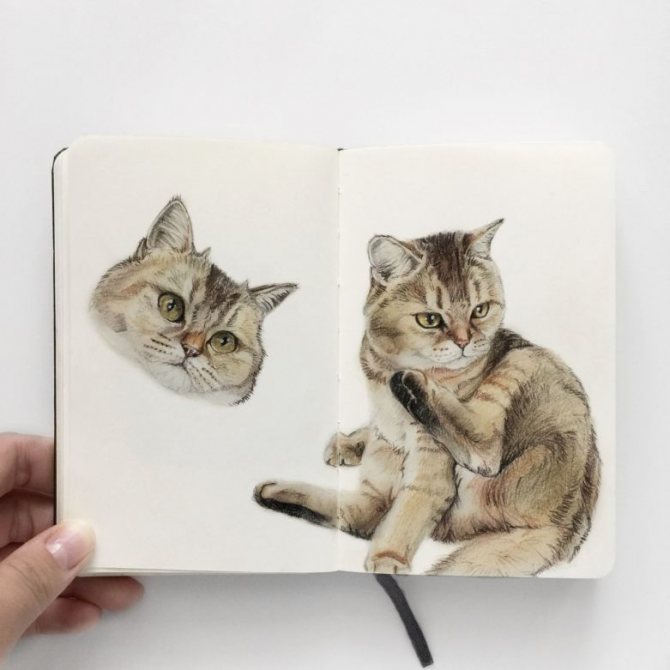
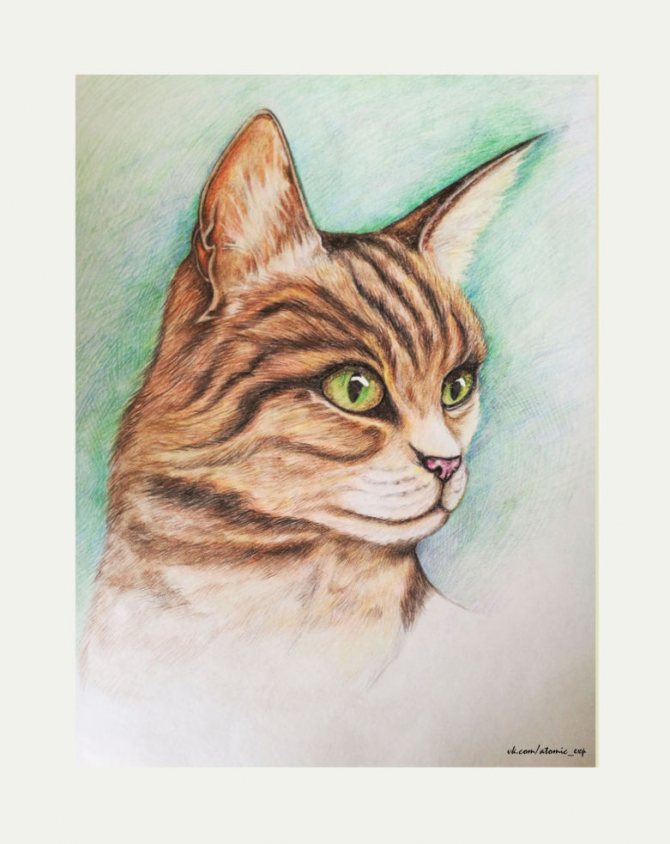
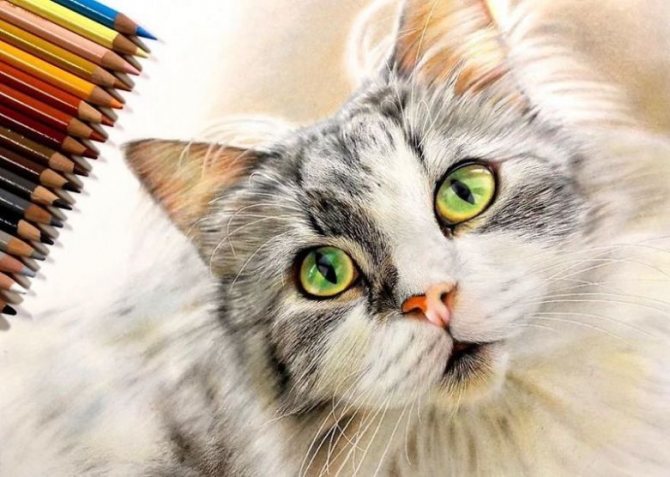
Realistic cats
In a pencil drawing, the cat is depicted as in real life, if the simple technique is already mastered and you want to increase the level of skill. There are many different breeds of four-legged friends.
That's why it's always interesting to work with the image of cats: the images are not repeated. In addition, kitties are so agile, flexible and nimble that it is very difficult, but interesting, to keep up with the constantly changing poses. If you don't have a furry pet at home yet, you can do sketching from photos on the Internet.
Despite the fact that the muzzles of kittens are different, the way of building the composition of the head is basically the same for all.
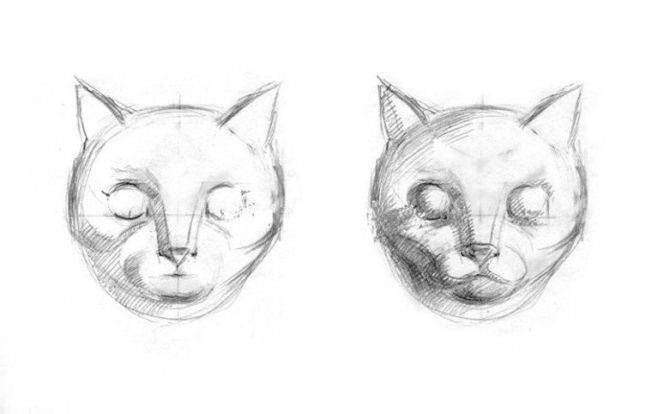
Realistic drawing
For those who have already mastered easy techniques, you can try to depict a realistic animal.
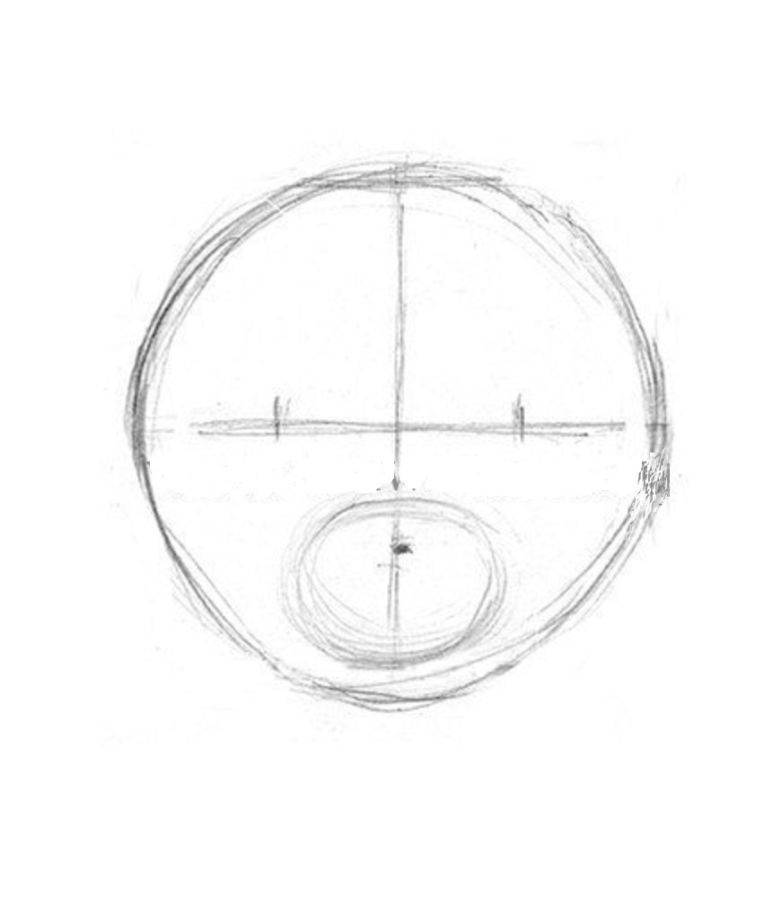
- On a sheet of paper, draw a head. It will slightly resemble a circle, with the pointy end downwards. Draw two axes of symmetry through this circle. Horizontally determine the places where the eyes of the animal will be, from below - the nose and the rest of the parts. Sketch should be slightly visible on paper, so it can be easily copied and redrawn again, if necessary.
- The same light lines mark the ears, the whole drawing should be symmetrical.
- It is desirable to take into account that in the picture the upper jaw will be in the foreground, the muscles in the background, thanks to this you can easily give a realistic and three-dimensional drawing. To smooth out the lines, it is desirable to depict the fur. The nose of a cat can be conditionally divided into 6 parts.
- Next, it is desirable to draw the eyes realistically. The lacrimal glands should be located strictly on the horizontal axis.
- Using an elastic band, it is necessary to lighten the eyes and other parts a little, giving the drawing a volume.
- Then, a pencil with a soft slate is needed. It will help to trace the fur, and it is necessary to outline the forehead and the pupils.
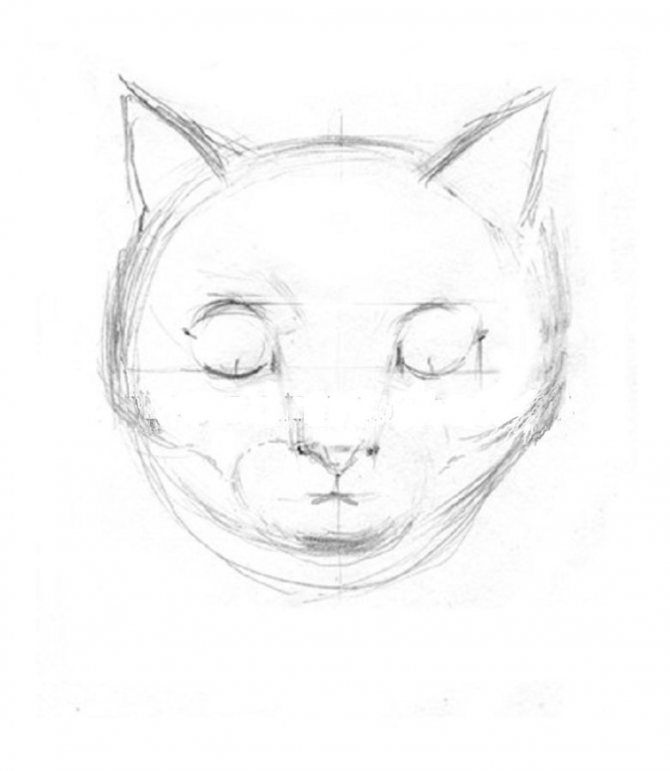
Such work is labor-intensive and painstaking, and it may not work right away, but the result will not keep you waiting.
Using simple techniques, you can learn to draw a cat from any angle, realistic and animated, in motion and at rest. It all depends on the author's imagination and the effort involved.
Start with simple sketches, gradually complicating the task. For example, depict an animal that hunts mice or pecking milk from a bowl.

Try other options, such as a cat with its head on its side.
After the preceding diagrams, it's easy to see how to draw a cat easily, beautifully and quickly.
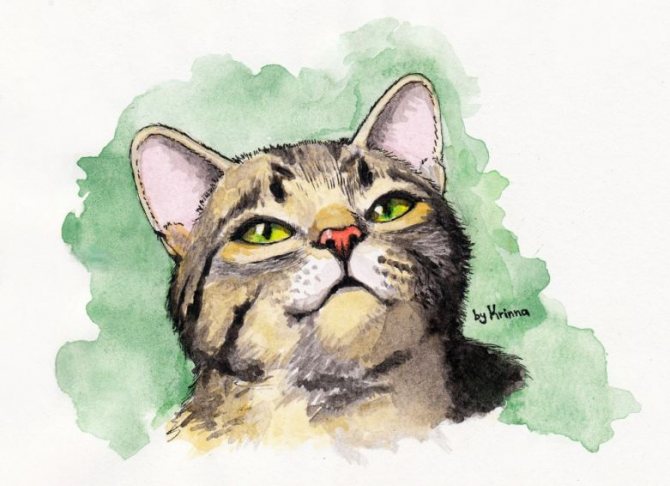
A simple picture of a sitting gray cat
This work is easy for children who want to draw not only animated cats anymore, but also their pets in reality. They will also be happy to try to color the image with colored pencils: the kitty will be gray with dark stripes. To complete the task, they will need:
- any sheet of paper (album or A 4);
- a set of colored pencils;
- a simple pencil and an eraser;
- A gray, patient cat or his picture.
Work on creating the image also in stages.
- First, an oval is outlined, elongated slightly to the top (torso). Next, the head and ears are drawn and parts of the cat's "face" are sketched (not forgetting all the nuances of construction).
- The next turn is the limbs: four paws with claws are added.
- This cat will be gray in color. To start coloring, shaded pink nose, yellow - eyes. Unusual pupils are colored dark green, leaving white circles glare.
- Then proceed to the fur. Gray pencil stroke all over the body and head, imitating the growth of wool. Do not forget about the edges to create a visual effect of fluffy fur.
- Throughout the figure depict dark gray stripes. Make a thin black mustache. Ruler or felt tip pen to work out the contours of the eyes, nostrils, etc.
Ready kitty cat! The main thing that in the process of not run away sitter!
Picture of the drawn cat


Compositions with other elements
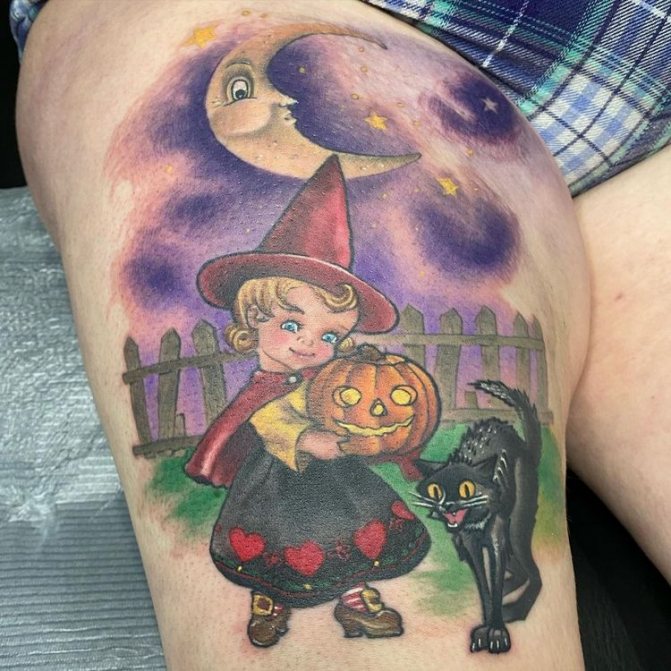


Traditionally, women's tattoos are complemented by floral and plant motifs. Most often a black cat is applied together with roses. Flowers can be gray, black, or red, for example.
Cats have long been considered nocturnal creatures, so they are often depicted surrounded by the stars or next to the moon. A popular idea is a neat crescent located on the forehead of the animal.
Of course, witches with brooms and other mythical creatures are popular in fabulous cat compositions. Kittens with wings are also not uncommon.
Miniature tattoos are often complemented by cat footprints (paws). And in larger tattoo works, the cat is often depicted with a fluttering butterfly on the tip of its nose.
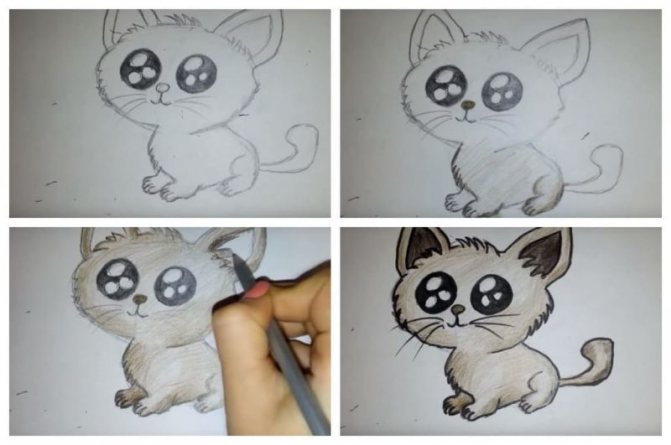
Drawing a cartoon cat
Drawing a cat from a cartoon. Very similar to a cat named "Woof", but still a little underdrawn =)
Drawing it with such a detailed scheme is easy, you can see for yourself.
I think it's no secret that from simple sketches such schemes step by step, the skill of drawing grows worse than it does from a group of trying to draw from scratch. Sketches give only an understanding of some of the structure of the depicted object. A few tries drawing cats in different poses from different angles are much more helpful.
However, the result pattern is much better.and therefore the vision of the subject is trained more.