Drawing an eagle step by step
Many people think that drawing an eagle step by step is difficult. They think that only a professional artist can cope with such a task.
Beginner should not even take up drawing king of the sky. However, any aspiring beginner artist can draw the proud bird in pencil step by step. Below is a master class for beginners.
Learning how to draw an eagle
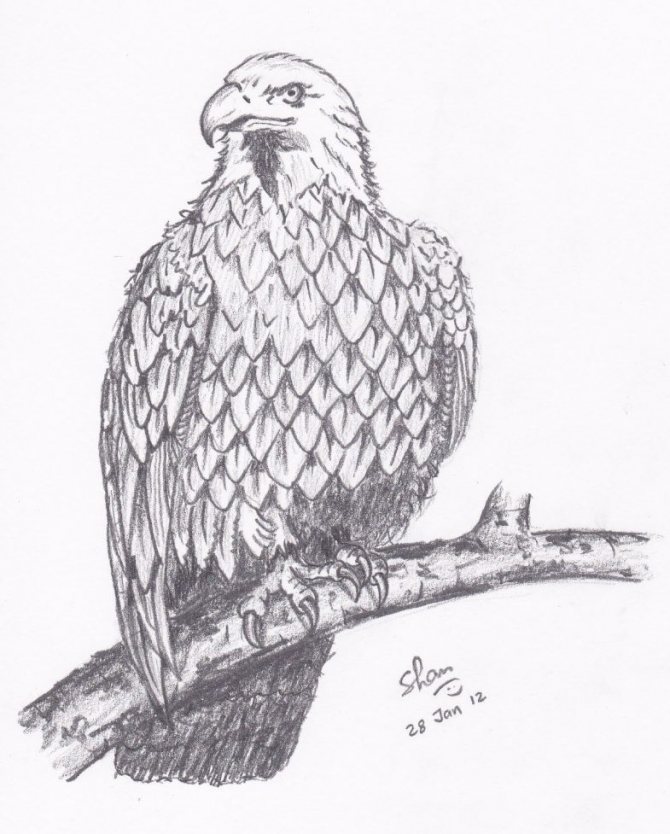
Good afternoon, today we present you a lesson called, how to draw an eagle. We will draw the proud bird, which is one of the largest birds of our planet. This is a truly unique bird that soars high in the sky (flying height can reach 10 kilometers) and from this height can see its prey, even the smallest mouse.
In addition to the fact that we will draw the eagle, we will tell a little about the structure of the body of the eagle and its behavior. We will show the bird in flight and on the ground. Taking as a basis our lesson, you can learn not only how to draw an eagle, which we offer you, but also independently learn how to draw a bird in different views and poses. Let's start .
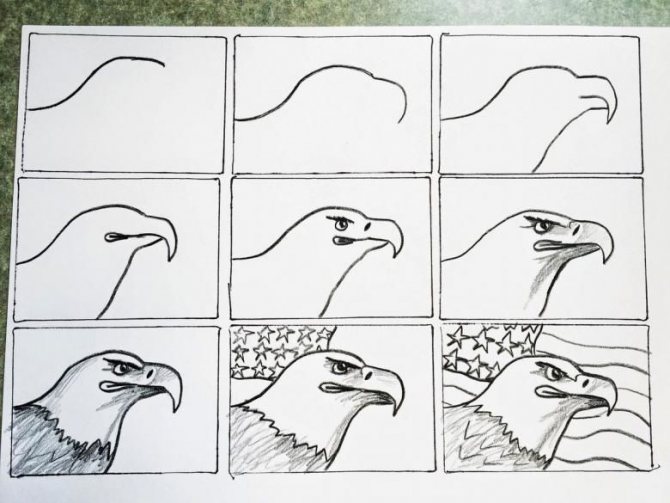
Learning how to draw an eagle
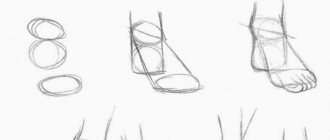
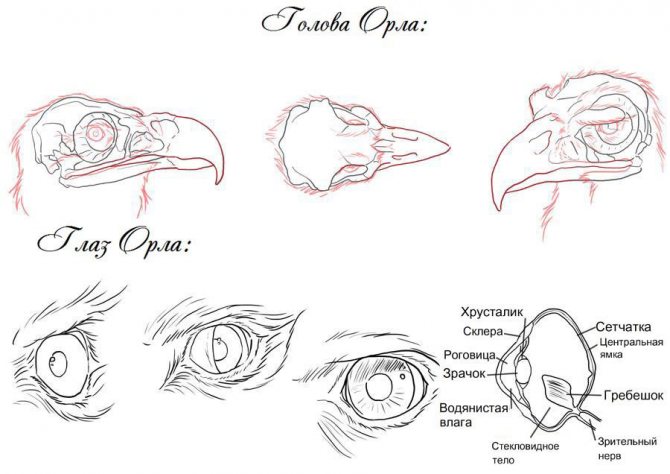
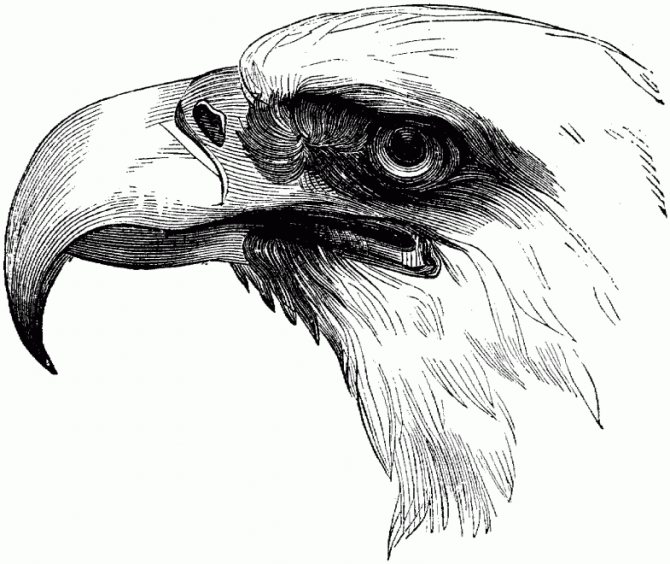
Step 1 Before drawing an eagle, it is useful to get acquainted with its anatomy. The first three steps will focus on the anatomy of the eagle.
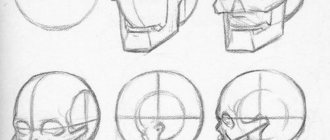
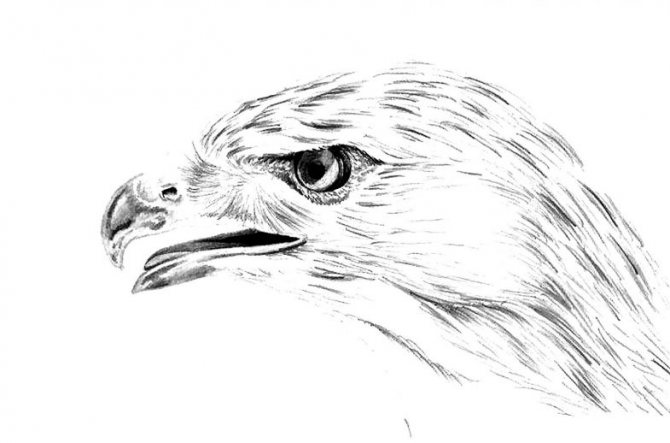
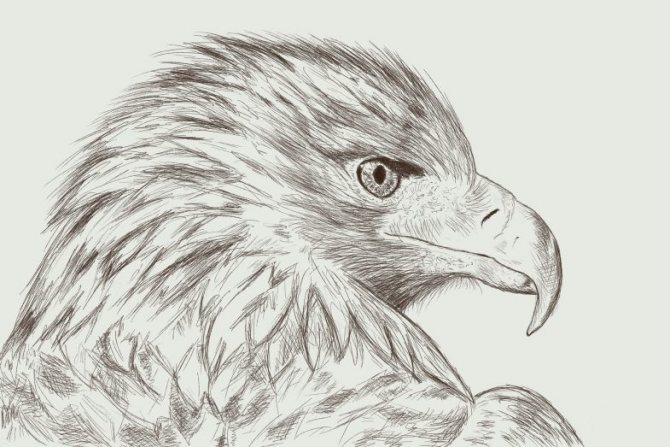
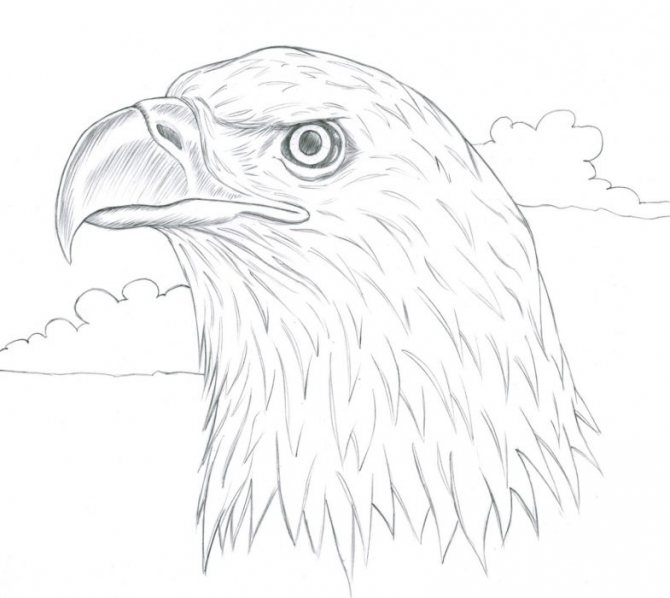
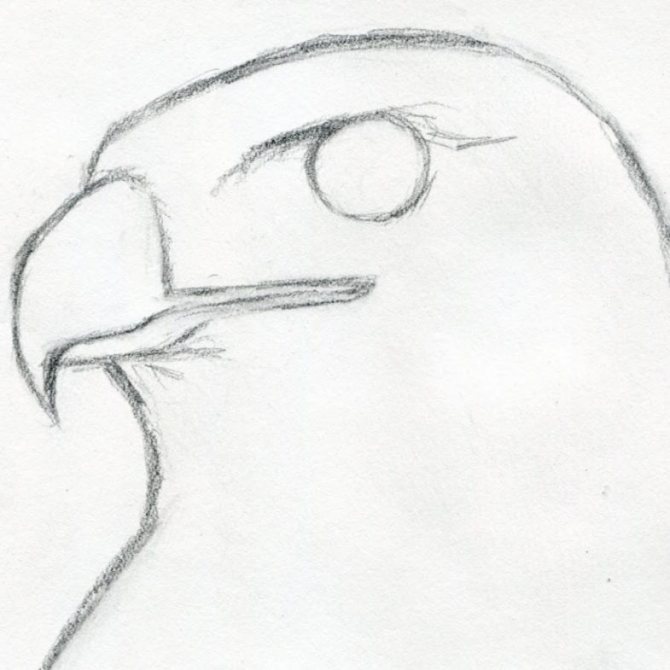
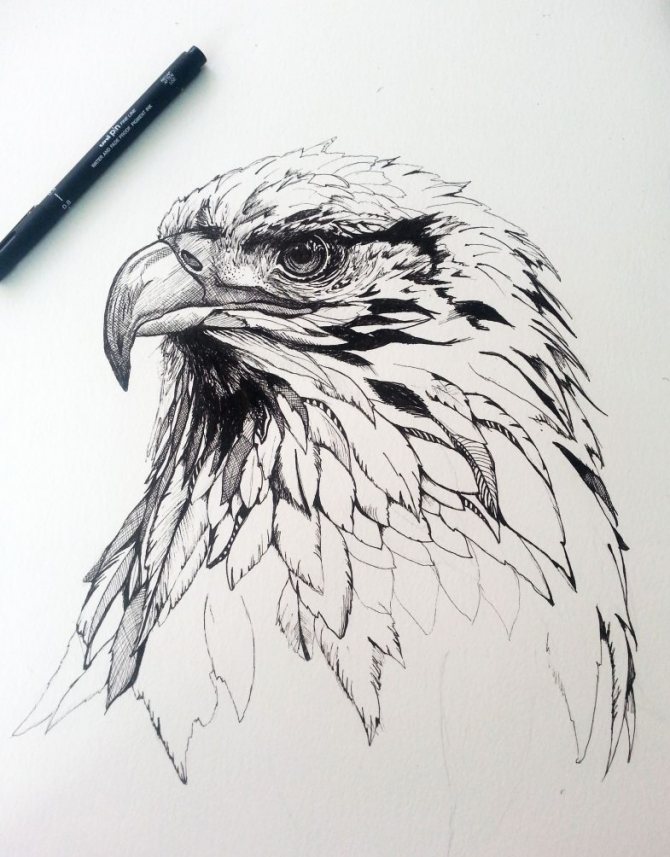
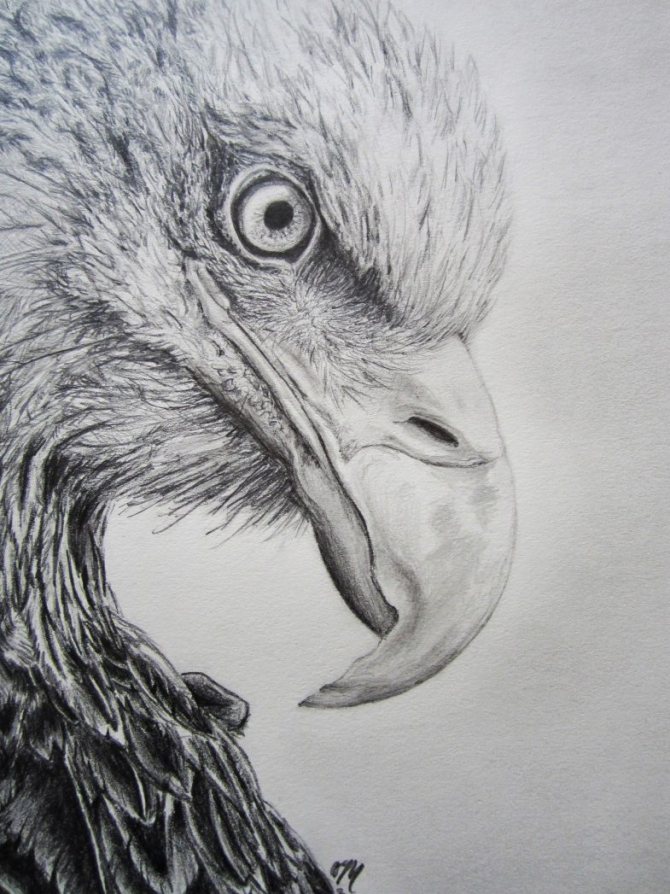
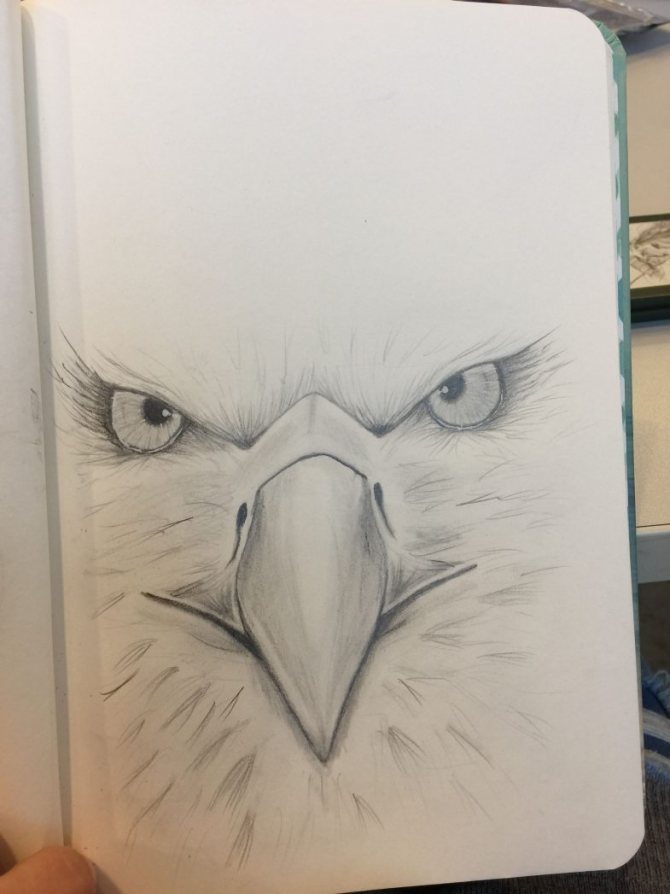
Step 2 In the second anatomy picture, we will focus on the construction of the head and eyes. It doesn't look very nice of course, but it's important to know when drawing.
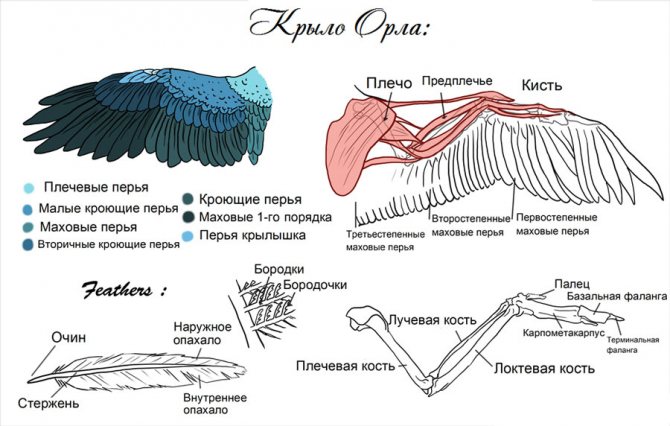
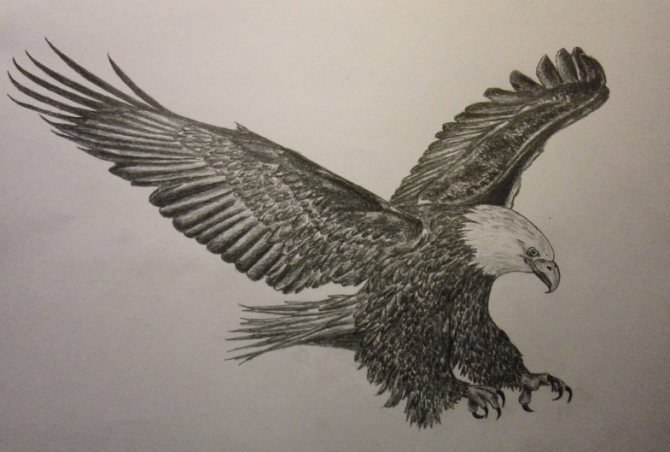
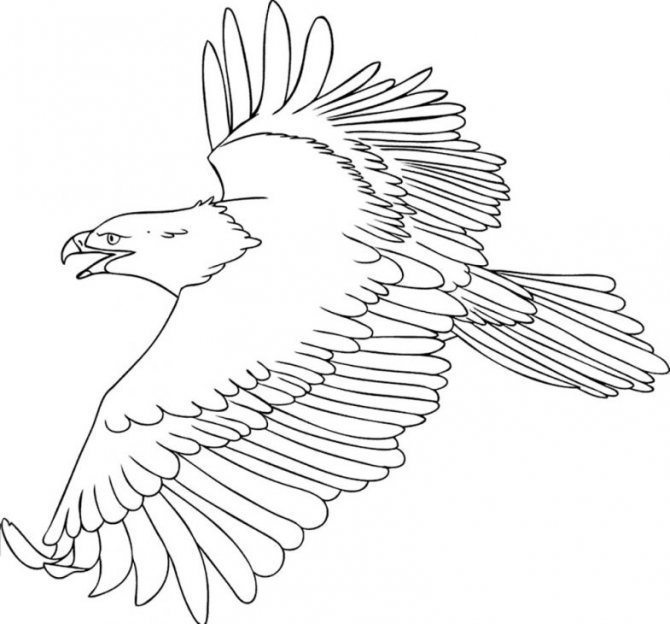
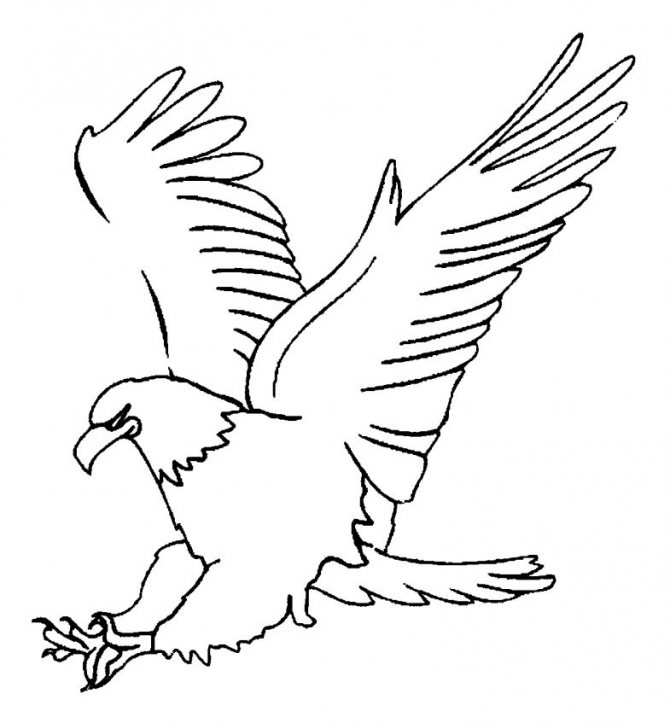
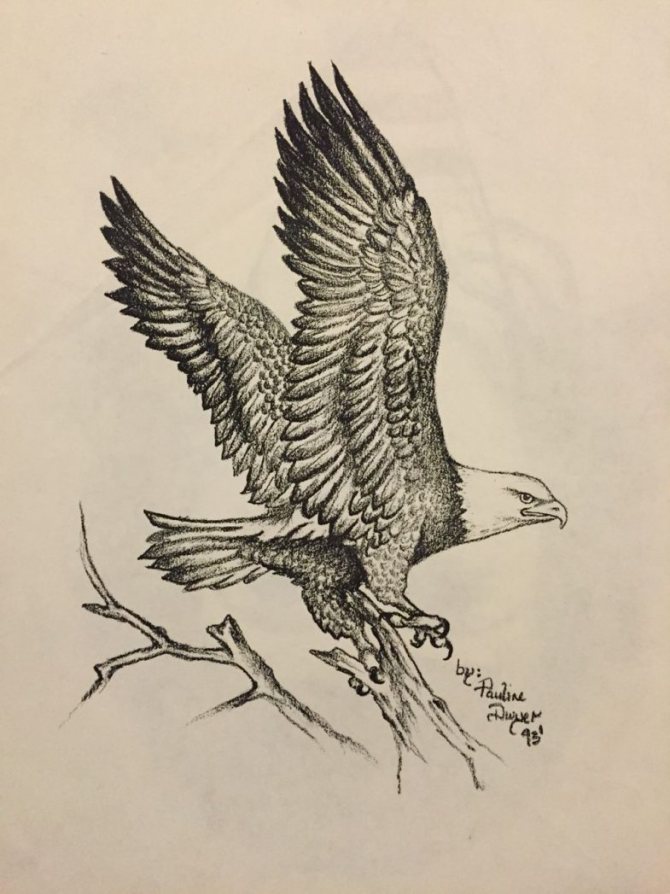
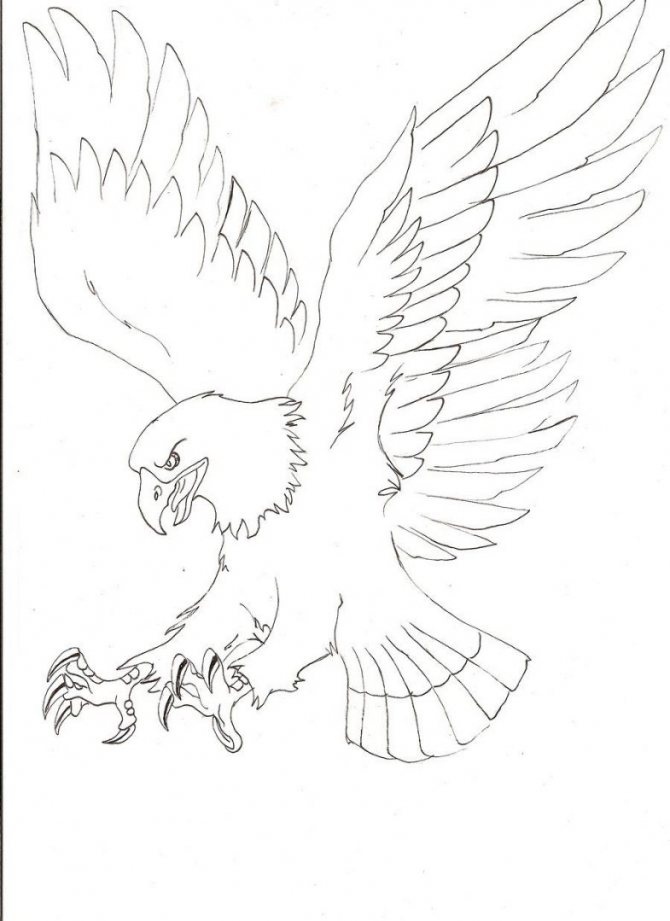
Step 3 In the third drawing, we will become familiar with the eagle's wings in detail, which is also very important.
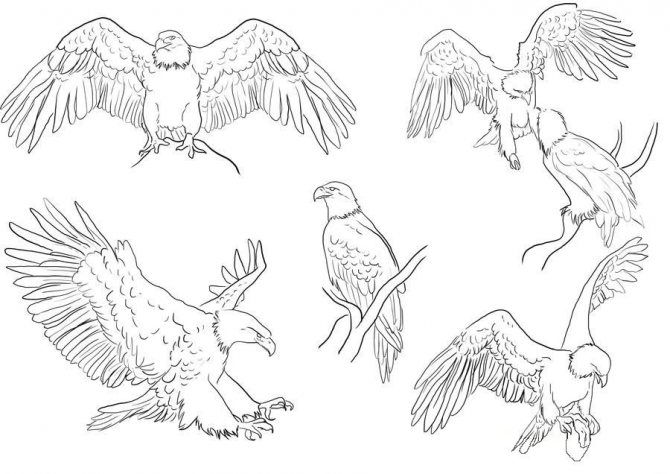
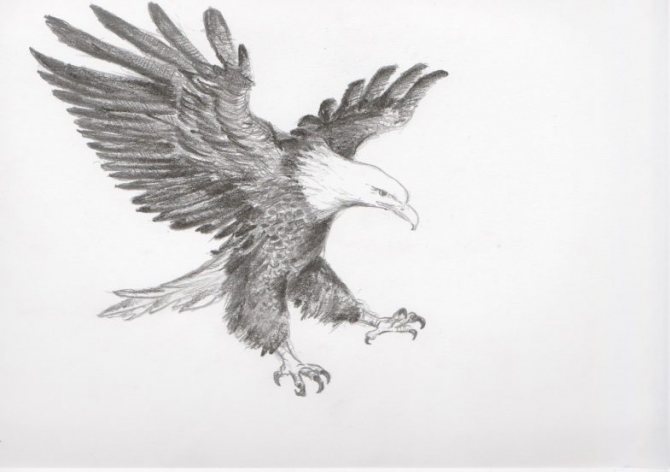
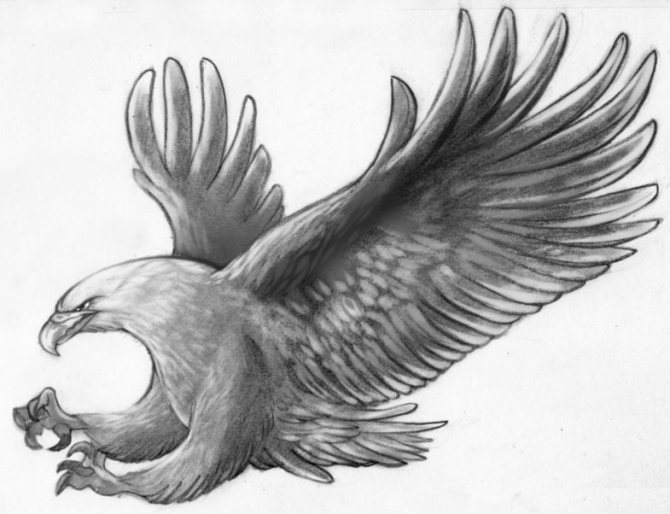
Step 4 This drawing shows several variations of the eagle in motion that may be useful.
Step 5 And here are some more examples.
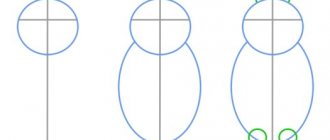
Step 6 Now let's start drawing. Let's draw the main lines as indicated in the figure.
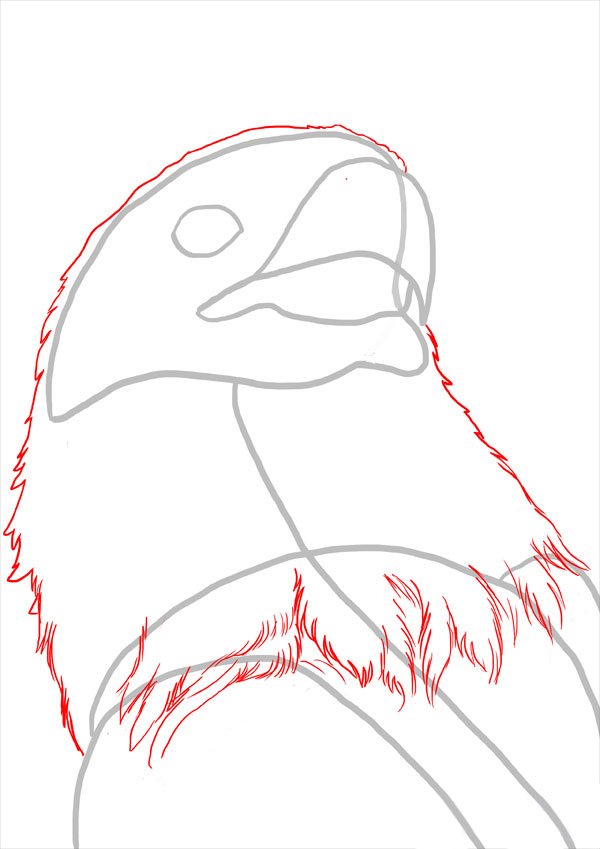
Step 7 Next, let's draw the basic outline of the head.
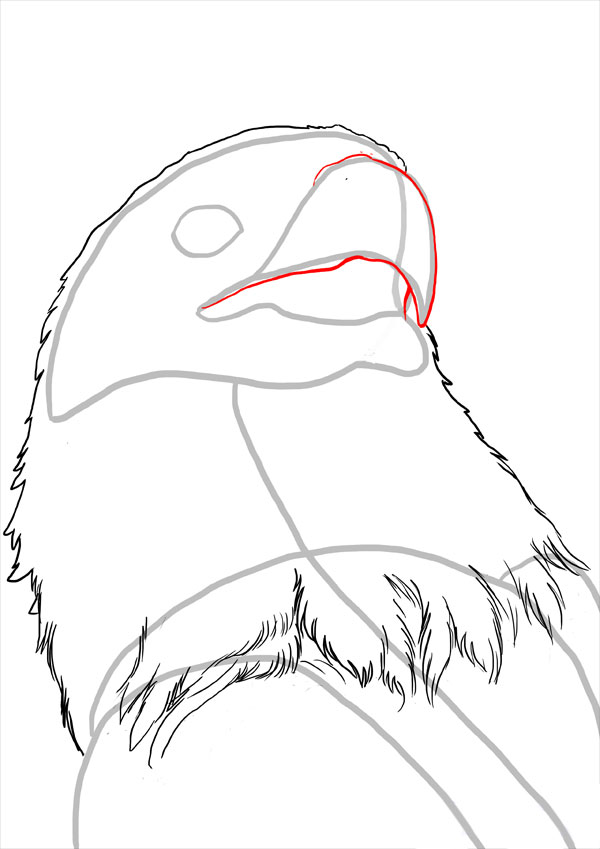
Step 8 Now it's the turn of the beak. Let's draw the top part.
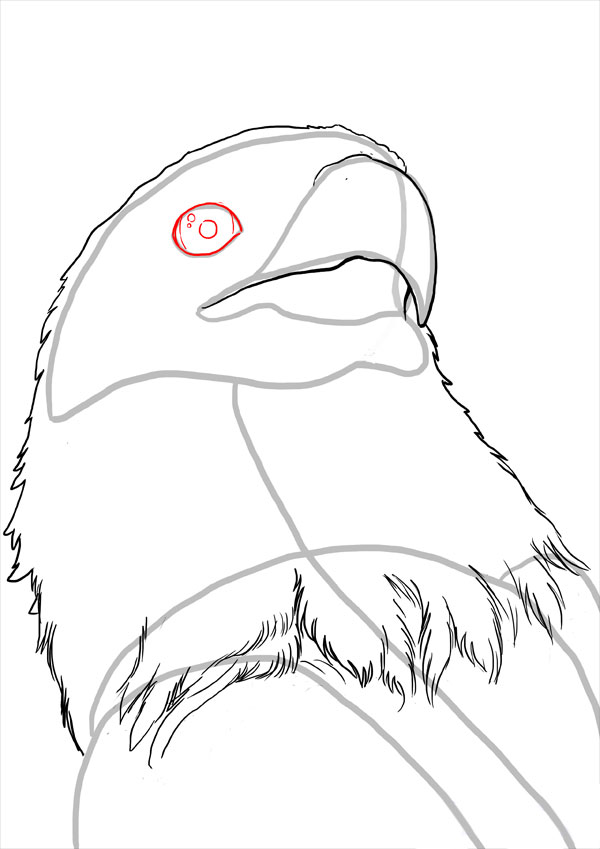
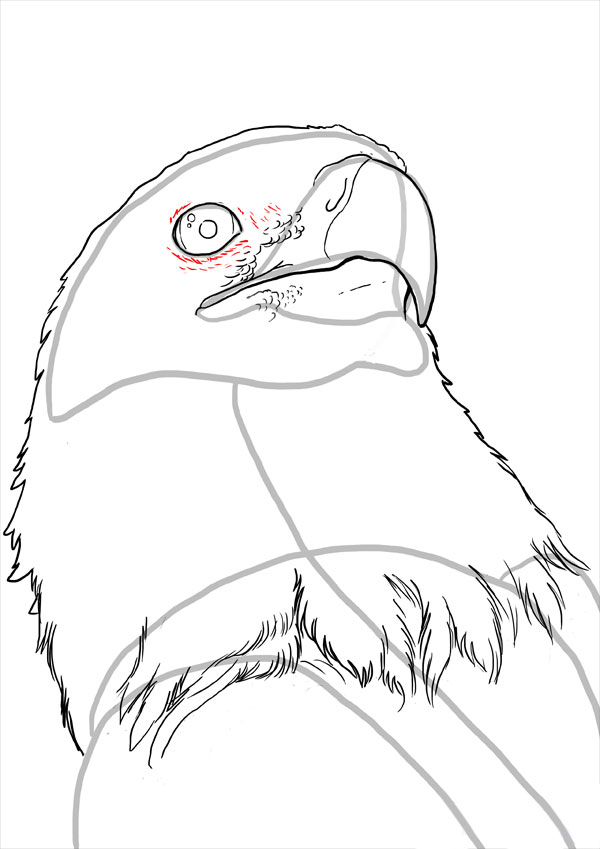
Step 9 The next important detail is the eye of the eagle.
https://zgemchug-msk.ru/ amber can be bought.
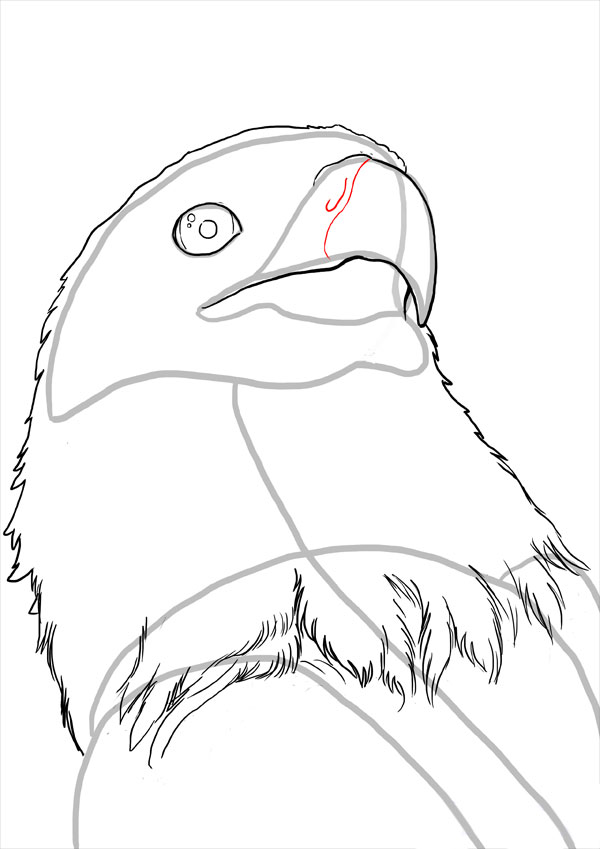
Step 10 Draw the nostril and the line separating the upper part of the beak.
Step 11 Now draw small feathers around the beak. This way our eagle will be more realistic.
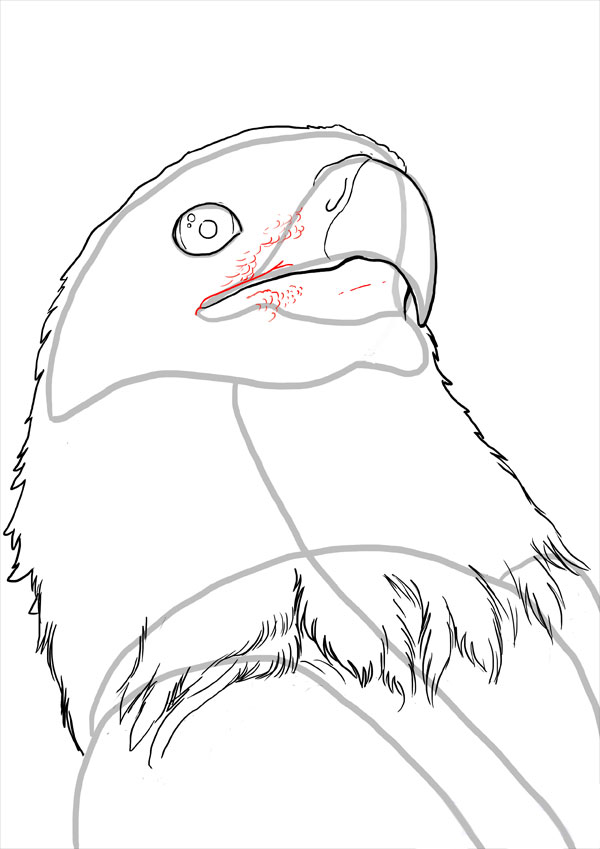
Step 12 Again, draw fine feathers, only this time around the eyes.
Step 13 Let's draw the feathers under the beak, and at this point the beak work will be complete.
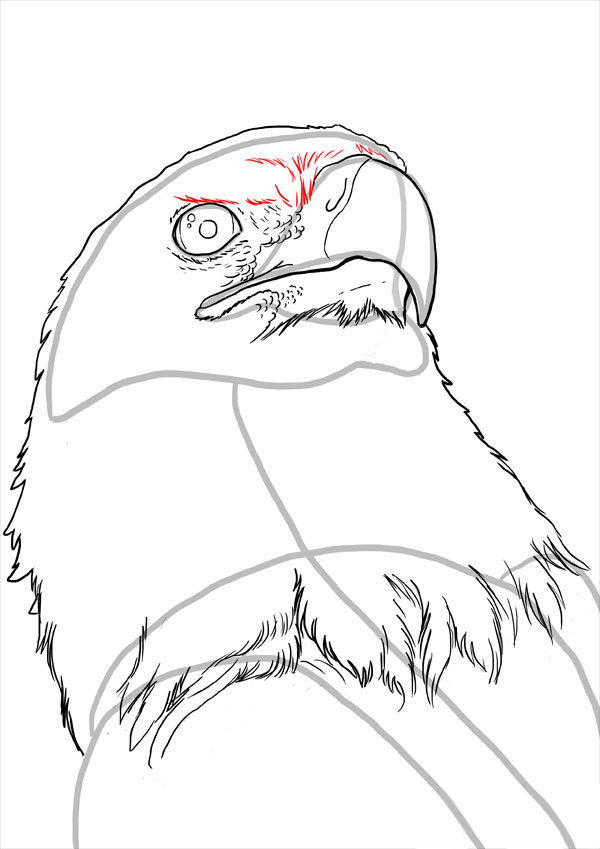
Step 14 Start drawing the feathers on the forehead.
Step 15 Next the feathers on the cheeks.

Step 16 Now draw the feathers of the head on the back side.
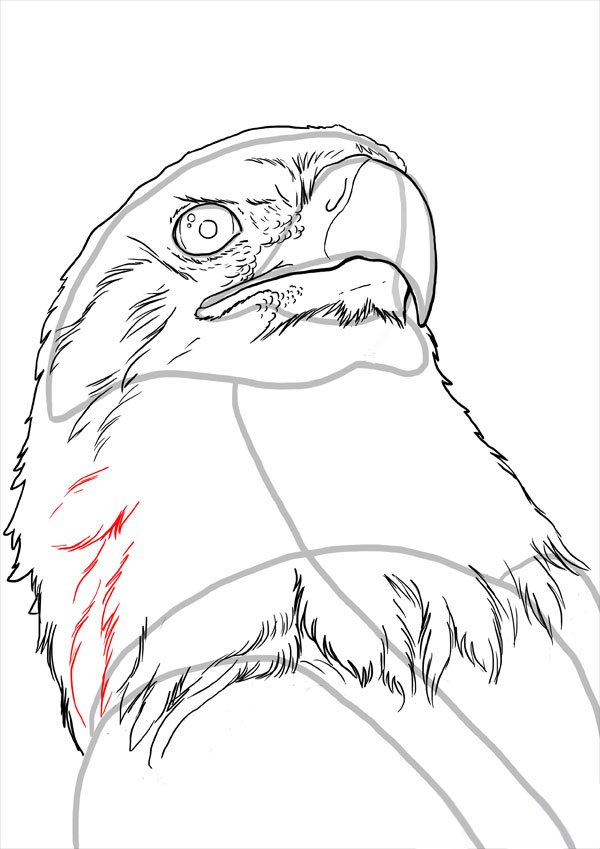
Step 17 Let's draw the feathers closer to the chest. It looks similar to the fur of other animals.

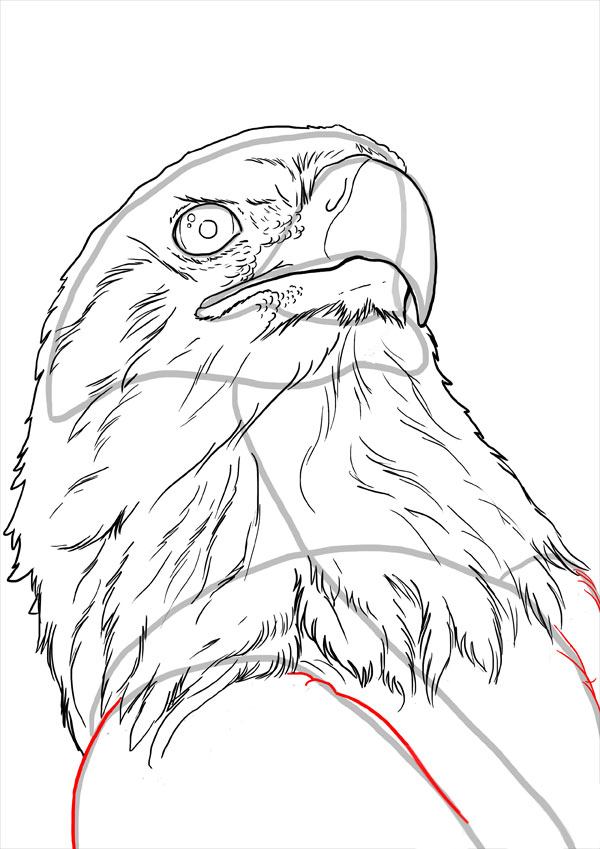
Step 18 Finish drawing the head by drawing the feathers on the chest.
Step 19 Draw the upper lines of the wings.
Step 20 Next, draw the large feathers on the wings.
Step 21 Draw the feathers on the body of the eagle.
Step 22 Now you can color the drawing to your liking.
Here's our lesson today on how to draw an eagle has come to an end. The lesson was difficult, we won't argue, but instructive. If you can't do it, repeat it, practice and you will succeed.
We still have a lot of new and interesting lessons on various topics. If you want to be the first to hear about them, sign up for new lessons and get them delivered to your home. Good luck!
Electric Vibrator Video in Moscow.
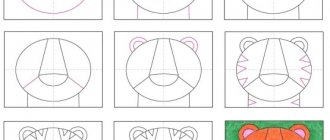
Simple Level
You can write a picture with a pencil on a plain scrapbook page.
Here are step-by-step instructions for children:
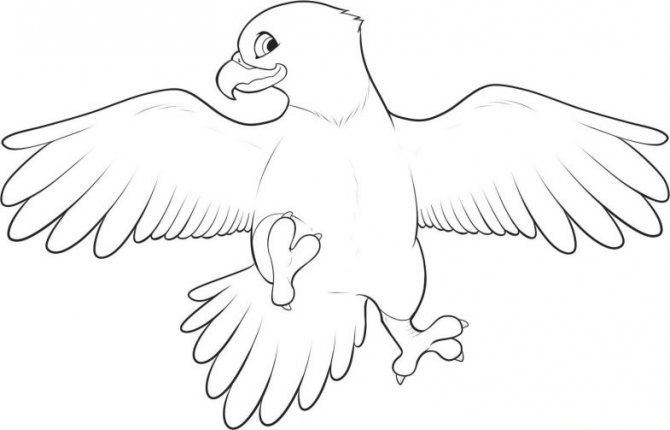
- Position the scrapbook horizontally. Now take hold of a pencil: in the middle from the top near the left side of the sheet, draw the shape of a feather.
- You will need to draw three similar images.
- When completing the drawing of the third wing, the line goes down. It reaches the middle and up again. Remains to finish drawing the other wing of the bird.
- The body of the eagle is depicted arc-shaped line. The eagle's arm is drawn with a hook. The line is directed downward to form paws with claws.
- To raise the line up, the line goes in waves. Then we draw the tail. From its top, a wavy line depicts the wing.
- For more realism, three feathers are added. Similarly detailed torso.
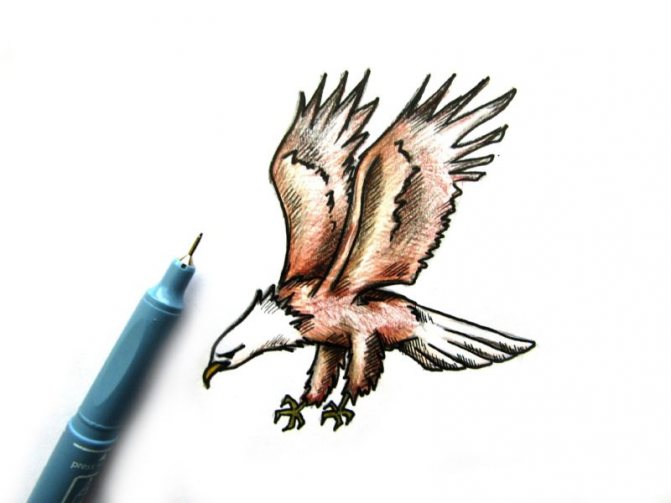
- We proceed to the eyes and eyebrows, paws and claws. Draw the contours with black marker.
- Liven up the image with additional colors, using markers or paints.
So, we got a simple beautiful drawing. Nothing complicated, but you should follow the step-by-step instructions, even though it is a simple drawing technique.
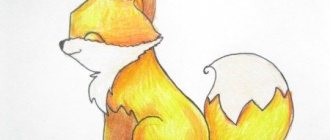
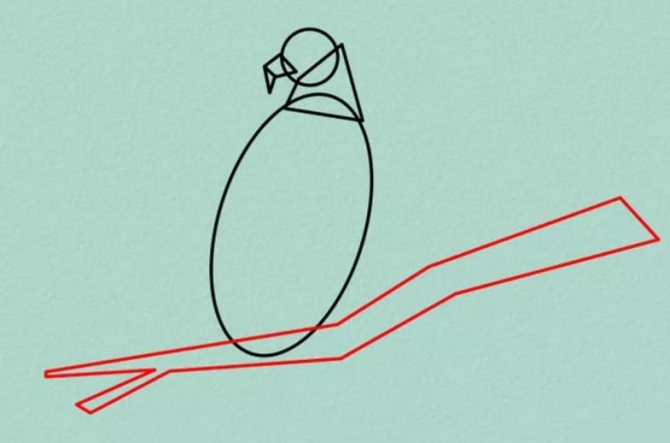
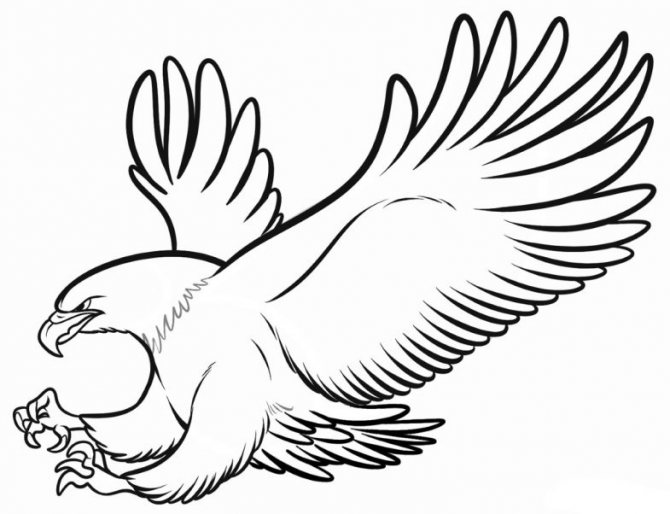
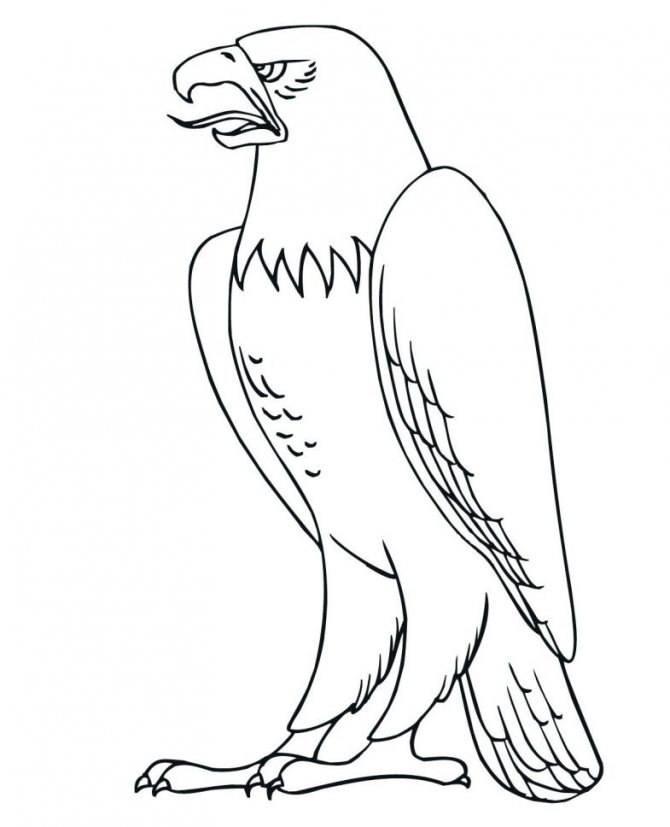
A simple drawing
Drawing an eagle is done in the simplest way. The image will be schematic at first, but then it can be colored.
Step by step instructions:
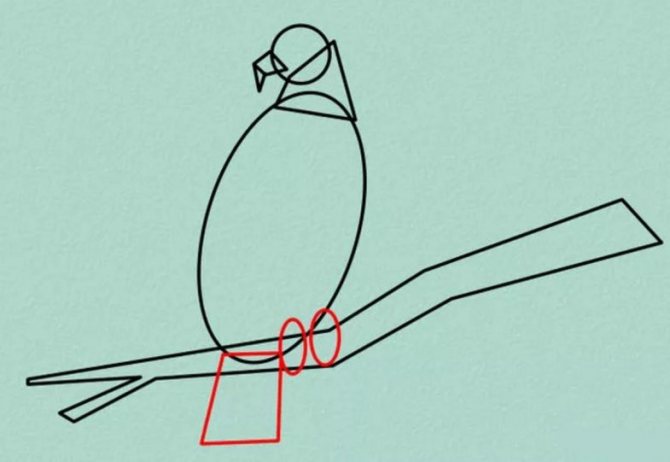
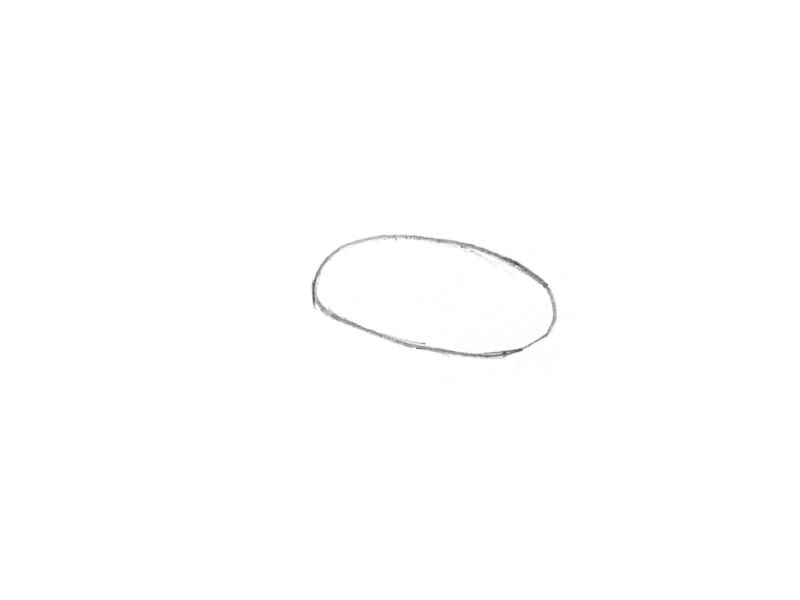
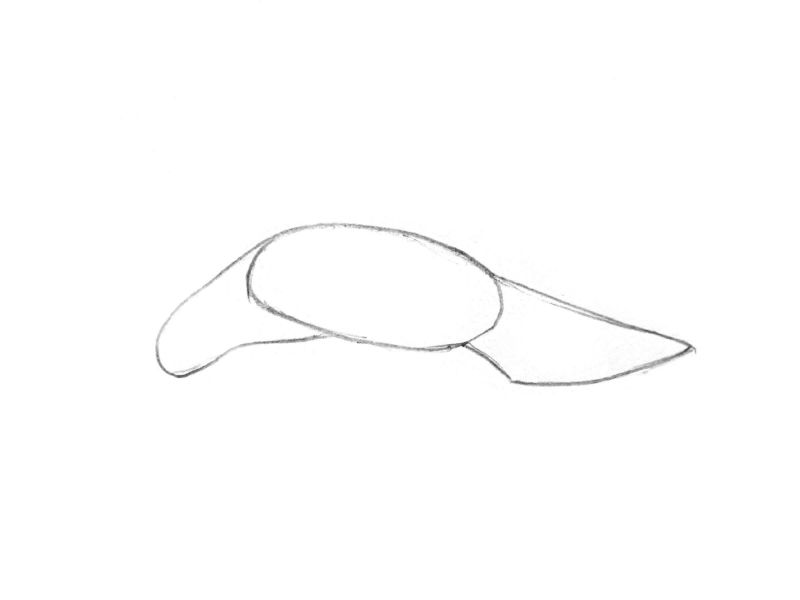
- Create a long and narrow oval on the diagonal of the page.
- Draw two similar longitudinal ovals. Should form a pattern that resembles outstretched fingers.
- Draw an uneven, vertical line down, it should not be strictly vertical.
- From the middle of the line to the left corner of the paper to draw a line diagonally. It should be wavy. At the end of draw 4 small feathers, smaller than the first 3 feathers. Then finish the wing with a flat, slightly concave line.
- From the end of this concave line depict the neck and the top of the head. From below to outline the outline of the beak.
- Complete the formation of the neck on the reverse side. Underneath draw the paws.
- A small semicircular, wavy line indicate the lower part of the torso. To check the ratios, visually draw a vertical line from the end point of the right limb. The end of the torso should end at this level
- At the end of the torso to draw the tail with a small fan.
- It remains from the top of the tail, which reaches the torso to draw a little semicircular, wavy line, which will form the back of the second limb.
- Now straight strokes to work on the feathers and then paint them. Start painting from the central part of each wing and move gently to the periphery, gradually reducing the number of strokes.
- Draw the eyes with black dots and over them to draw eyebrows. Paint in more detail beak, paws. When coloring, it is better to use a stipple, which will create subtle transitions of tone.
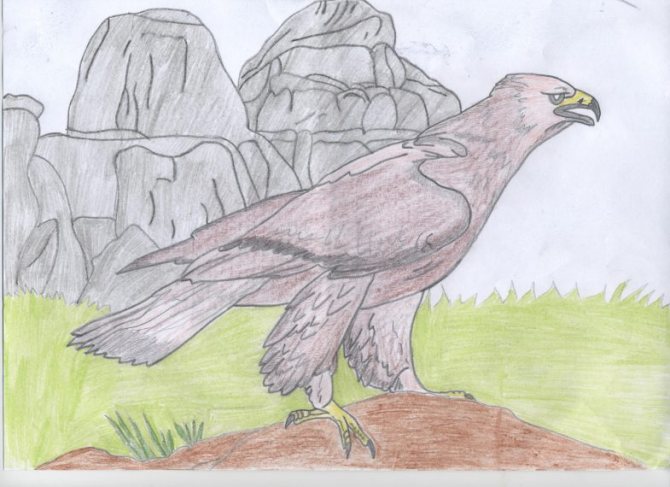
This pencil drawing of an eagle can be made quite picturesque if you devote a lot of time to coloring the bird. Behind the eagle, you can create a background of mountains or woods that will turn the drawing into a real painting.
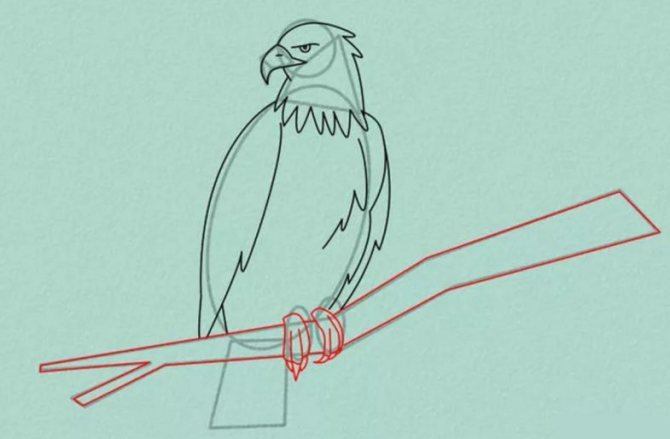
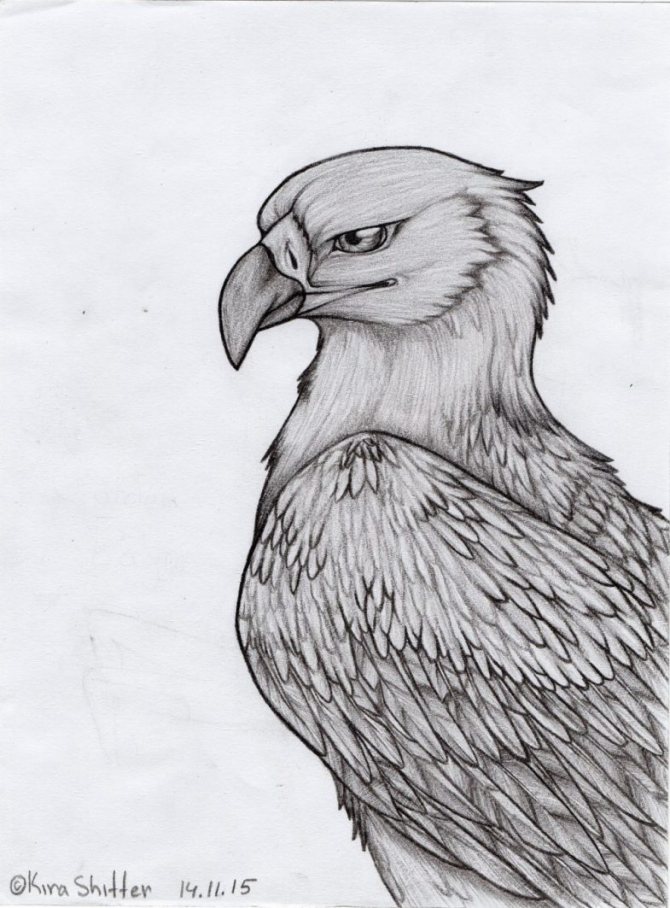
Middle level
How to draw the king of birds beautifully? If you coped with the previous task, you can solve the current one. Now you will need to draw an eagle using a more complicated method.
To create the outlines, use a regular pencil. Then the figure should be painted.
Before drawing, prepare the artist's tools:
- Watercolor paints;
- Pencil;
- Brush;
- Eraser;
- A container of water;
So, with all the necessary tools at hand, let's move on to the process itself:
- The album is still placed horizontally.
- We draw a large oval in the center. Above it, we draw another smaller oval, placing it horizontally over the main one.
- Arc lines complement the main figure. Zigzag lines create the contours of the head. The beak is separated by a wishbone from the head.
- A tail of eight small feathers is finished drawing from the bottom of the torso.
- A second row of larger feathers follows.
- The paws are depicted as circles in the middle of the torso (at the edges on both sides).
- From the edge of the two large arcs work through the feathers of the wings.
- Then add the second row of plumage. So, the figure can be processed paints.
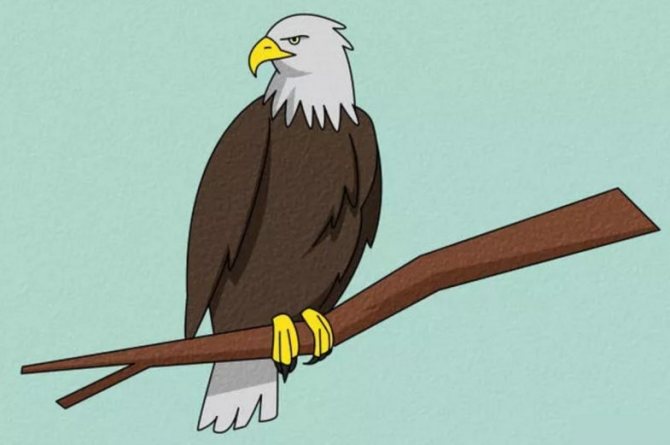
- Unpack the paint, prepare a container of water, pick up a thin brush.
- Brown is good for outlines. We choose a light brown shade and paint the body.
- A darker shade of brown is good for painting the head and plumage on the body.
- For the beak and feet yellow paint is used.
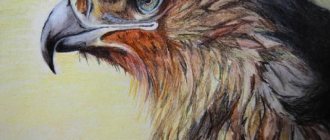
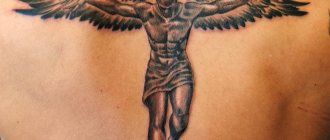
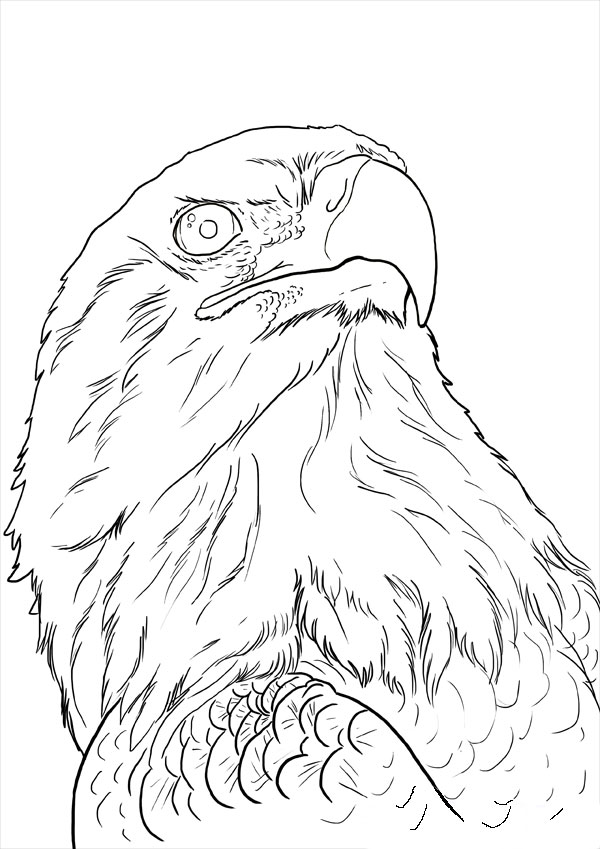
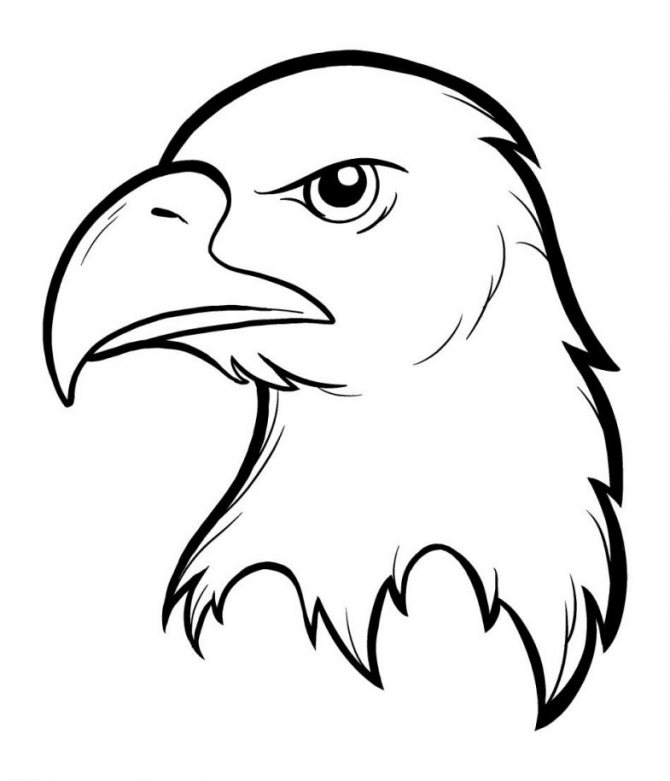
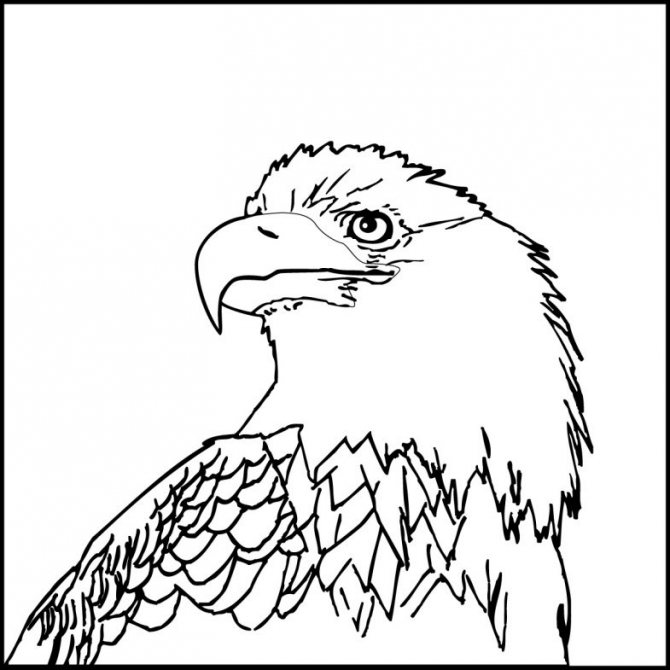
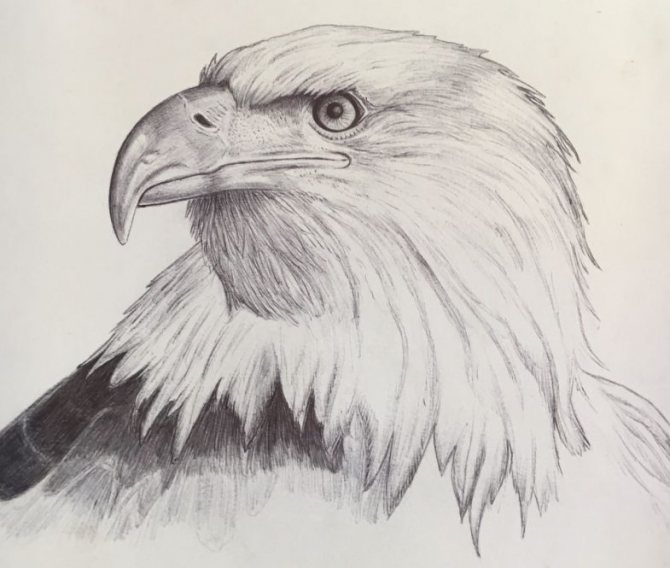
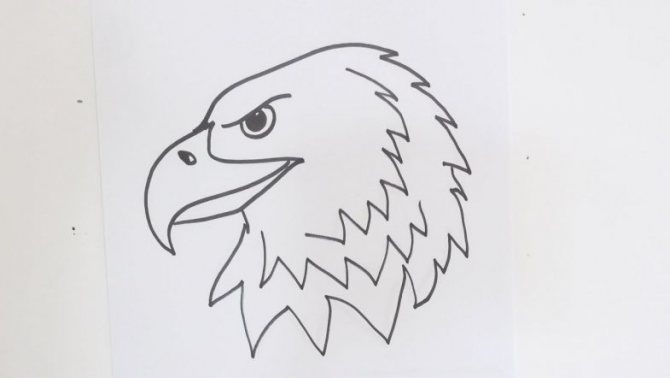
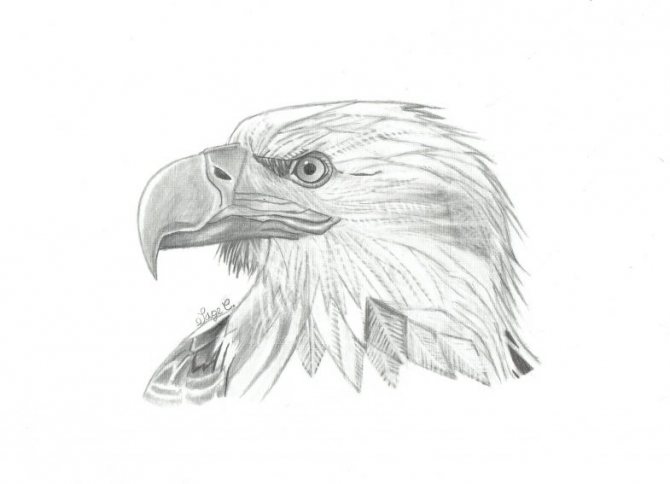
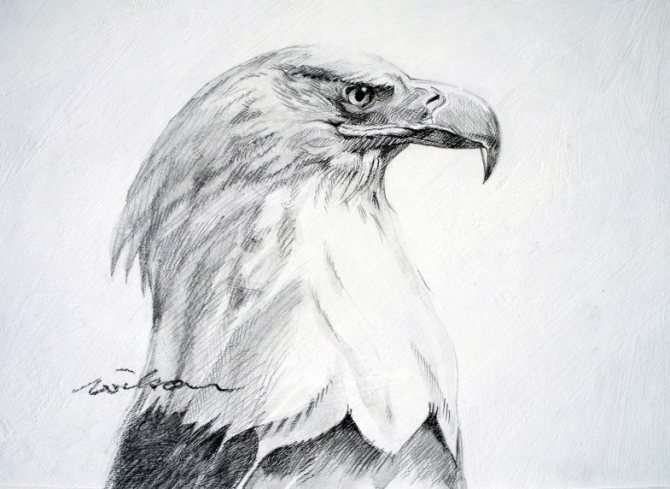
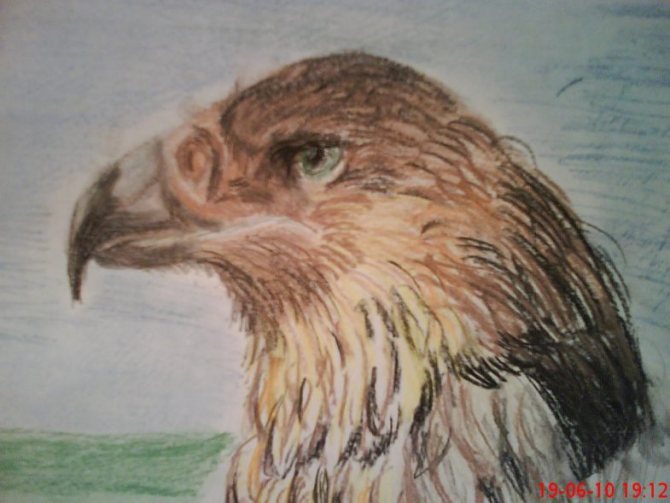
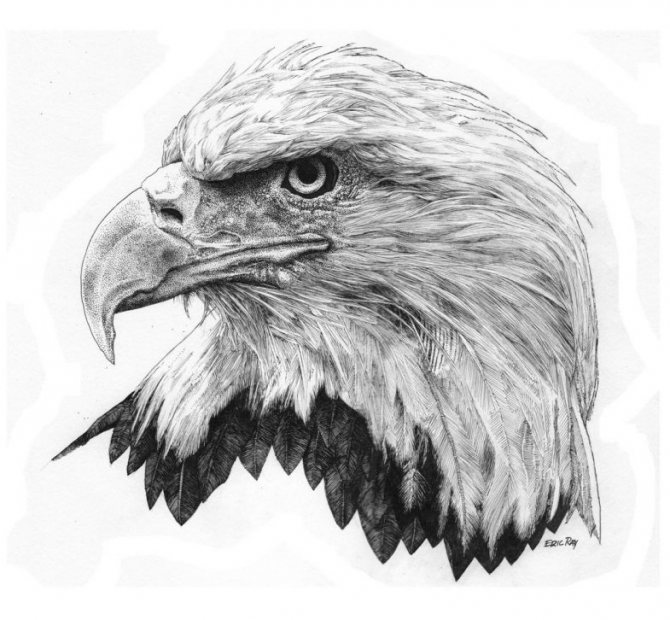
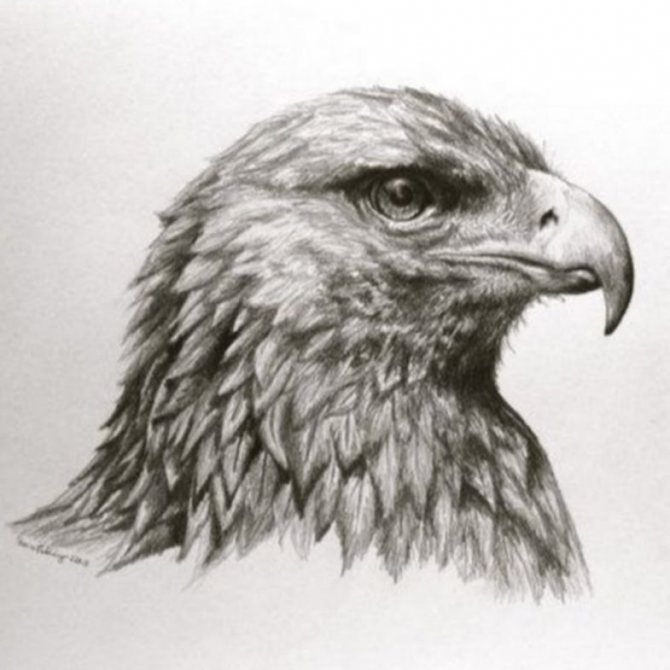
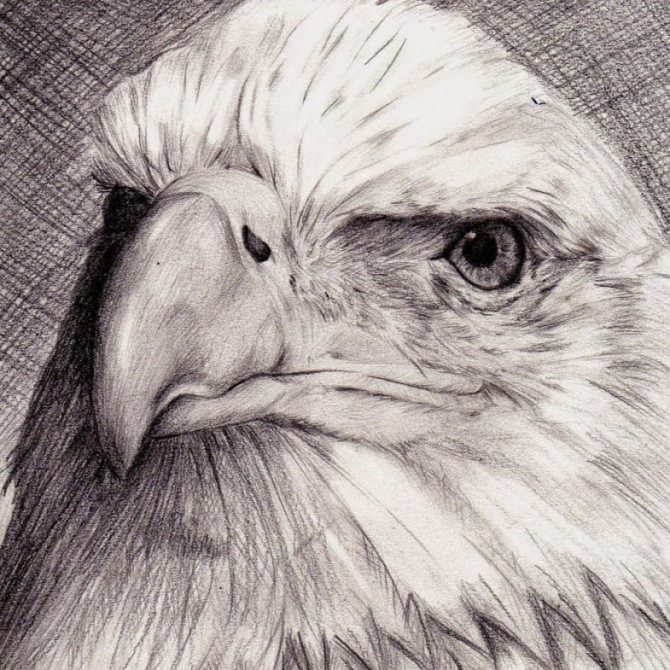
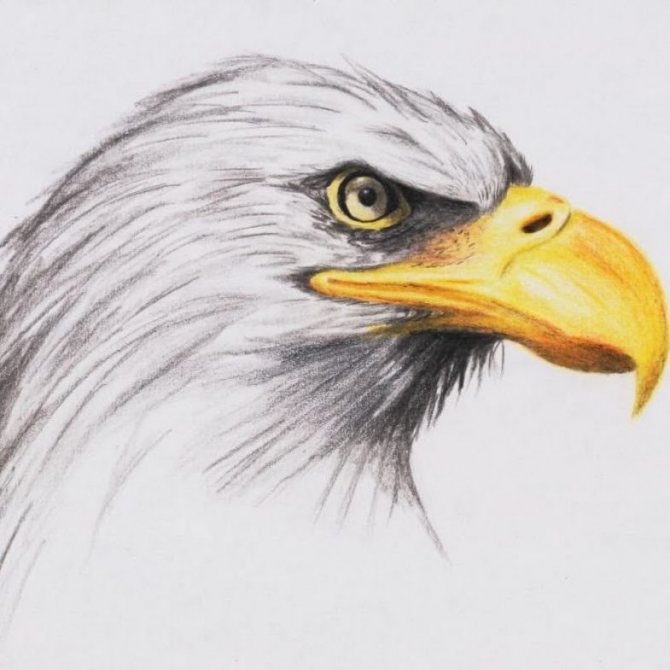
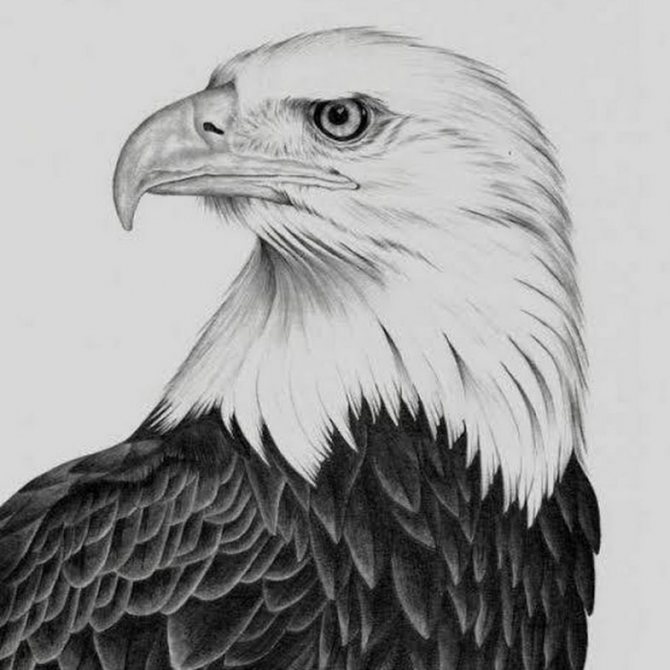
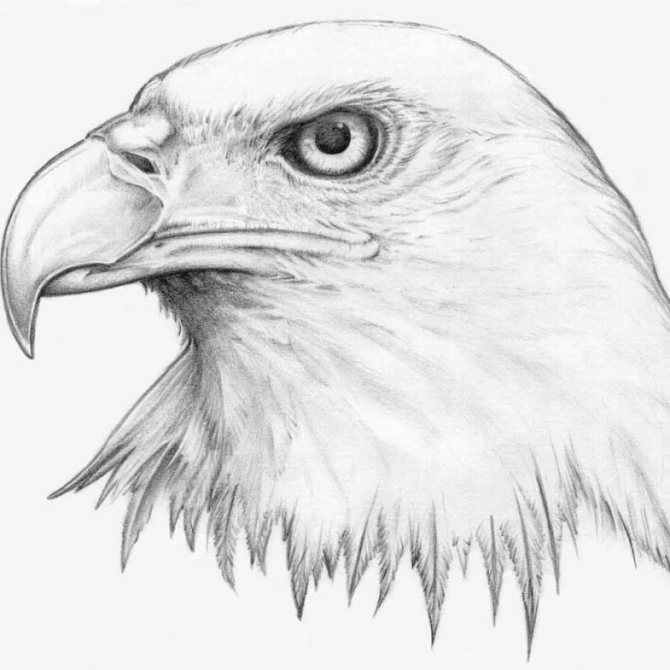
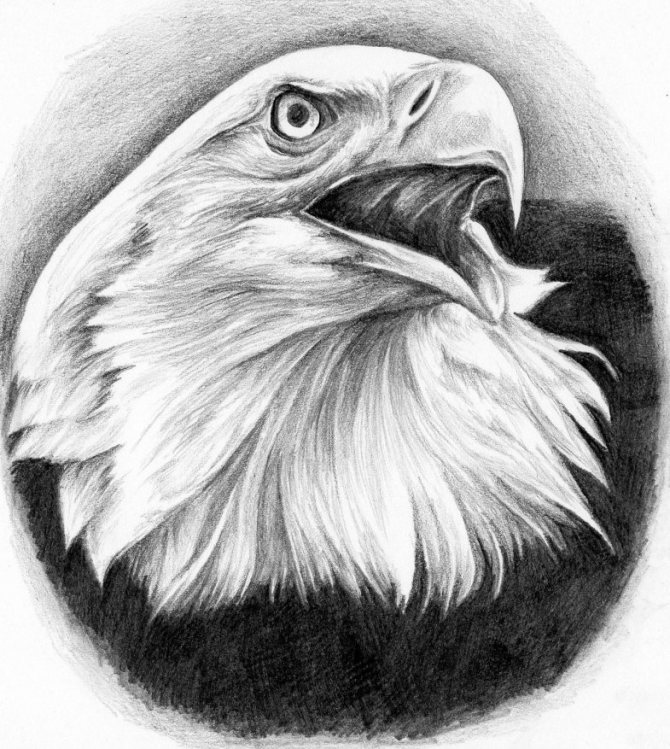
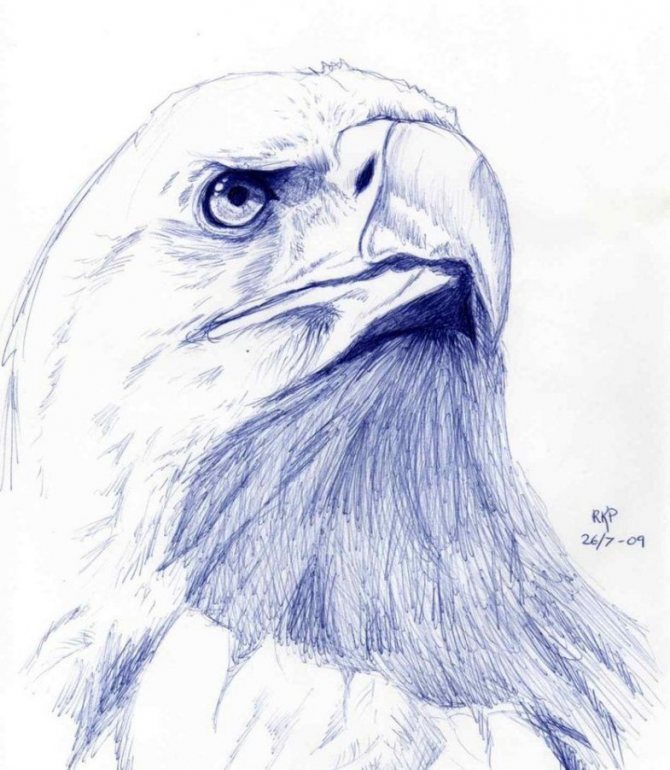
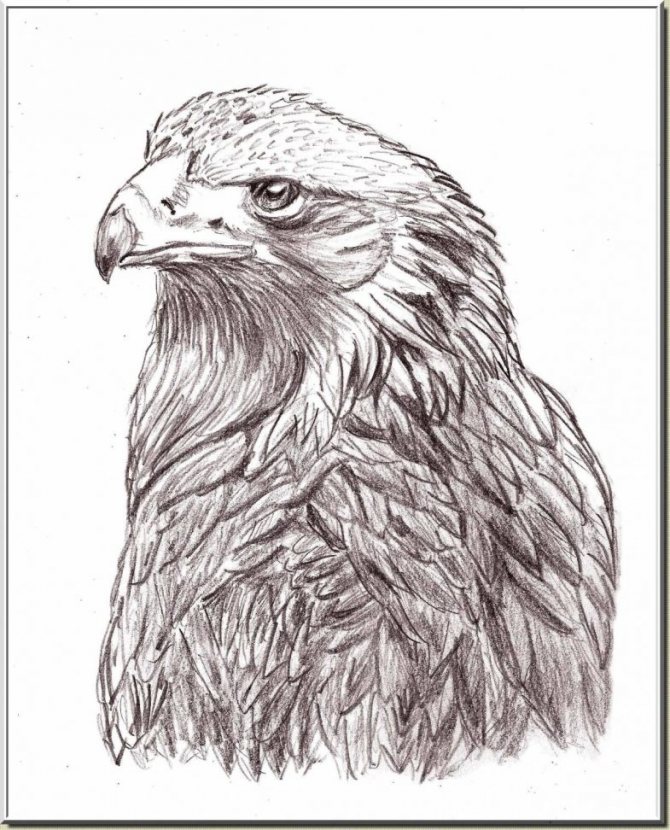
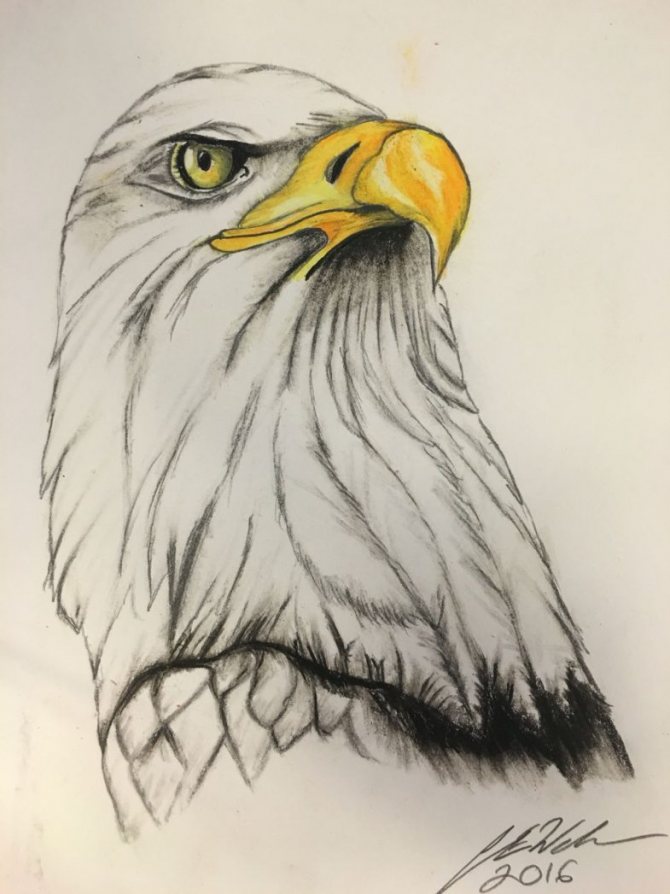
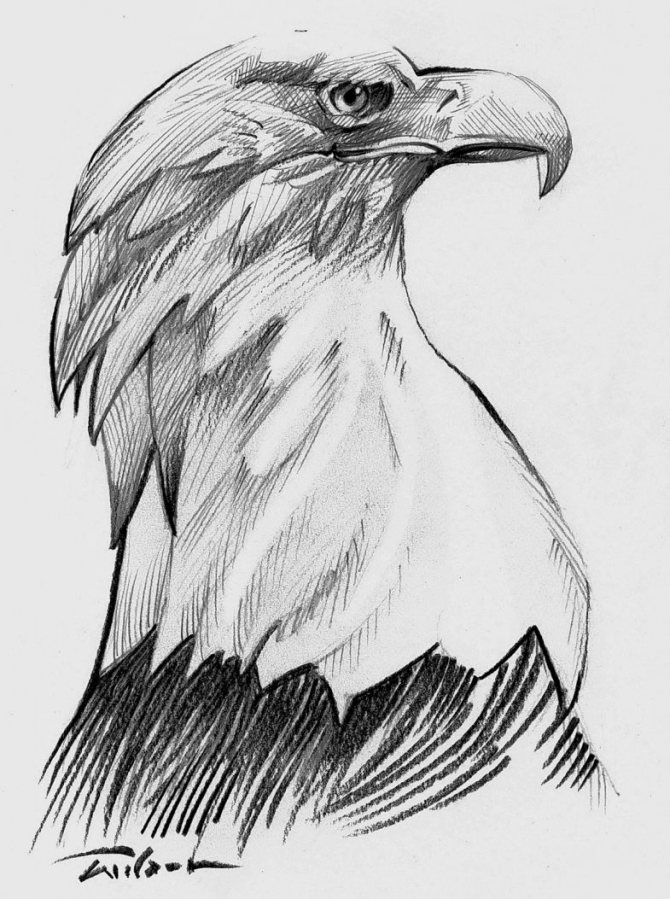
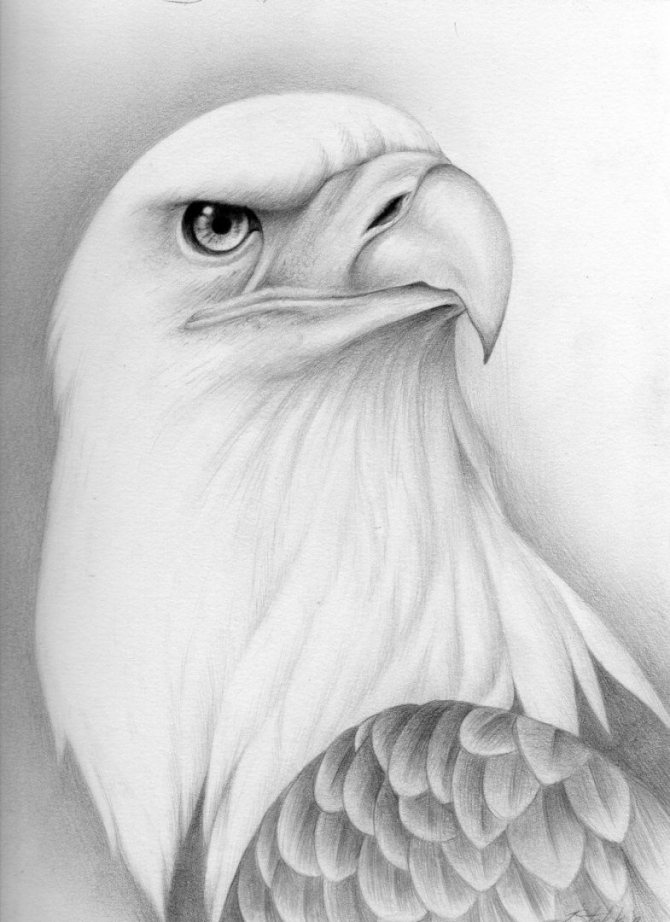
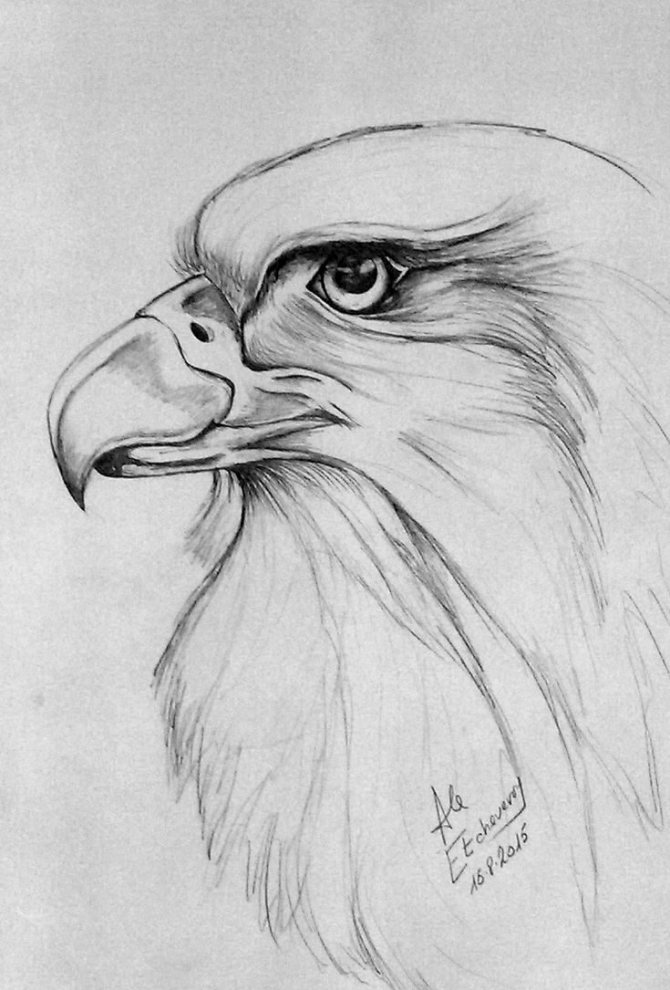
Head of an eagle
A portrait of a proud bird in profile will make a simple but interesting drawing of an eagle for children. To create such a portrait, you will need to make several straight lines, which will then be made into arcs and colored.
Step-by-step steps:
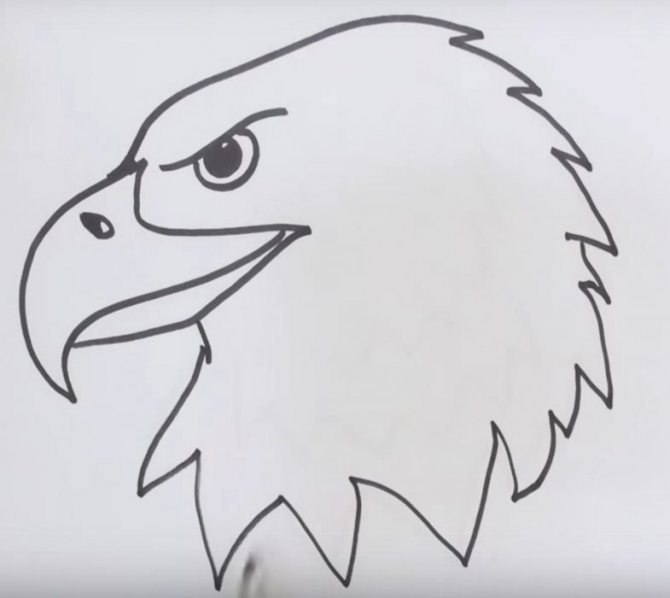
- Use a dot to mark the middle of the sheet. From it to the left, draw a small horizontal line, which then ends with an arc downwards. The arc must end with a vertical line. This is the top edge of the beak.
- To the right, draw up an arc that will be twice as long as the beak and a full width higher than it. This is the top of the skull.
- In the middle of the vertical part of the beak to draw a horizontal. At the bottom of another, which will mark the bottom of the mouth.
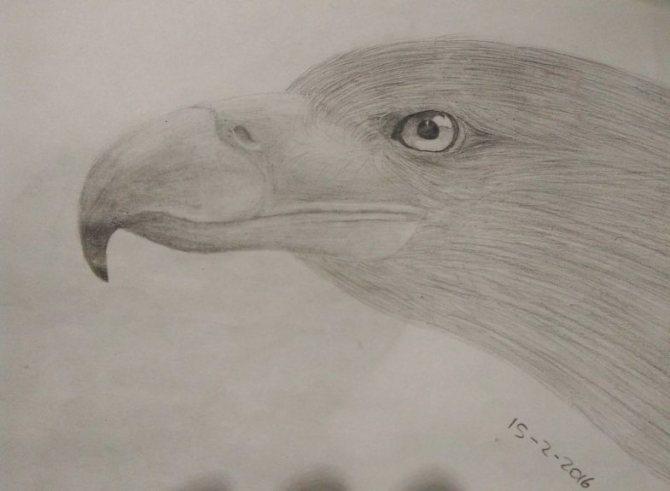
- In the middle of the head to make an eye. First you have to create a circle. Then around the circle to draw an almond-shaped contour, with a sharp edge back. Color the pupil.
- Beak divided into two parts by a vertical line. The outer part will be lighter. On the inside to indicate the nostril.
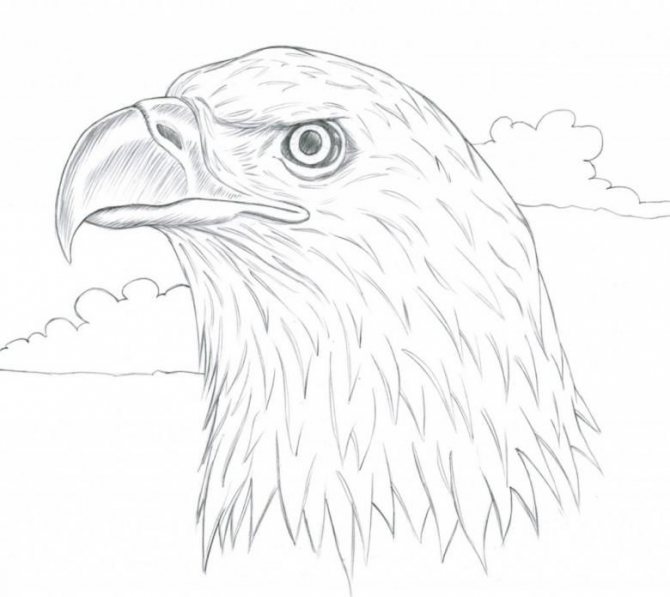
- Draw a semicircular line on the back of the head and teeth plumage of the neck below.
- Only a few strokes remain to indicate the plumage. The portrait of the proud bird is ready.
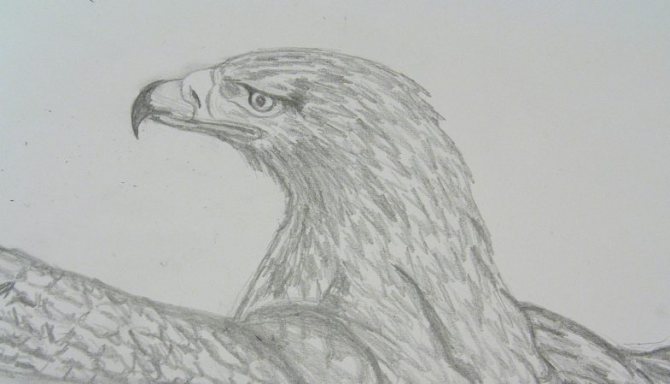
Tip. To make the portrait more picturesque, the strokes can be roughened with a flick or your fingers.
Such simple drawings of the bird, the lord of the mountains and steppes will be a good exercise in drawing or even the beginning of a career as an artist for both child and adult.
High level
It is not necessary to be limited to easy methods of drawing an eagle. Let's try to consolidate the knowledge by moving on to the difficult stage.
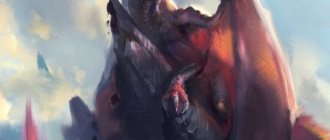
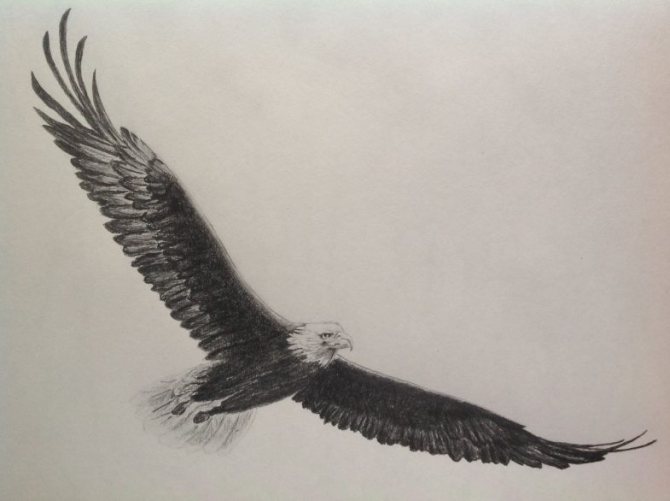
Let's draw the king of birds, soaring in the heavenly expanse against a background of snowy mountains.
Independently difficult to portray a similar image, but adhering to the following recommendations, everything will work. The contours of the paper will pencil, and paint will be gouache.
To represent the silhouette of the need:
- The highest point of the eagle is marked with a short stroke. In this case it could be the right wing. Then we mark the lower part.
- Place the pencil to the top marker, measure the distance to the bottom. At the moment of contact, grip the pencil with your fingers. Next, without releasing the tool, determine the number of pencils by width. Also measure the distance of the upper mark to the head and wings.
- The position of the animal is marked with dashes.
- The angle is measured with a pencil. The slope of the feathers is also measured. Drawing on the predetermined marks upwards animal. Right wing is complemented by six feathers. Then turn of the left wing and the second part of the body. On the head clearly highlight the beak, depict the eyes. The next point is the process of applying paint.
- The first paint sketches affect the background of the picture. First, place the necessary tools near you: a container of water, a medium brush and gouache. Combine white paint with blue paint, paint the upper area of the sheet. Here add a little purple color to cover most of the background. The eagle should remain unpainted.
- Saturate the bottom part of the sheet with blue color. After mixing the shades, paint the remaining fragments.
- At the bottom, dark blue gouache is used to draw the dark spots. Next, the entire perimeter of the mountains is covered with shadow areas. After that, a little pink is added for selective brightening.
- Red and blue are mixed with brown. It is then used to paint the wing and head. The black paint is partially painted on the wings. We rinse the brush to absorb the brown lighter shade. We move on to the wing and chest area. Gray is used for the small part of the head, and gray-brown for the tail. Eyes and beak do not touch yet. A small part of the head area can be lightened.
- To paint the beak and paws, use a mixed version - yellow with brown. To darken the feet and some of the feathers, add dark brown. Make a fleck of white as a highlight on the beak. Draw the eyes in yellow. On the legs we do a little shading.
The eagle soaring in the sky against a background of snow-white mountains is perfectly depicted.
Is your result different from what you expected? No problem! Try again, following the step-by-step instructions.
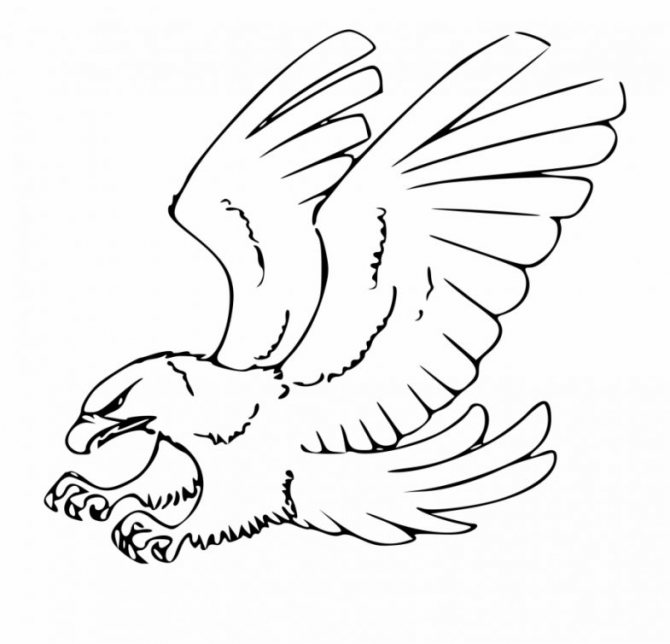
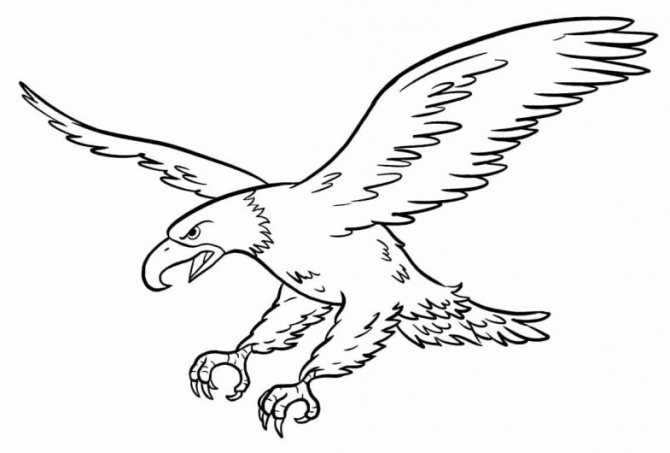
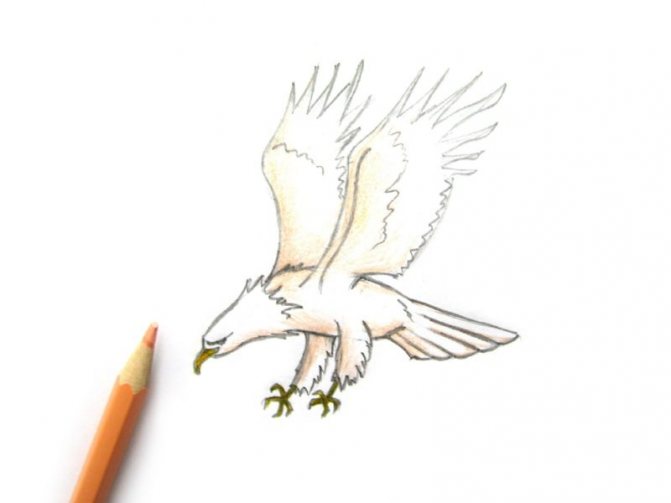
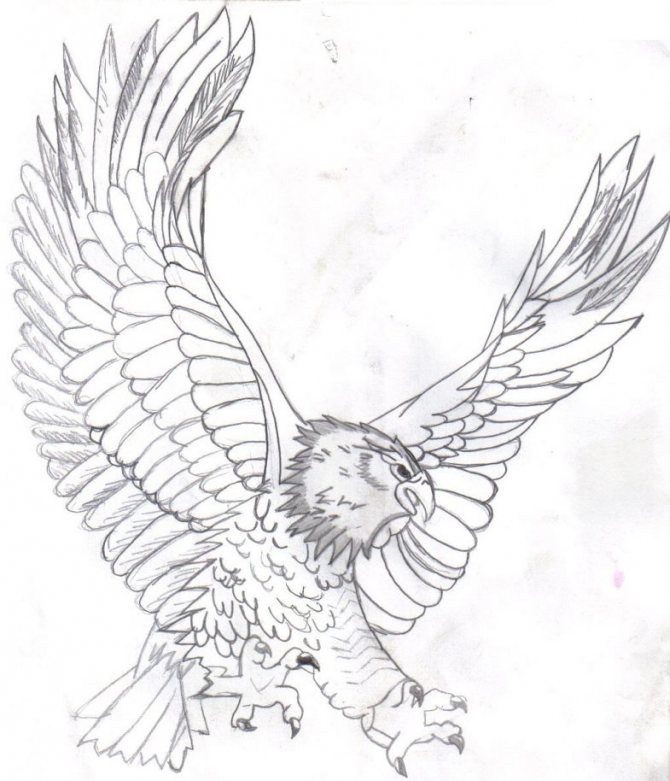
Soaring Eagle
The soaring eagle is the hardest to create, as it requires a more precise ratio of proportions and fine elaboration of each stroke.
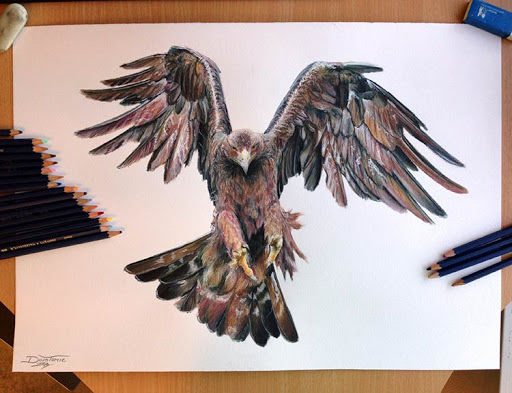
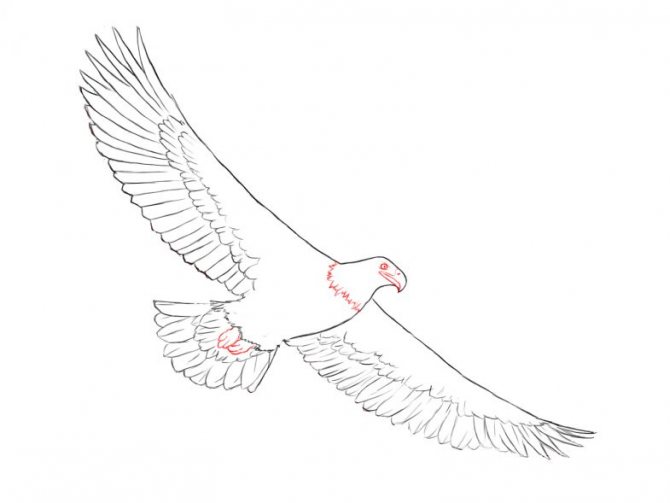
Drawing a soaring eagle step by step:
- First you need to mark the highest point of the figure. This line will then need to be removed. The highest point will be the edge of the long feathers of the right limb.
- Just below this point you need to draw a horizontal line a bit to the right. On it you will draw the plumage afterwards. Now from that line to the center it is necessary to draw a diagonal at an angle of 30-40 degrees. Make the diagonal into a slight arc. This will be the contour of the wing.
- Measure a third of the diagonal and draw a horizontal line of this length from it. This will be the upper contour of the skull. At the end make a small rounding, to which attach a beak.
- Next, draw the left or back wing. First draw the upper contour - it is twice as long as the head line. The contour will also be horizontal and will go a little lower. Next, the wing is drawn as a curved cone, which is twice thinner than the head. This ratio of sizes creates a perspective.
- The lower part of the torso is shaped with an arc that runs horizontally from the left wing and reaches 1/3 of the right limb.
- Then the right wing end has to be drawn from the upper point to a length equal to half of the upper diagonal.
- The lower straight diagonal must mark the contour of the right limb.
- On top of the 5-7 strokes make large feathers.
- It remains to make the lines softer and retouch the contour. Make the outline of the plumage wavy.
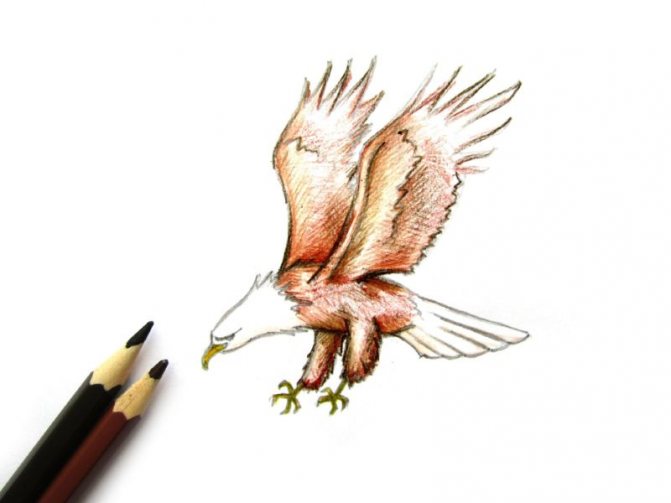
- This figure can also be dissolved. The body and the right wing are decorated with a darker color. The left, far limb should be lighter - the tone will convey perspective. The head and outer feathers should be brighter and lighter.
Tip. You can use this piece to practice drawing drawings with perspective. With strokes or paints you can paint a bird so that not only its body, but also the space around it becomes three-dimensional.
The landscape, which will serve as a background, should be made in the form of mountain tops. Sami mountains can be drawn only contour lines, zigzag lines.

The photo drawings of the eagle


0