The structure of the skull is important
Familiarity with the structure of the skull and its structure, will add to the knowledge of anatomy. And this will help well in drawing not only professional artists, but also beginners creators.
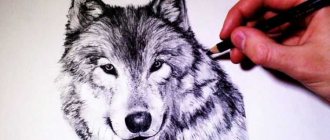
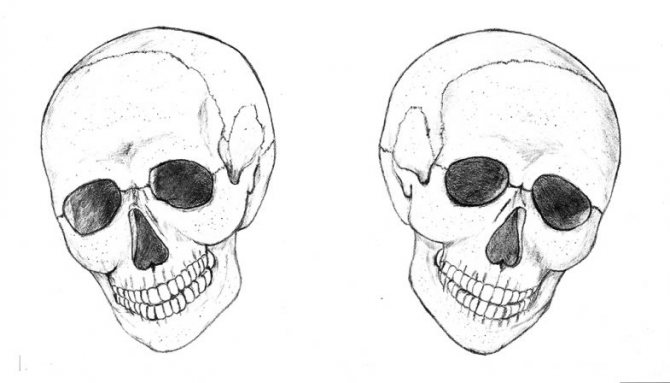
The structure of the skull certainly affects the appearance of the human face. Knowing how to draw the skull correctly can greatly help in expressing emotion and facial characteristics in people. Skulls are not the same.
They all have a different shape and their physiological personality. For example, a woman's skull is different from a man's skull. So you need to know some important nuances in order to draw a quality portrait.
This article will break down the basic concepts and details. Such a master class will be a good start for beginners. So, how to draw a skull simply and beautifully?
Such work requires a lot of patience and effort, but this tutorial will try to show the simplest possible drawing technique. This tutorial will show how to draw the work in pencil step by step.
Before you start, it is worth preparing the workplace, free the table and prepare materials for the process.


The meaning of the tattoo
It is no secret that the skull tattoo in most cases carries a negative connotation, as it is the embodiment of the transience of earthly life. The well-known Latin expression "memento mori", which literally translates as "remember death", is the most accurate verbal interpretation of this symbol. The philosophy of this sign is that everyone should remember that he is only human. Unfortunately, most tattoo lovers stuff skulls following fashion trends or simply for personal aesthetic reasons, completely forgetting the meaning of the human skull depicted on the body.
But the reminder of death is not the only interpretation of this symbol. Some cultures view the skull as a personal talisman. In addition, the image of the skull emphasizes masculinity and fearlessness of its owner. Such tattoos are often intimidating militant in nature. It would not be superfluous to mention the fact that the skull is also a symbol of destruction and death. Not without reason pirates and criminals actively used and continue to use this symbol. The skull on the body as if it says "do not stand in my way".
It is important to know that in the criminal environment the skull symbolizes the high rank of the thief, so it is worth carefully select the sketch of the tattoo. Otherwise, there is a chance to be in a difficult situation, where you will have to confirm their authority is not a naked picture, and the real action and strong-willed qualities.
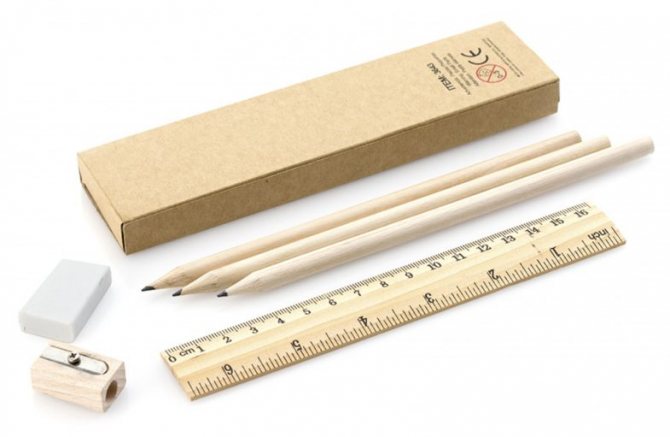
Materials for work
There are few accessories, everything can be found at home. There is no need to buy professional attributes if you are a beginner.
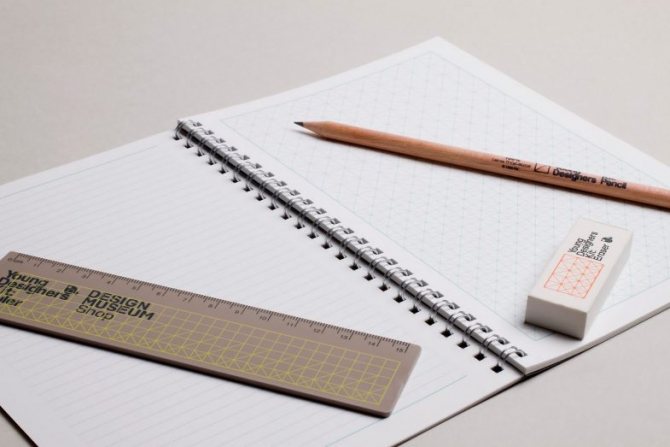
For the drawing you will need:
- A sheet of paper, preferably thick, because it will be subjected to repeated erasure with an eraser.
- A simple pencil. If you continue doing this, in the future you can buy a quality set of pencils with different slate densities.
- Eraser.
- Ruler.
- A pencil may often need to be sharpened, so - a sharpener.
After preparing the materials, begin to build a step-by-step sketch in pencil. For a sample, it is better to take a ready-made photo, which can be used as a reference. Such step-by-step instructions will be understandable even for children.

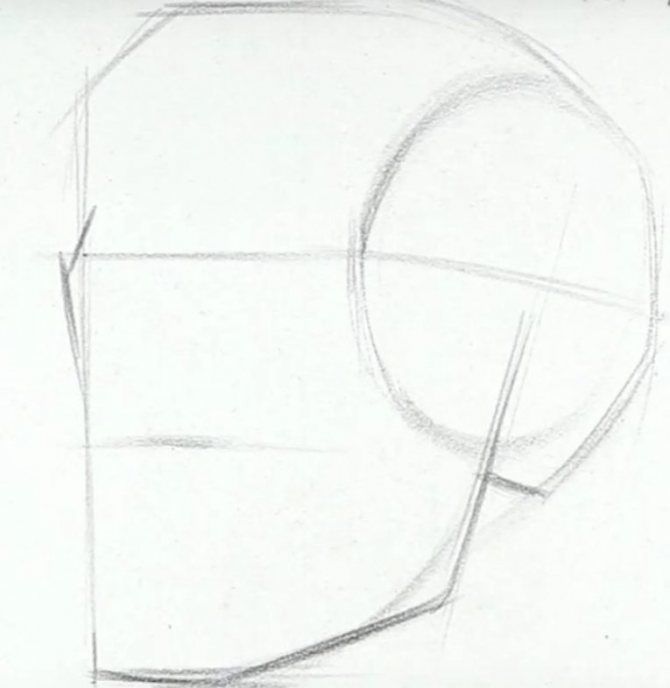
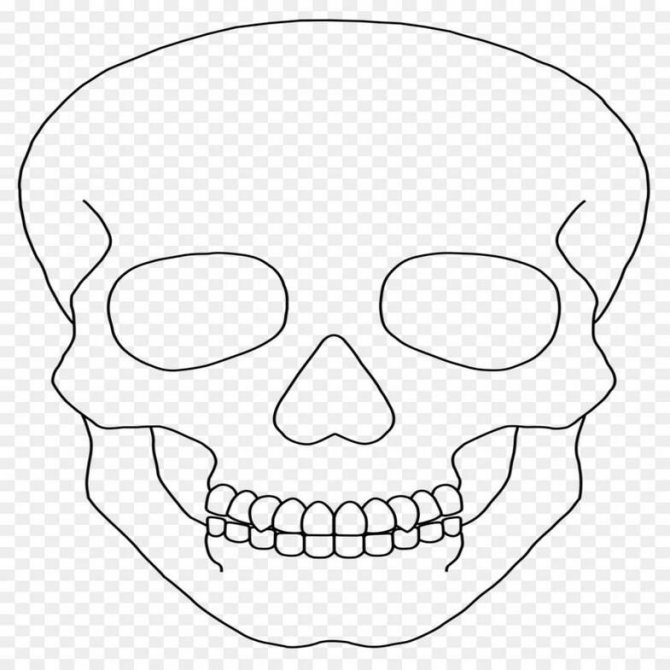
Drawing by the ticks
To draw a head bone on the ticks, you need to have patience and a clean sheet of paper. A sharp pencil is necessary to sharpen it. First you need to position the sheet of paper so that you can start drawing at the top side of the sheet.
In a horizontal position it is necessary to draw a long line. Its size depends on how big the skull illustrator is going to do. If he is going to depict a small skull, it will be sufficient to draw a line of three cells. On the sides of the sketch you need to put vertical dashes of the length that the entire skull should be. Then these dashes should be connected by an oval line.

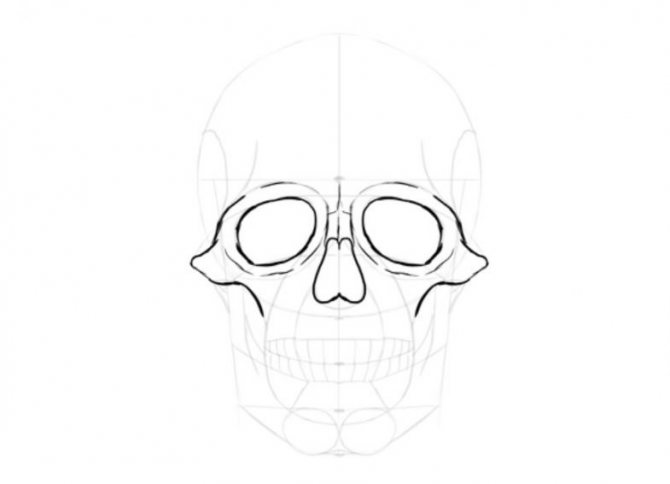
The second step of drawing the skull is to draw the eyes inside the image of the head. After these operations it is necessary to draw one straight line on the underside. On this straight line we start to draw the teeth. When the silhouettes of the eyes will be painted over, and the teeth out, the drawing can be considered finished.
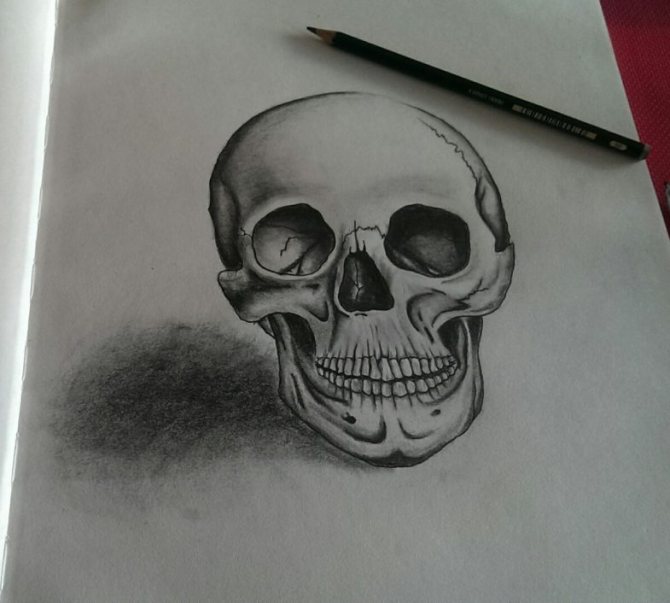
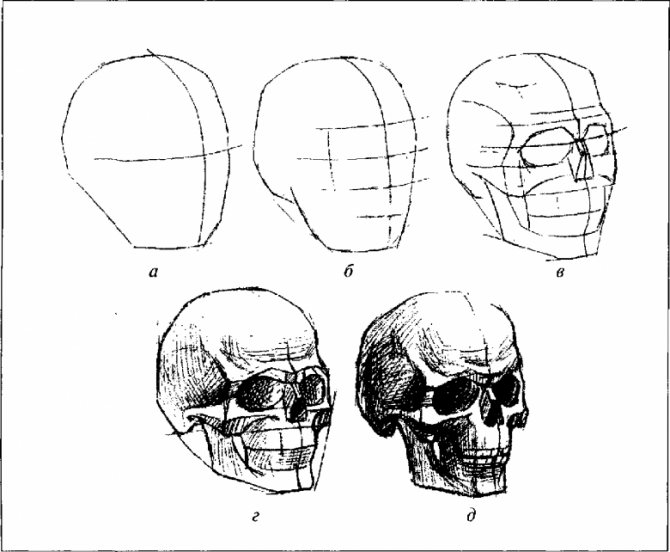
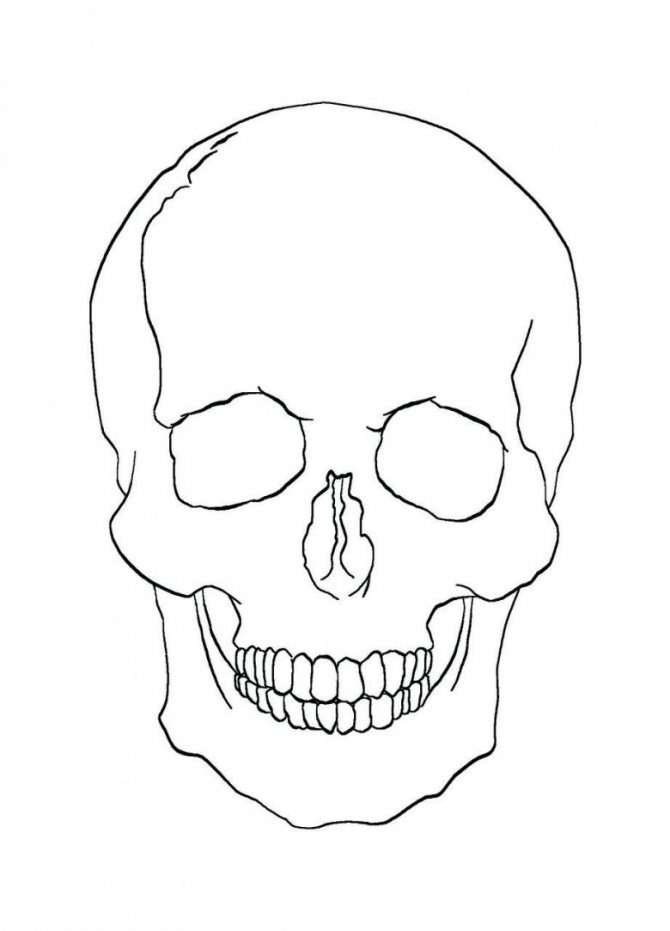
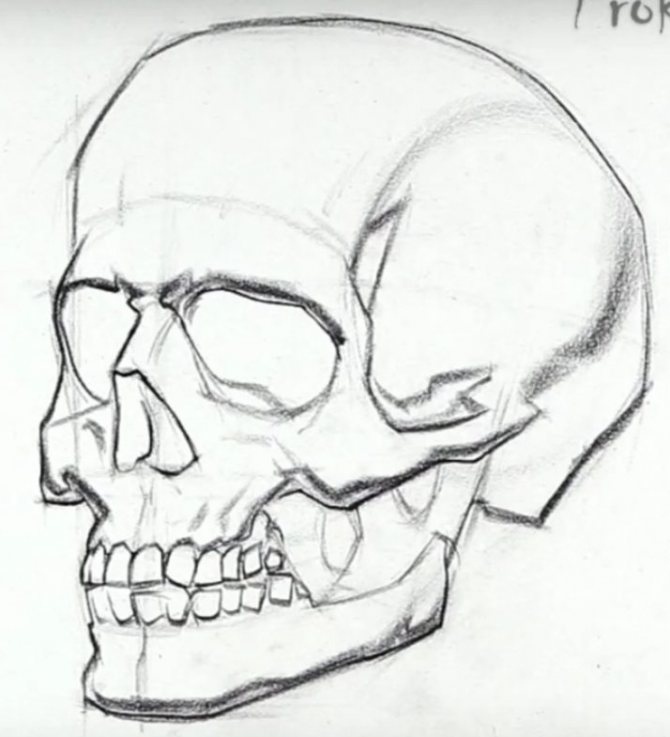
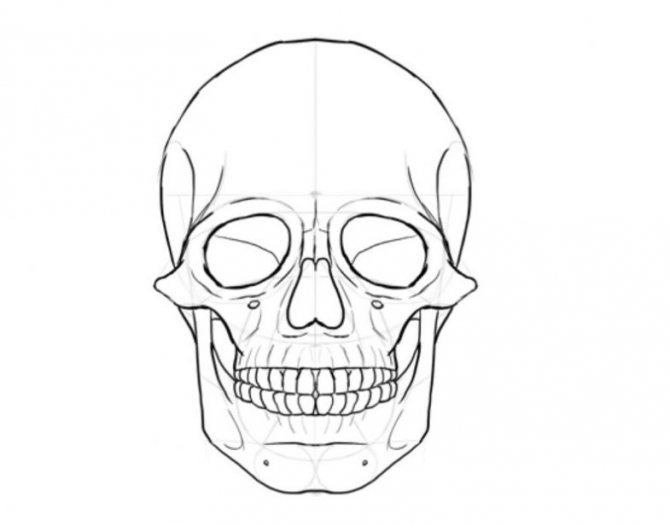
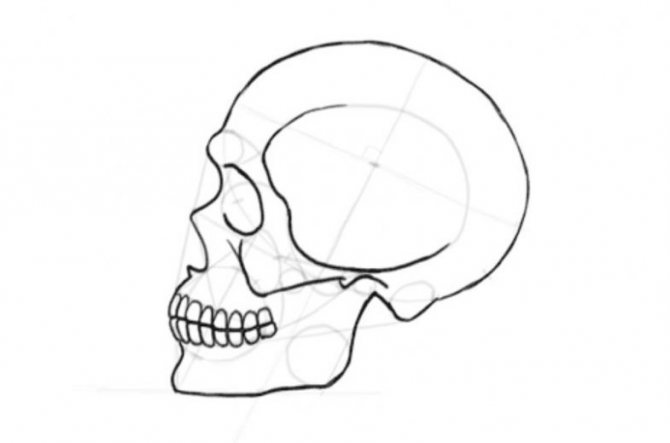
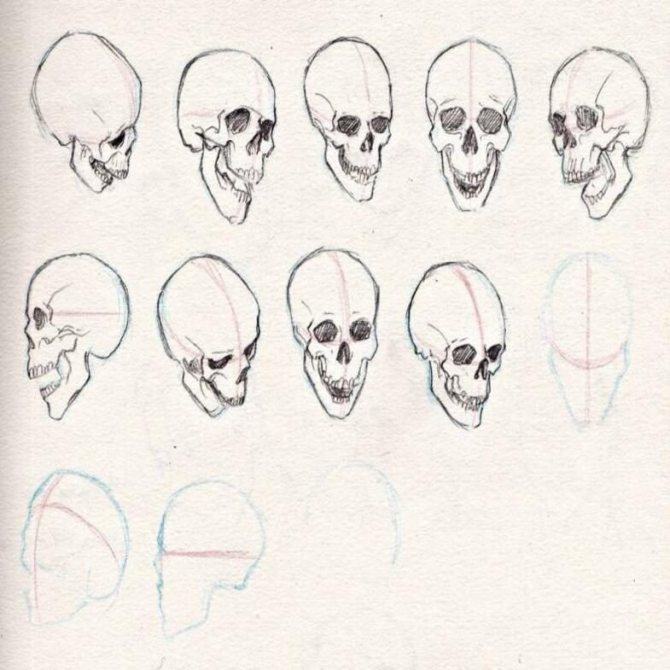
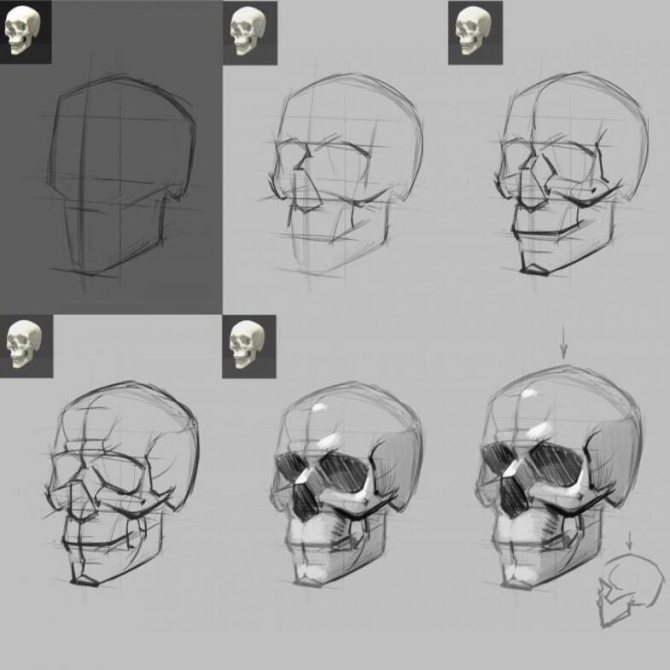
Drawing the skull - option 1
This construction will be done in a 3⁄4 spread.
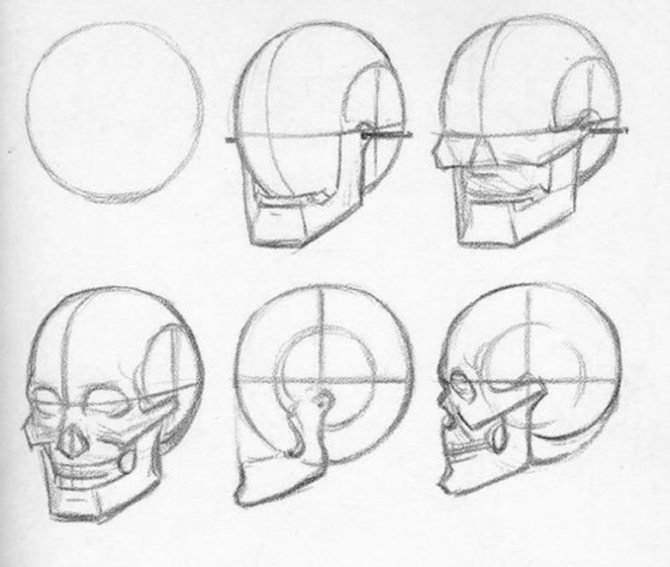
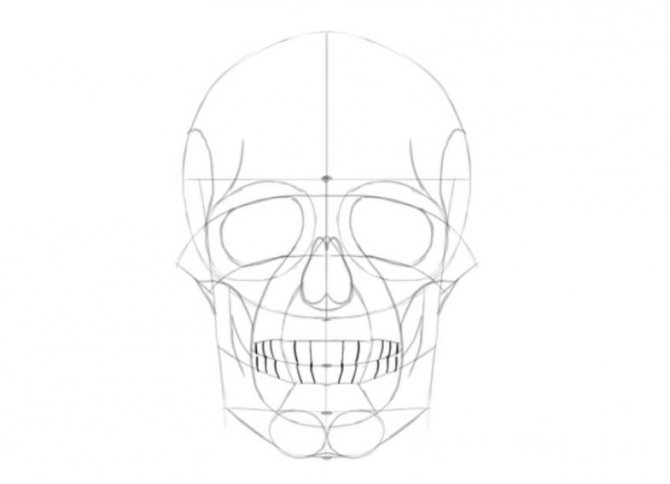
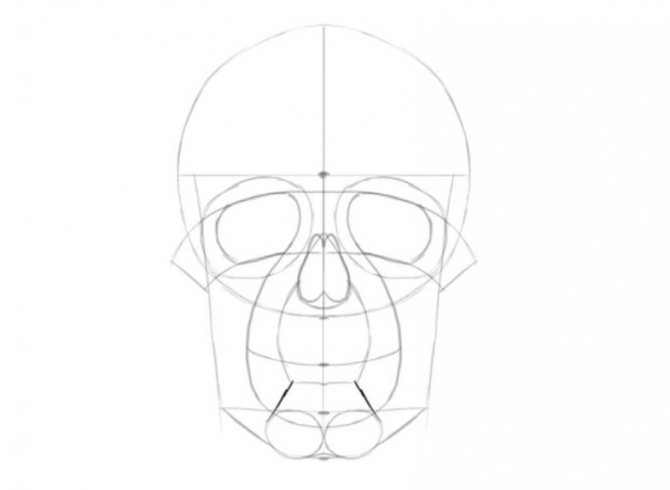
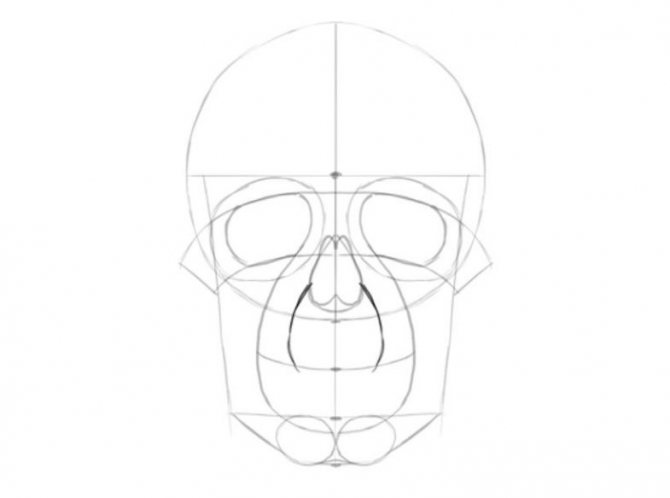
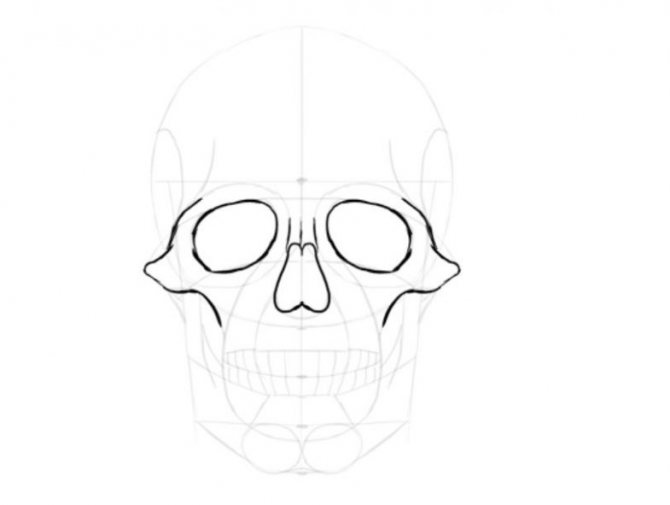
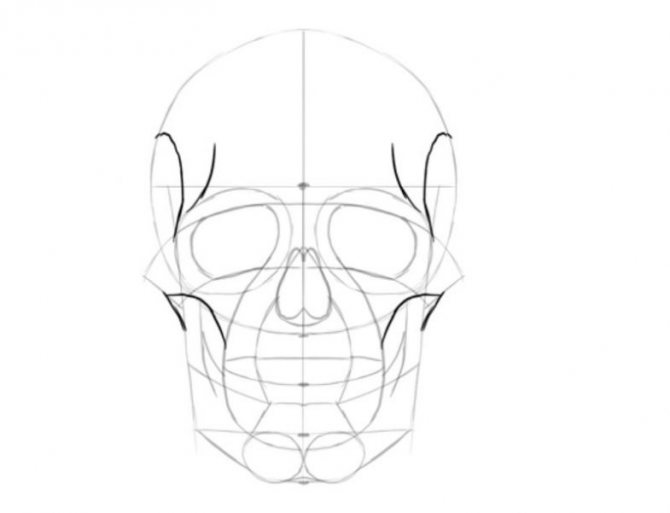
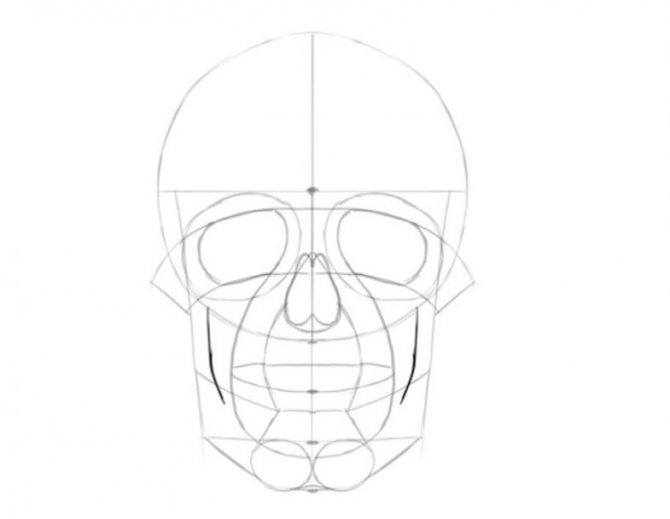
- Lines are drawn, outlining the basic outline of the head. A semicircle is outlined, and then the outlines of the lower jaw and temporal lobe are marked. Two horizontal lines should divide the facial part.
- To make it easier to achieve symmetry, the face should be divided in half with a vertical stripe.
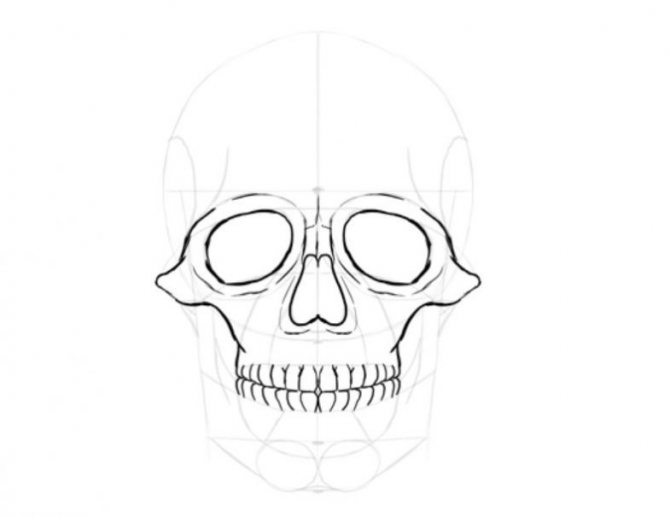
- After that, the eye sockets and nasal bone are marked. Eye sockets are quadrangles with rounded corners. The nasal opening is triangular or pear-shaped.
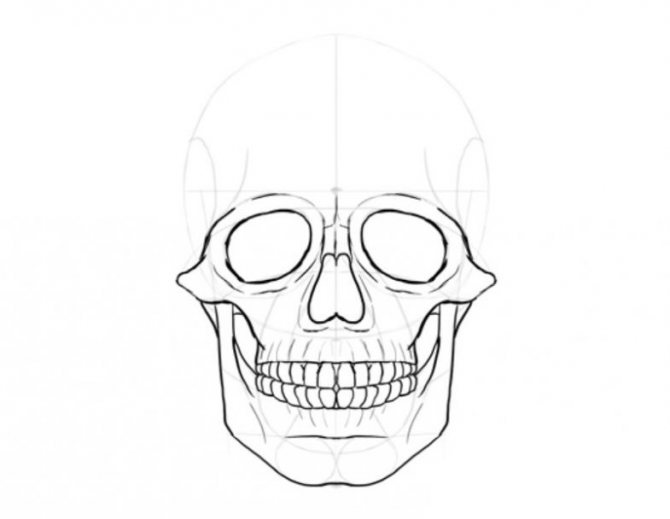
- Then the sketch of the jaw and cheekbones is drawn. It is worth paying attention to the lower jaw, namely its angle and lower border. They set the shape and oval of the face.
- This is where the teeth are drawn. The length of each tooth is approximately 1/2 the distance between the bottom edge of the nasal cavity and the tooth line. The teeth can be drawn rounded or rectangular in shape.
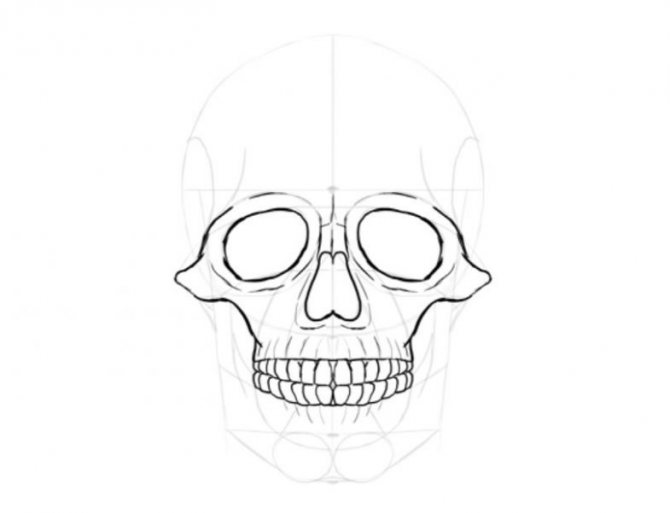
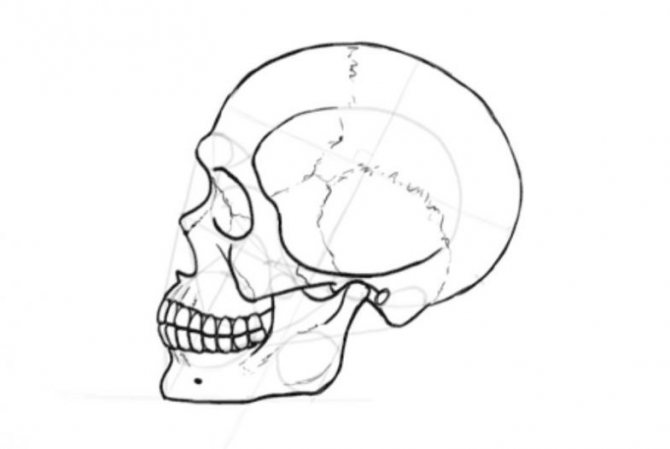
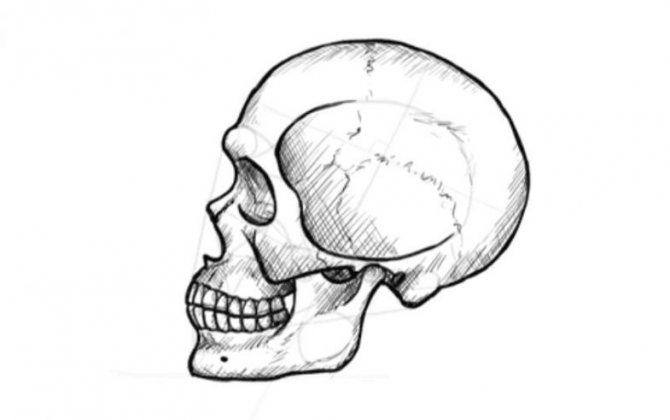
These were the 5 steps of how to draw a skull step by step, now you can erase all the auxiliary lines.
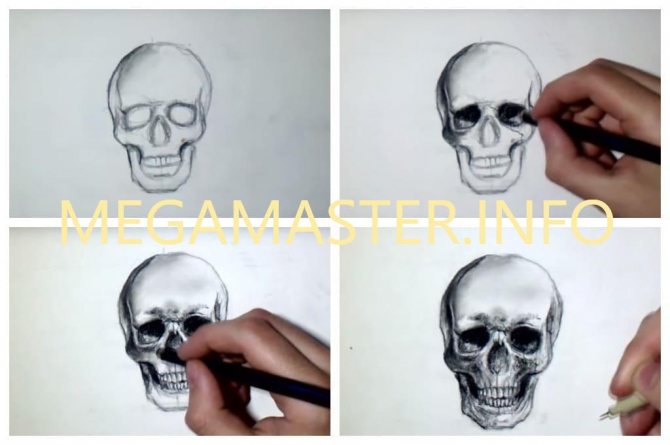
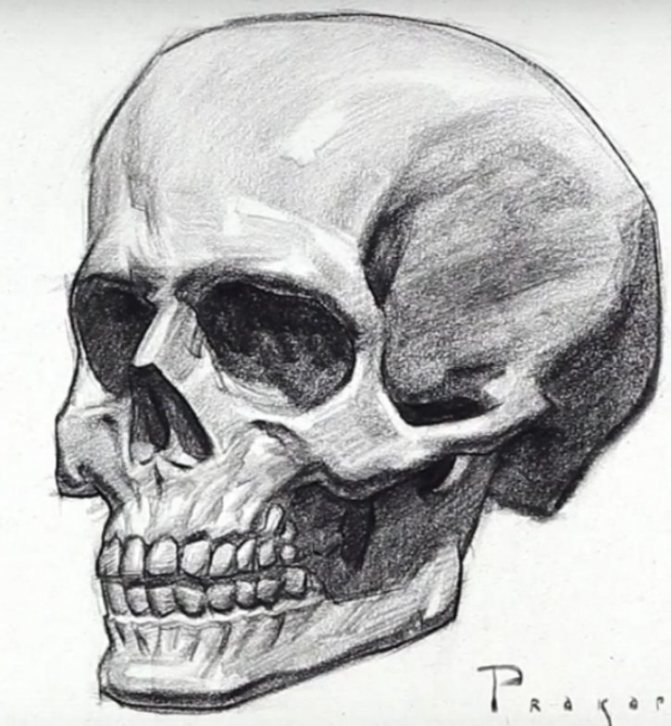
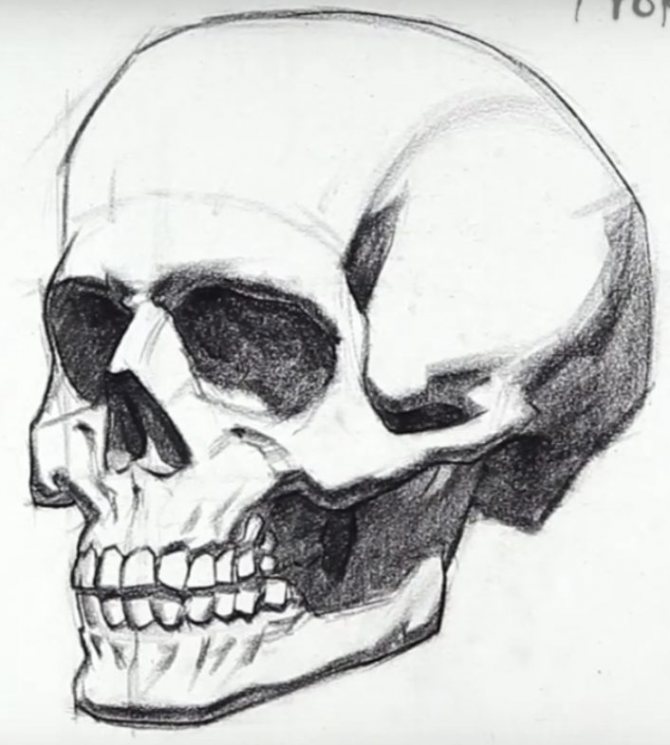
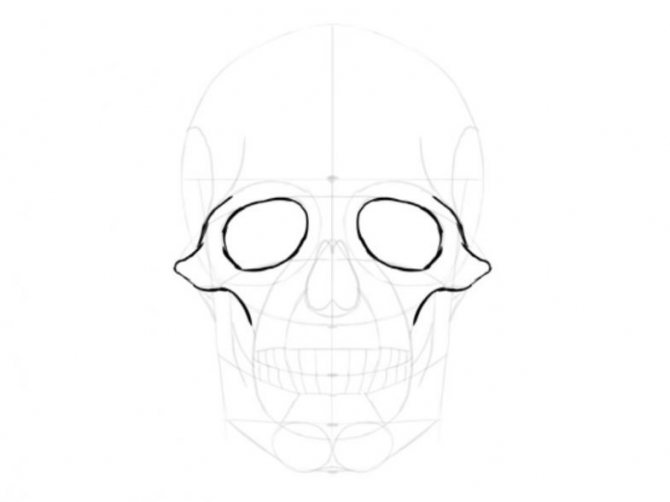
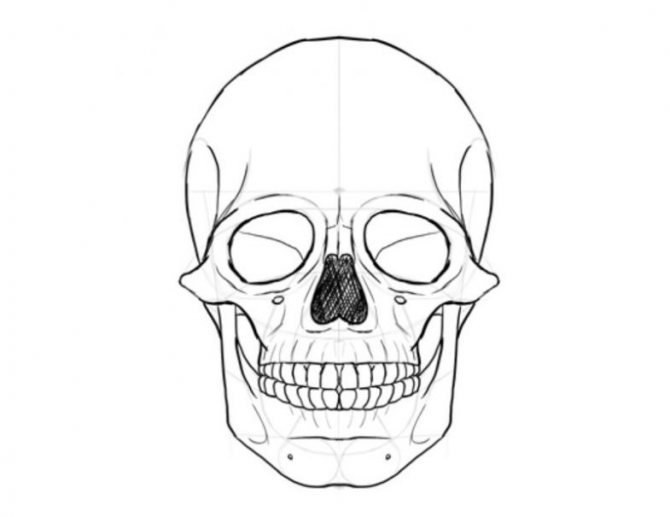
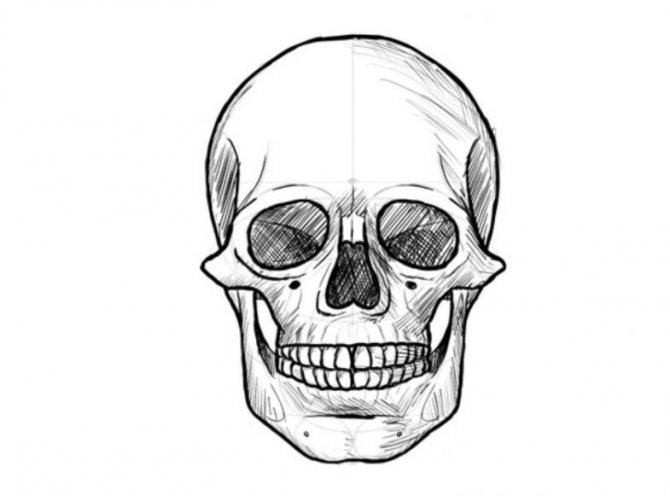
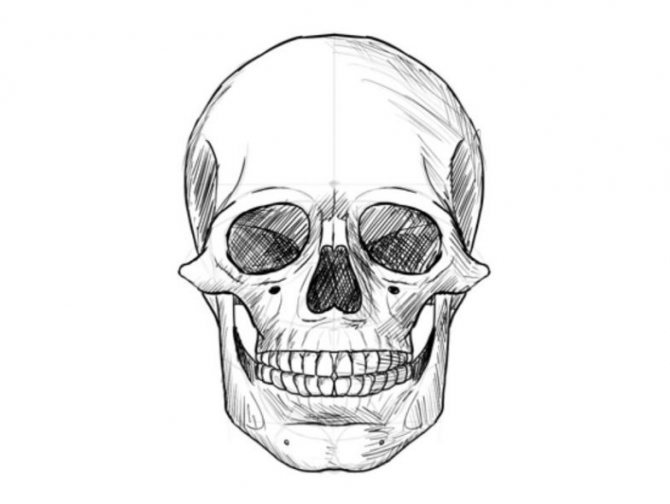
And it's time to start hatching:
- You can first highlight the dark parts, these are the hollows of the eye sockets, the nasal opening and other internal parts.
- The shape and volume can be set with a light tone, use shading on the form. This will help emphasize the flatness in relation to the light.
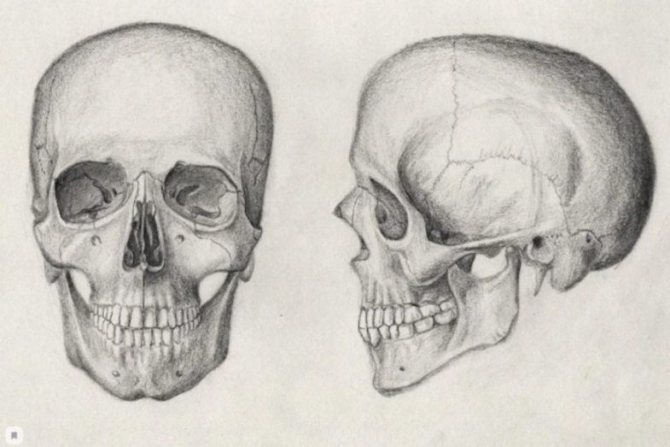
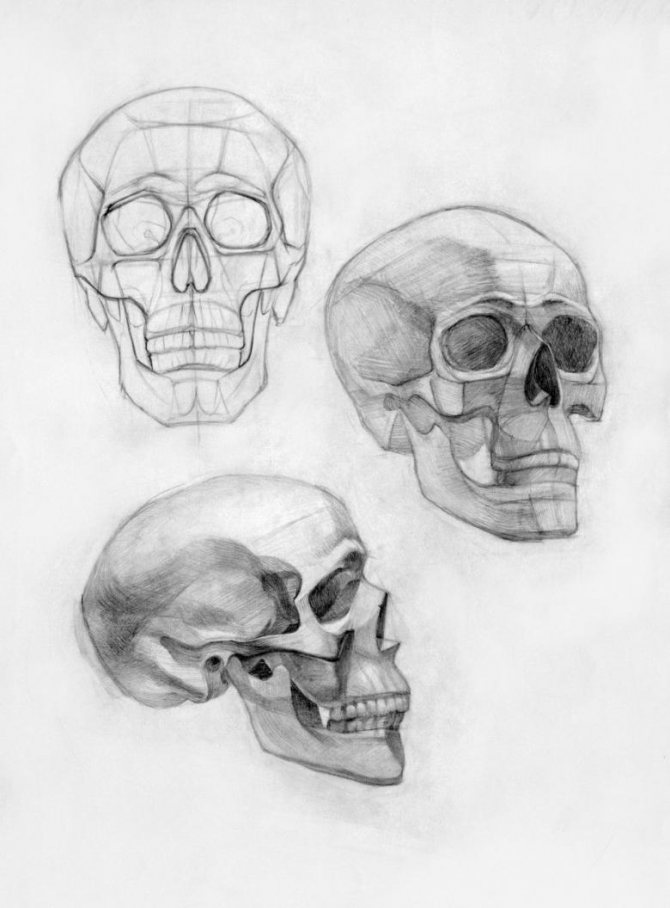
Front view.
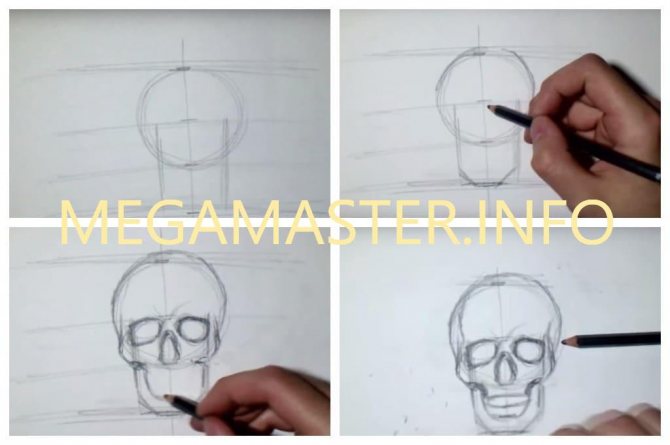
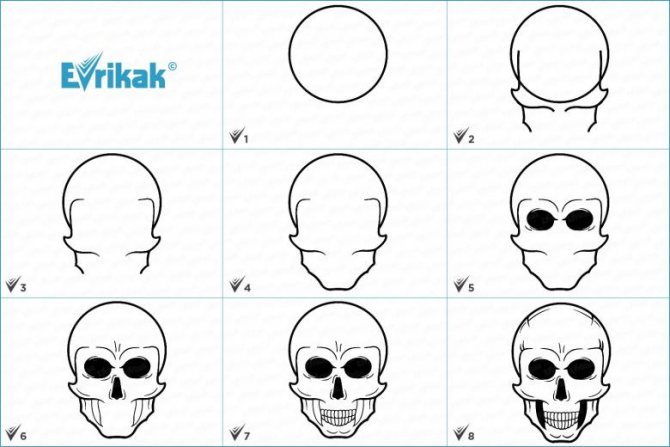
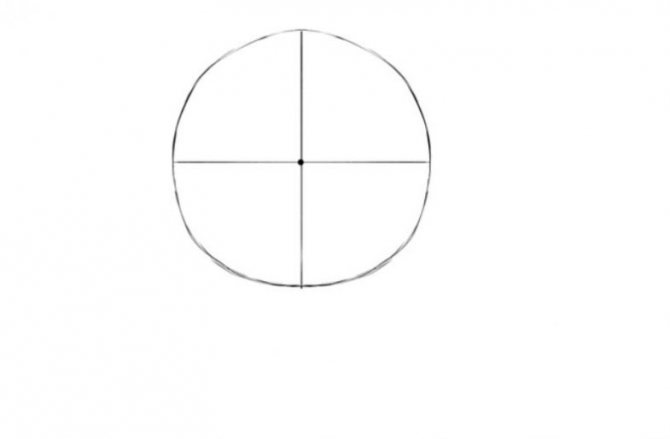
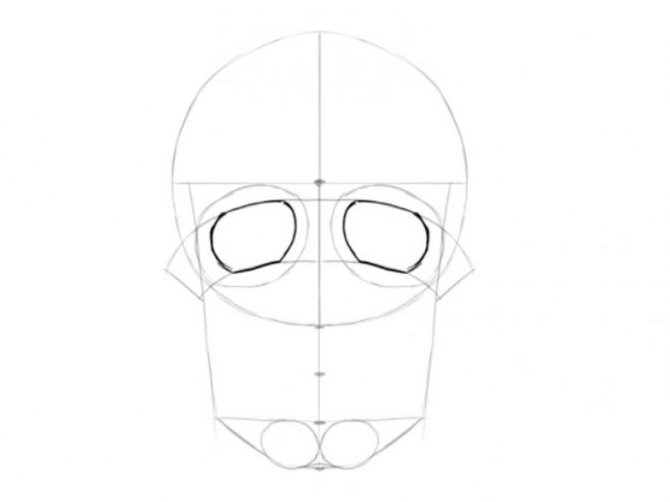
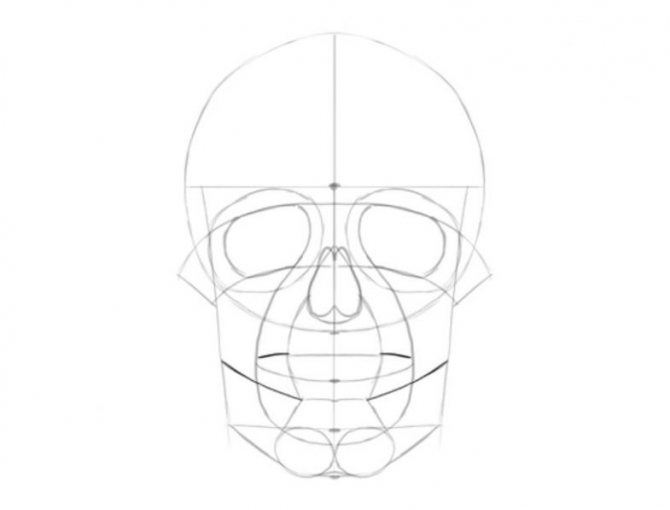
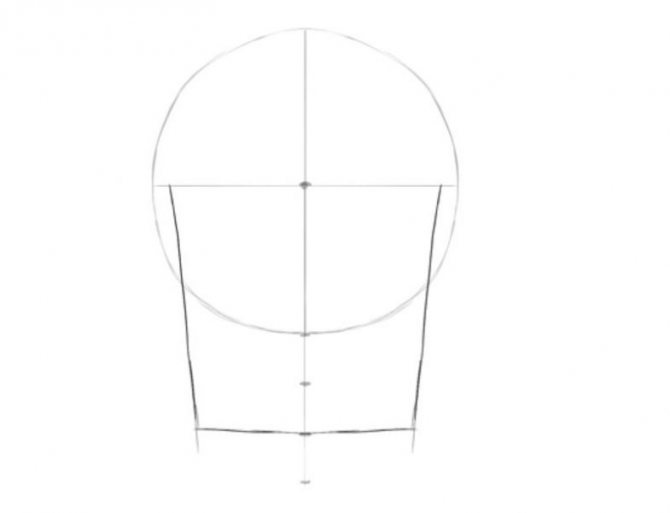
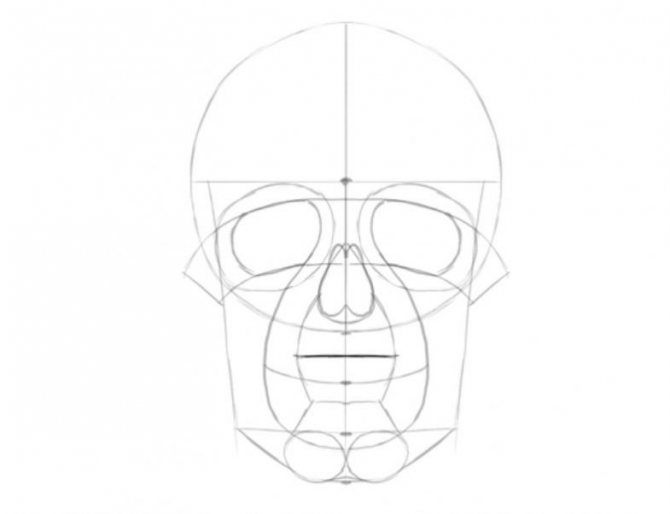
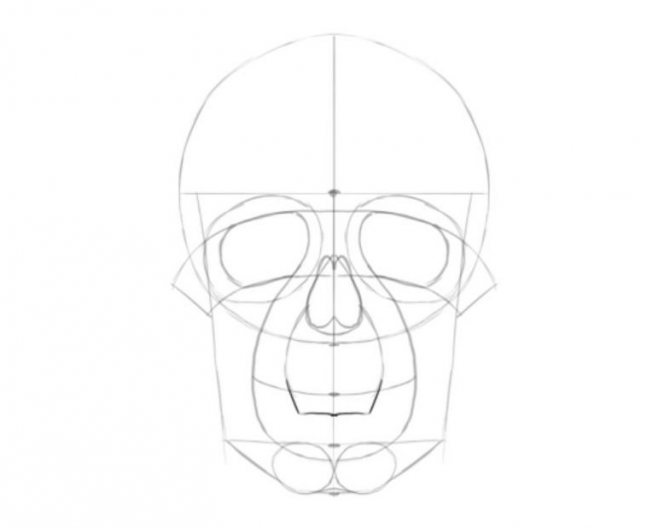
Now the view will be from the front. Materials are the same, but you may need a compass or circular object to draw a circle.
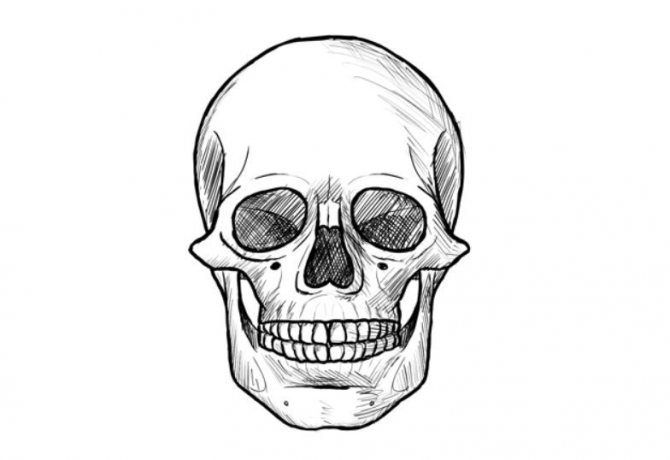
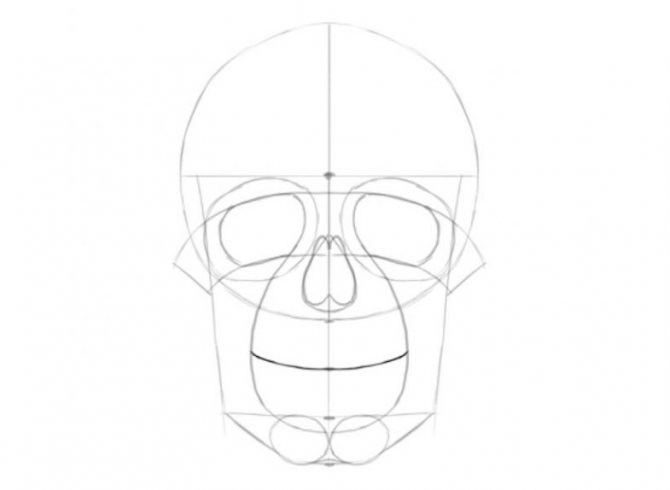
- The circle is drawn. You can do it by hand, or you can use additional accessories.
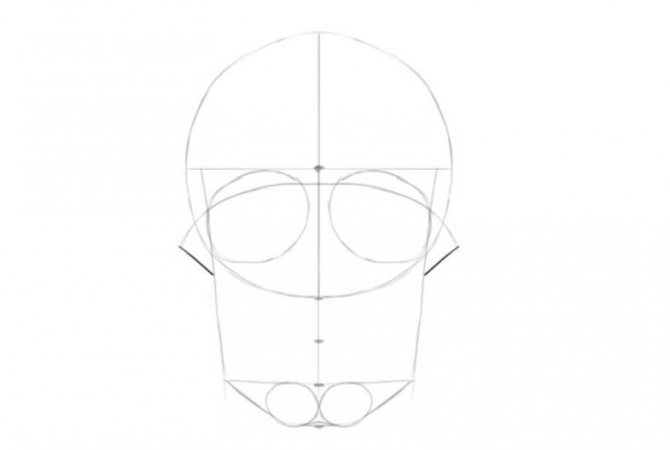
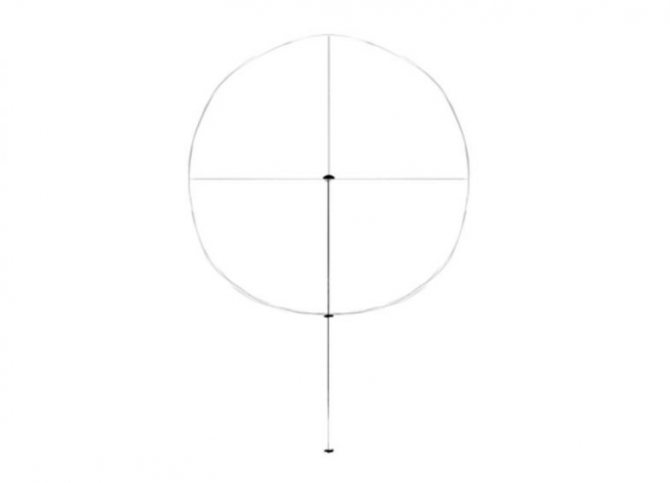
- Through the center of the circle are drawn two main lines - horizontal and vertical, using a ruler.
- Now in the lower quarters of the circle are drawn quadrangles with rounded corners - eye sockets.
- Marked nasal cavity along the horizontal line.
- Side bones of the skull - malar and nasal shells are drawn.
- Then along the horizontal line the upper teeth are drawn.
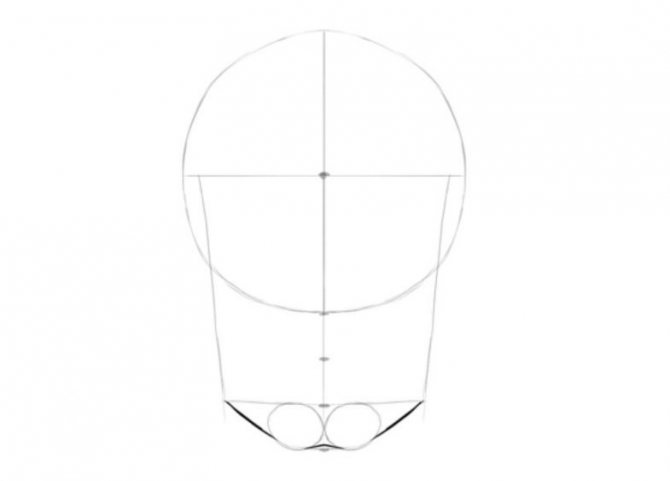
- It is necessary to draw the outline of the lower jaw. The lower jaw should be narrower than the upper part of the skull.
- Now it is time for the lower teeth. They should look smaller compared to the upper teeth.


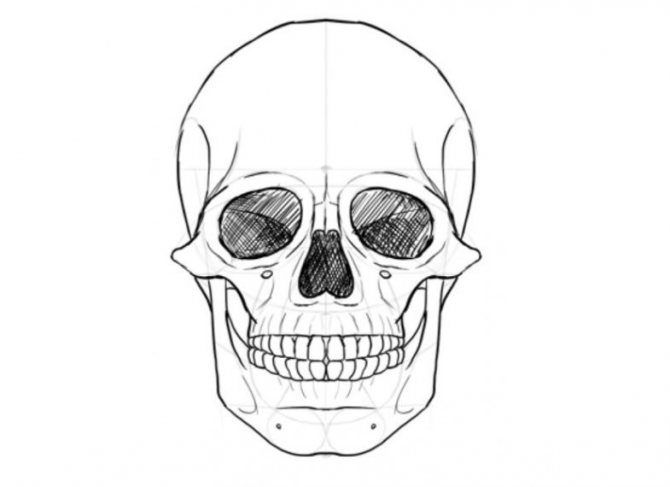


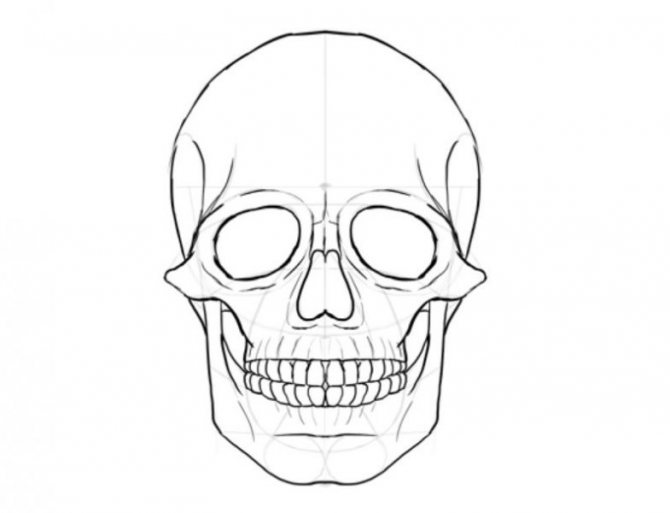

In the same way, additional lines are erased, and shading is done, as in the last version - first the dark spaces, and then the other places of filling.
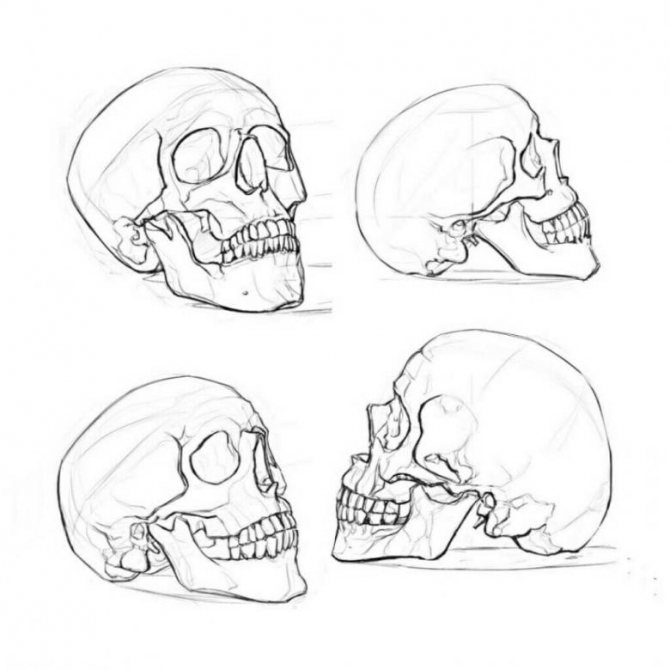
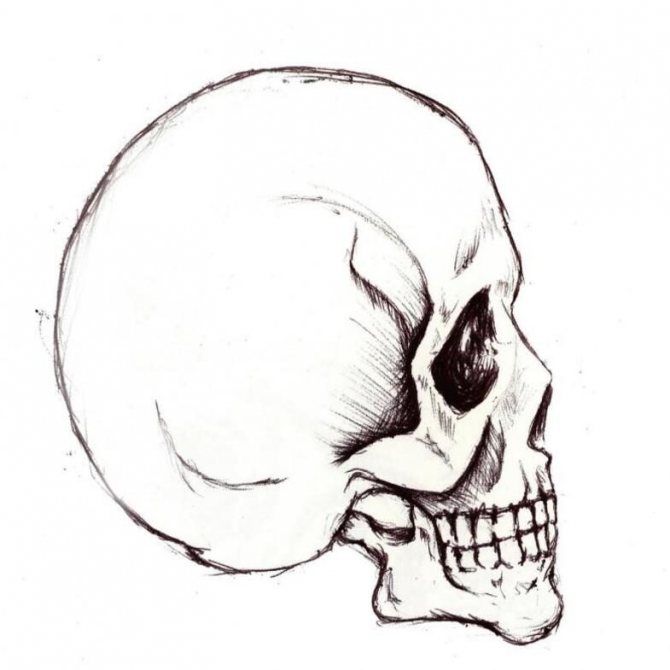
Side view
In this variant, there will be a side view - in profile.

- To start, you need to draw a slightly elongated circle, not quite an oval. As in the last variant, two auxiliary lines are drawn - vertical and horizontal.
- Now it is necessary to draw a smaller circle inside the just drawn one.
- The outlines of the eyebrow, nose, jaw are drawn.
- Hollows of the eye sockets are outlined, they can be darkened at once.
- With the help of a curved line from the bottom of the skull to the jaw is obtained the bottom edge of the skull.
- And at the penultimate step - drawing the teeth.
The last step, as always, is shading. Here works the same scheme that was used in the previous variants of the skull.

A few additional tips that may help.
- You should not put too much pressure on the pencil, it will be difficult to erase it later.
- Don't be in a hurry, especially in the last step. Filling in the color plays a big role in the subsequent result.
- To smooth out the strokes, you can use a small piece of paper to shuffle the pencil.
- More time should be spent on transferring light and shadow.
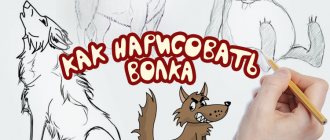
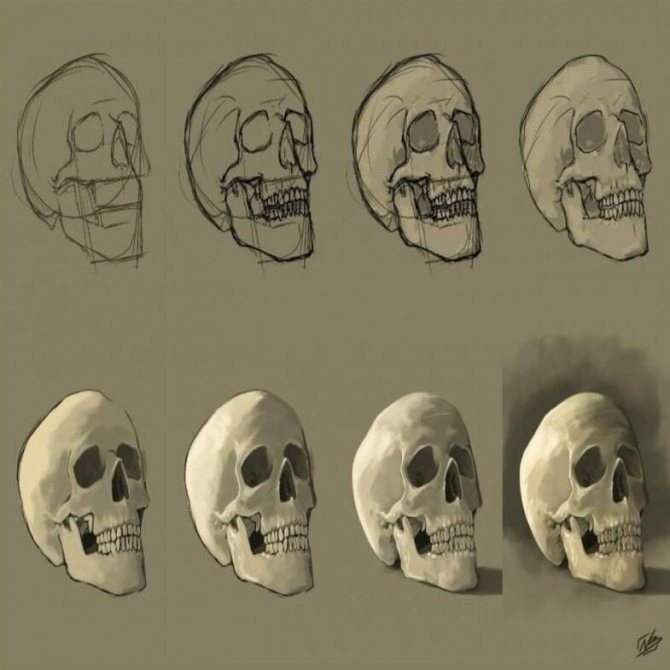
This master class showed 3 great ways to draw a skull easily. These options are simple enough and don't require a tremendous amount of effort.
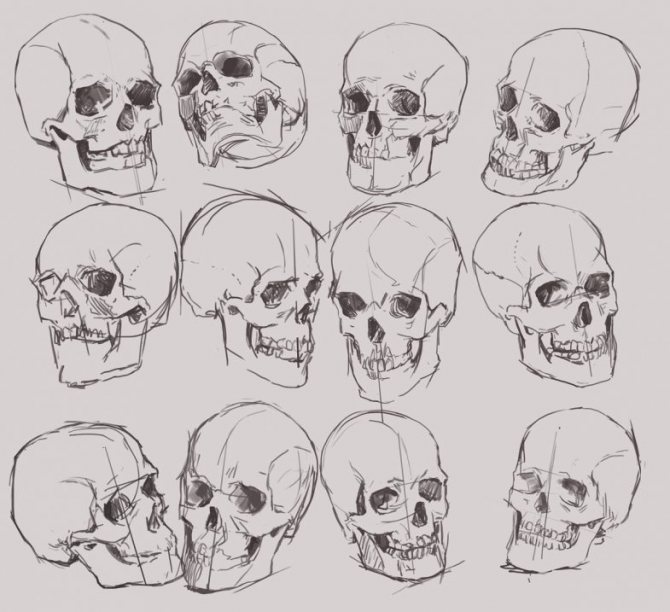
Having mastered some of the techniques, in the future it will be possible to draw skulls without a ready sample, from nature. As mentioned earlier, with the ability to draw skulls, you will get great portraits, with great similarity.

Now beginners will definitely be able to draw the skull step by step. It is important to try and know a few rules, and then sure everything will work out!

Graffiti on paper
If coped with the previous options, complicate the task a little bit. Now let's draw a graffiti, on which will be the silhouette of a skull. If you are just learning to draw, you need to follow our instructions completely to get the desired result. For this work you will need a simple pencil and a black marker to color the drawing. Once we have these things ready, we can start the creative process.
How to draw graffiti easily in the form of a skull:
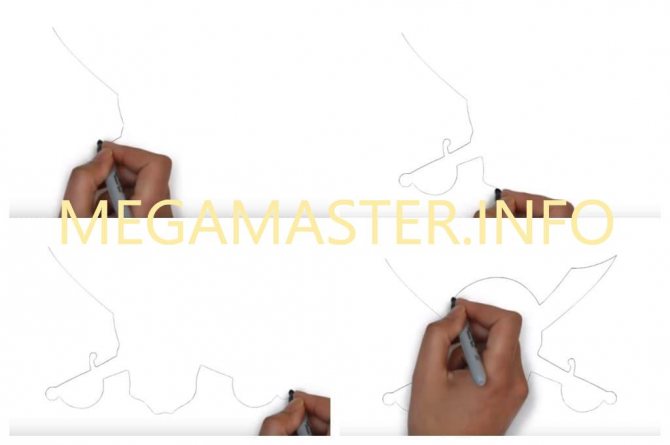
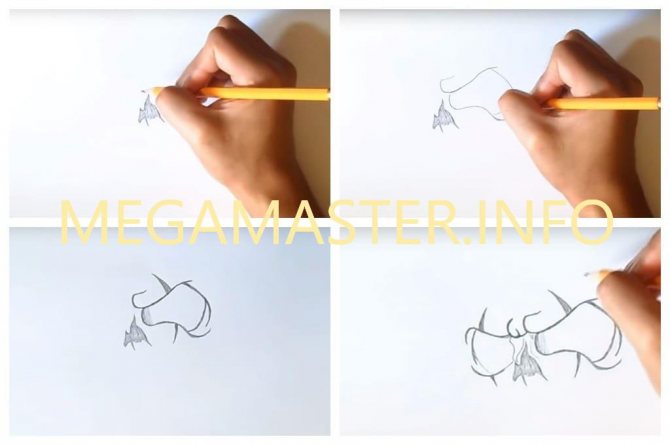
- In the middle of the sheet, draw the silhouette of the fire, if you do not know how to draw it our website megamaster.info will help you.

Immediately shading this sketch. Near the top of the fire we draw a horizontal wavy segment. On both sides of this segment, we add a wishbone and deduce the eye. - Next, in a similar way draw the eye on the left side of the sketch. Detail these areas and show vertical arcs with thick lines. Let's draw the contour of the head. Show the upper jaw and detailing the skull.
- Now, a semi-oval draw a hat on the head of the skull. We divide it into two sections and show the folds in the fabric. Decorate the visible stitches in the form of dotted lines. Draw this part of the sketch with a thicker line.
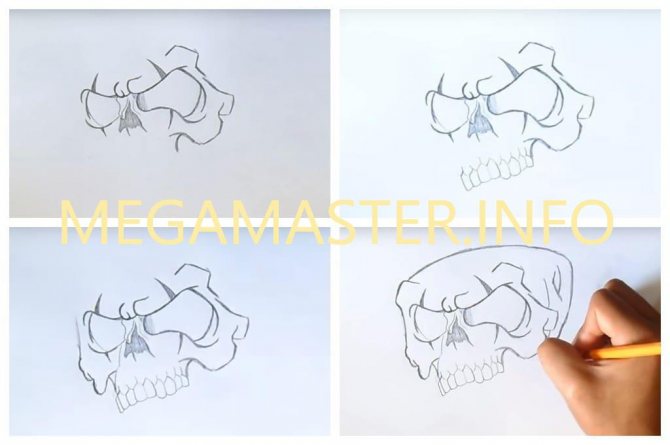
- Then, finish drawing the border of the lower jaw, showing the teeth on it. Point with a thick pencil and specify all the details.
- We proceed to work with the marker. It circled all the strokes. Paint eyes and part of the nose. We show the dark area behind the eye. Paint the perimeter of the mouth and finally, decorate the right side of the hat.
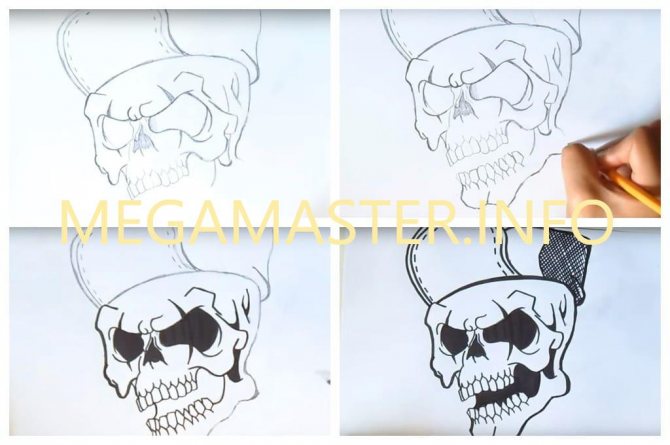
The skull graffiti is ready. Here's how you can draw a realistic skull step by step. The work, of course, for independent drawing is difficult, but, and according to our instructions, you may well be able to repeat this masterpiece in your scrapbook.
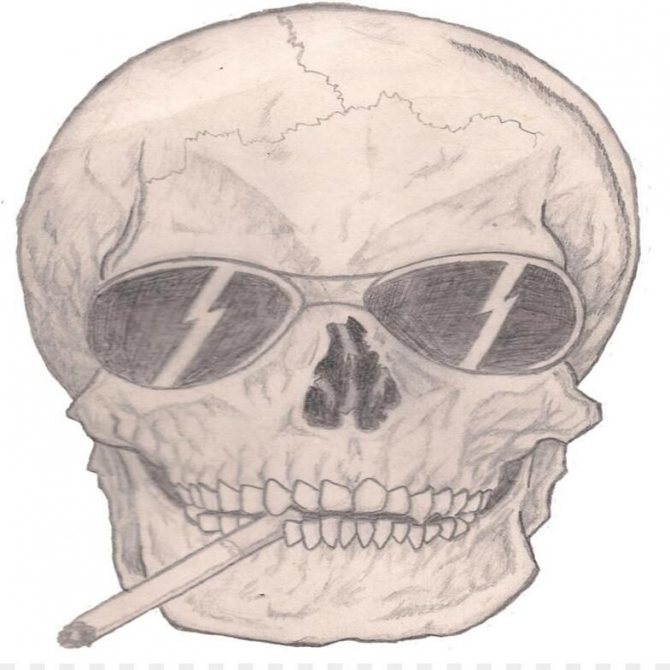
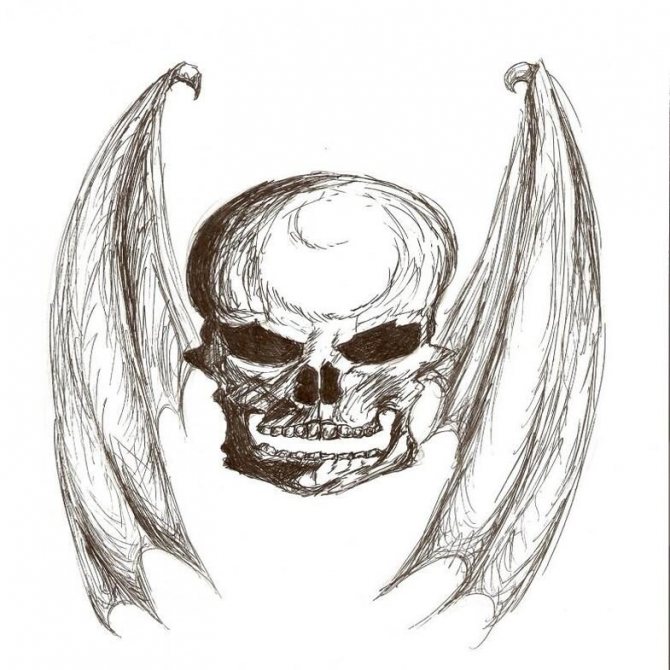
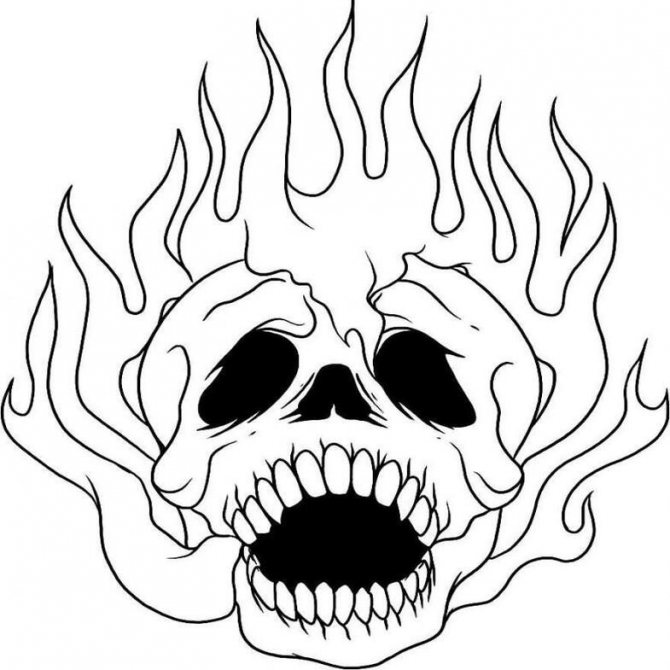
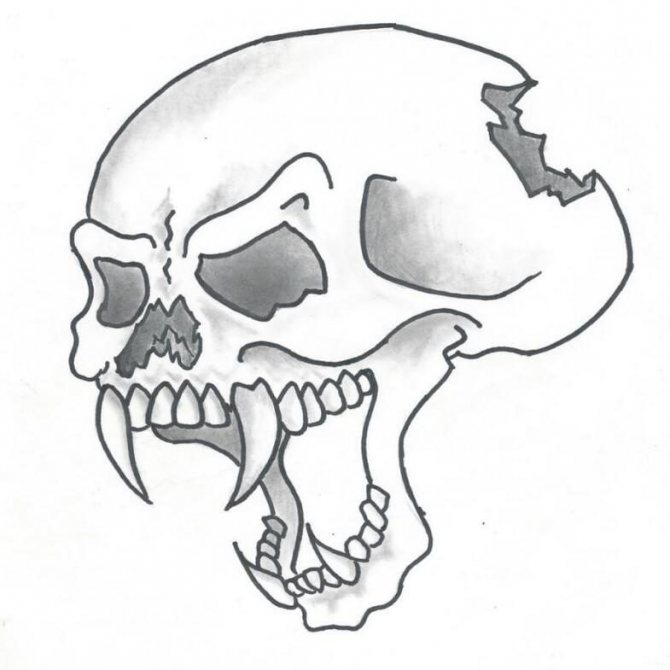
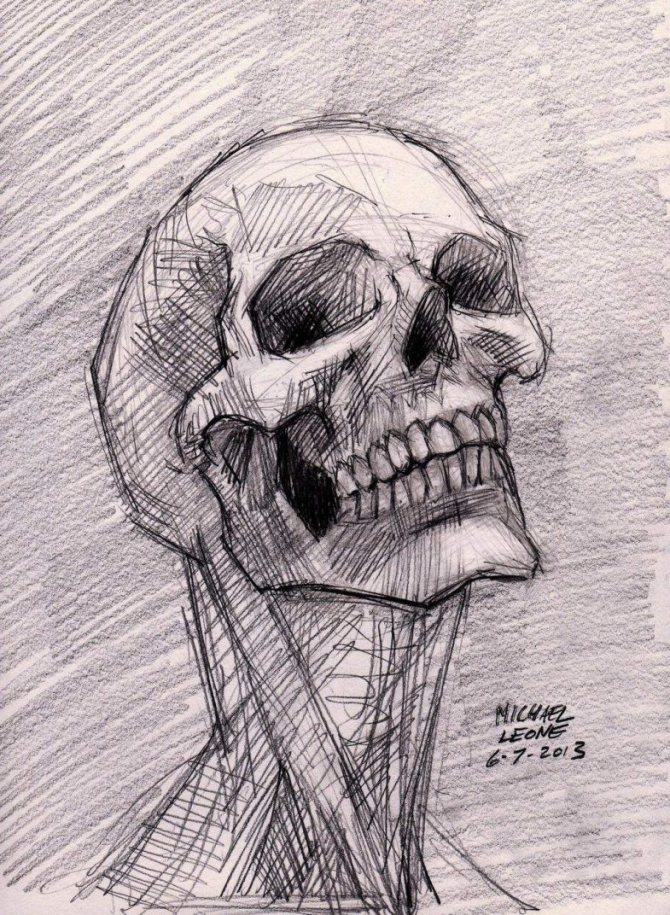
Pictures of skull drawings

0