In this article we will tell you how to make a tattoo machine with your own hands, using improvised materials. This is an easy and handy thing, which people who are fond of tattoos, dozens of them. The construction of a home-made tattoo-machine is simple, we will tell you nothing new, but we will describe the manufacturing process in details. We will tell you about some subtleties you might not know about, and of course we will give several step-by-step instructions.
How to make a tattoo machine
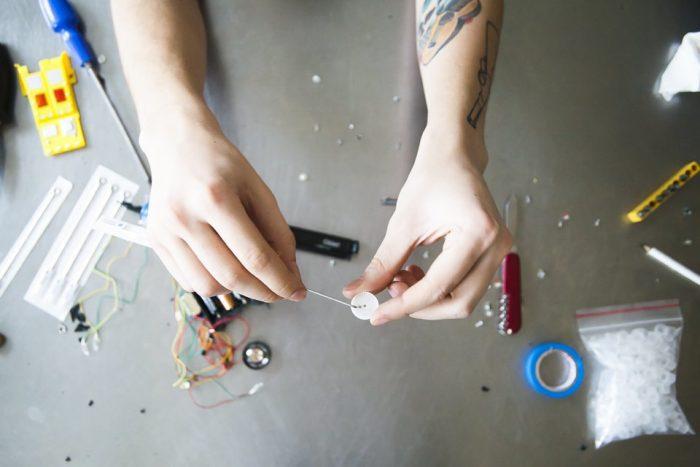
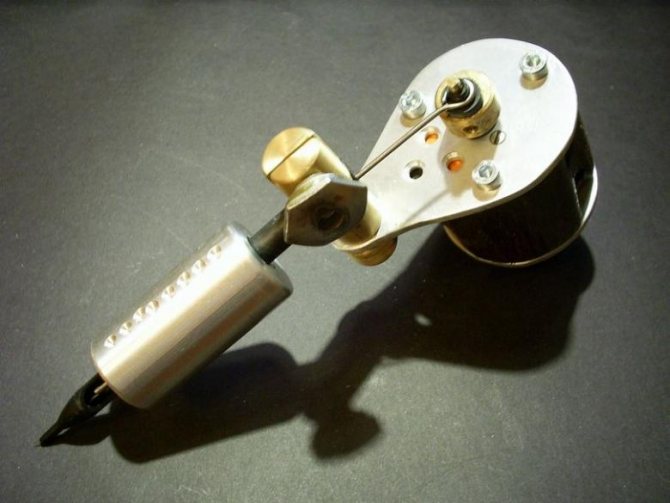
What does a homemade tattoo machine consist of?
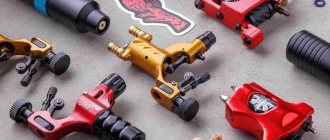
The most common among homebuilders is rotary type of tattoo-machine.
Homemade tattoo machines have a simple design
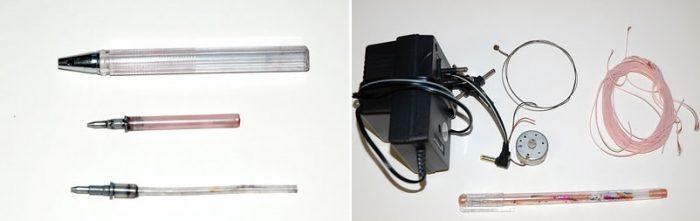
With all the necessary components, such a device can be assembled in about 15 minutes. Let's look at what parts might be needed.
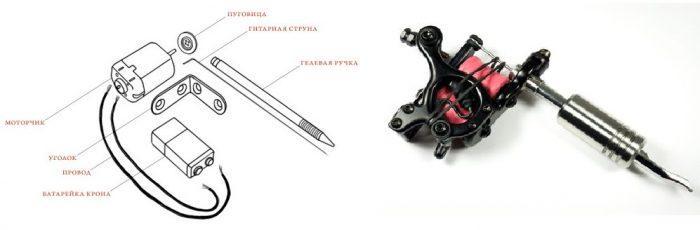
The device of a simple rotary tattoo-machine
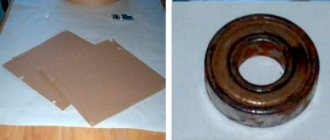
The base. Gel pen or automatic pencil (must be disassembled beforehand). It is necessary to remove the tip of the paste, drain the gel (if it is a gel pen), take a thin needle and push the ball so that he fell out. The needle will "work" in the resulting hole.
The base will be a pen or an automatic pencil.jpg
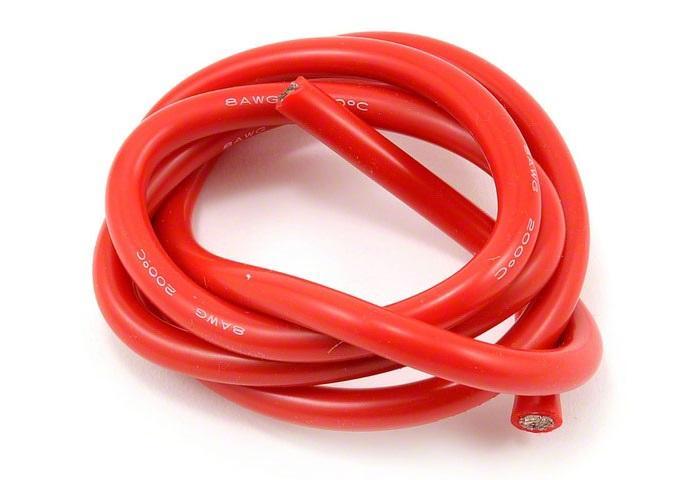
Needle. This is usually a guitar string with a sharply sharpened end. It is not uncommon to wind a spiral on the string, which needs to be unwound beforehand. The string is good because it holds the paint perfectly, does not warp or rust. Other materials (such as nichrome, steel, etc.) do not do the job in such conditions.
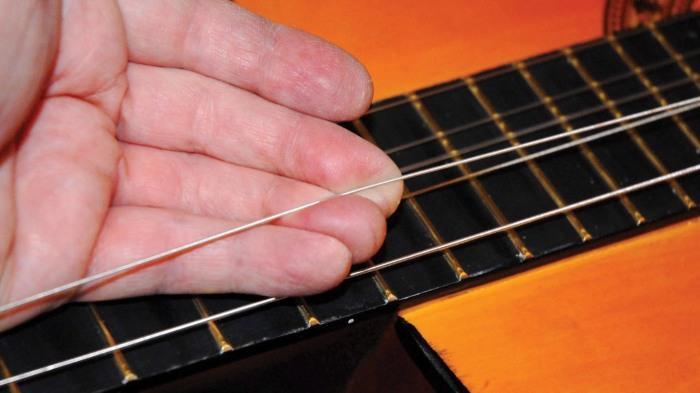
Guitar string is usually used
Handwheel. A kind of crankshaft. On any electric motor from a tape recorder you can find such a flywheel, but it is important that it be plastic (there are also brass ones). A hole is drilled on the flywheel, if this is not possible, the hole is made with a hot needle or a thin nail. The hole should be 1,5-2 mm from the center of the circle, but remember that this distance is the stroke of the needle.
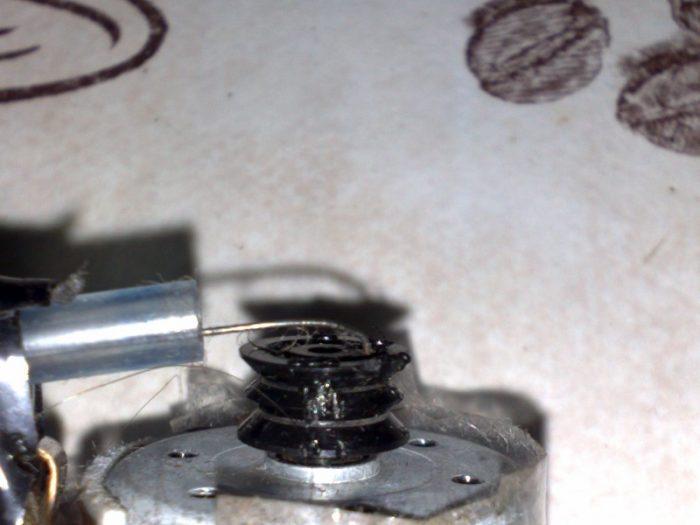
The flywheel plays the role of the crankshaft
Wires. Should be soft, so they don't "stand", but hang loosely. Also hard wires often break, if they break under the motor itself - it will have to be completely replaced.
Wires must be soft.
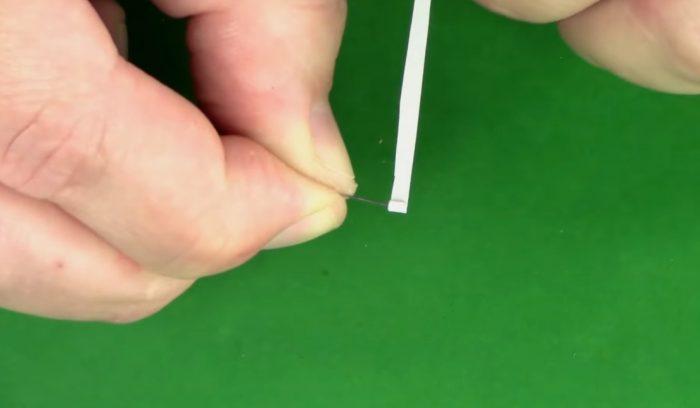
A side note! The unsharpened tip of the string (about 5 mm) is bent at 90°. This section will enter into the hole made on the handwheel. As a result, the needle will move vertically during rotation of the motor. As for the length of the string itself, it depends on the type of handle, and therefore it is selected by experience.
The strings can be sharpened with a nibbler or nulling stone, although you can also use a sharpening machine. You can use glue to fix the motor to the handle, but it is better to make a stand from a sheet of aluminum, and then use duct tape or tape to fix the stand in a suitable place.
The string should be properly sharpened.
Well, with the main points sorted out, tattoo machine, as we see, is not difficult to do with their own hands, because at home you can find all the necessary materials. Now from theory we will move on to practice and show a few options for making a machine for tattoos.
Another homemade tattoo machine
Articles on the topic
A medical mask with our own hands
The main types - how to tell them apart?
Induction machines Are divided into one of two subtypes.
Liner.
It is designed to create clear contours. It is designed to inject the paint under the skin as quickly as possible and to prevent it from spreading.
Distinctive features:
- extremely light weight and good ergonomics;
- small number of windings on the coils;
- use of a stiff contact spring for fast penetration and rebound of the needle;
- maximum distance between spring and striker is 5 mm;
- frequency of needle lowering in a range from 120 to 150 Hz.
WARNING! It is completely unsuitable for painting over skin areas, as it leaves behind dots.
Shader
It is used for quickly painting over large areas of skin, as well as for creating shadows. It is designed to ensure a good penetration of the skin and a long stay of the needle in the skin. As a consequence, the pigment spreads out and forms an even and uniform pattern without dots.
Distinctive features:
- Heavy weight due to the use of a powerful capacitor and coils with a large number of coils;
- the maximum distance between the spring and the striker is 10 mm;
- needle lowering frequency range of 60-100 Hz;
- less traumatic for the skin;
Such machine is absolutely not suitable for creating contours. It turns out fat and vague.
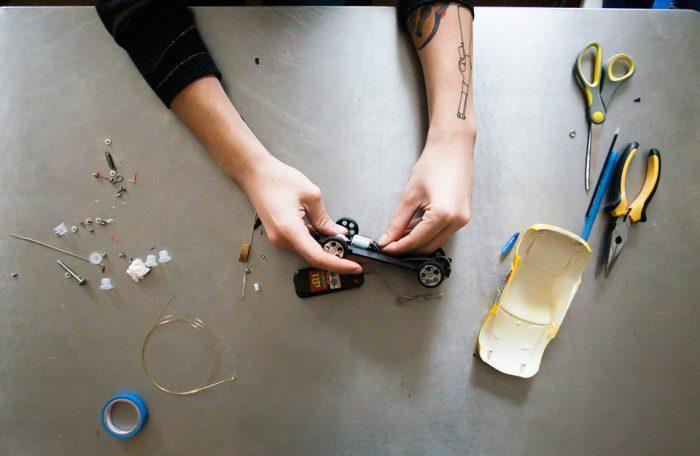
Option № 1. a tattoo-machine from a guitar string and a child's toy
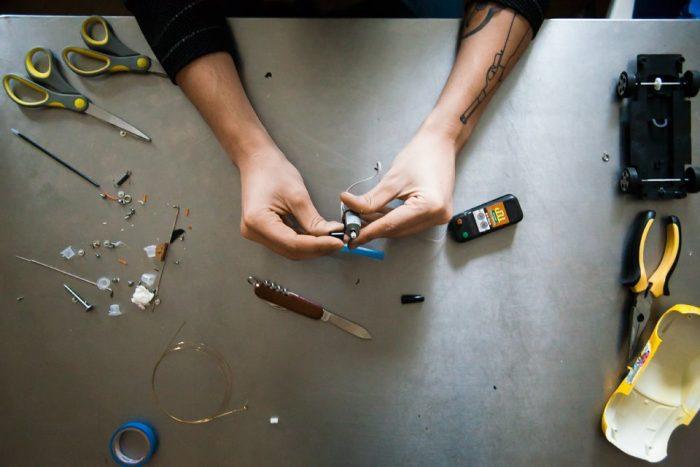
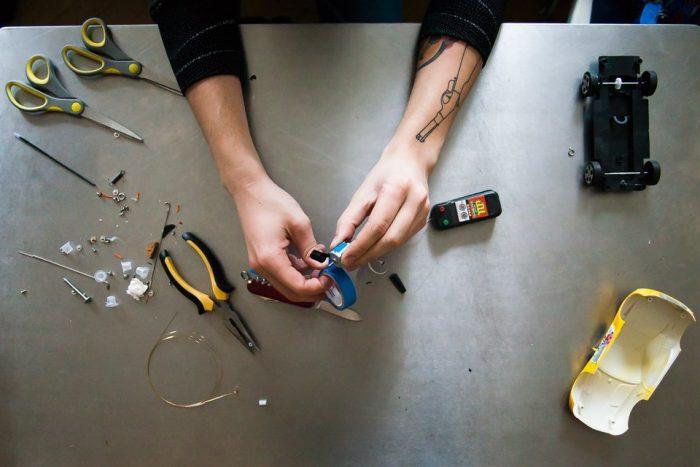
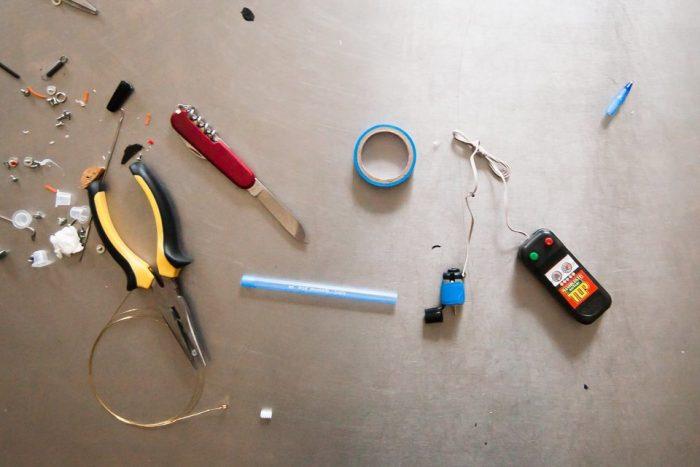
Step 1. To begin with all the necessary things are prepared - guitar string, electric motor from a child's toy and a few more simple details.

What you need for making a tattoo machine
Step 2. The rod is removed from the pen and thoroughly washed.
Stick is taken out of pen
Step 3. The cap of the pen is cut off (about 2/3 of the length).

The cap is cut off
Step 4. The motor is carefully taken out of the toy. It is worth noting that the final result depends on the type of toy. Thus, in our example we get a kind of prison tattoo machine: one person will beat the tattoo, and the other, holding the remote control, will constantly keep the button pressed. You can also make another version of the device.
A motor is removed from the toy

Remote control with buttons
Step 5. The cap of the handle is connected to the motor with tape.
The cap is connected to the motor
Duct tape is used for fixation
What we have in the end
Step 6. The handle body (together with the rod) is cut off by about 1/3 of its length. Then the body is put into the cap and the rod is put into it (into the body).
Trimming the body of the pen The rod is placed in the body
Step 7. A wine stopper is taken and a small piece is cut from it. This piece is firmly placed on the shaft of the electric motor.
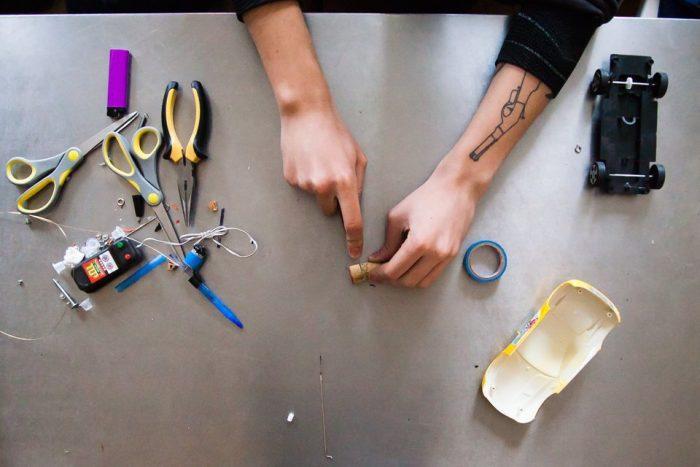
A piece of the cork is cut off
Step 8. Then the string is cut, about 1,5-2 cm longer than the length of the rod.
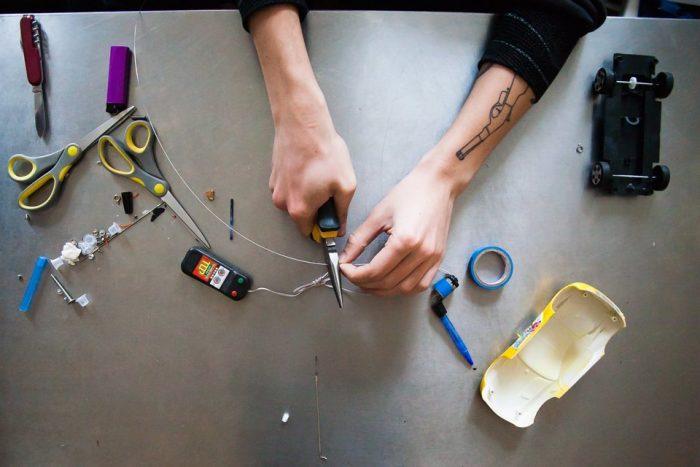
Cutting a guitar string
Step 9. The string is inserted into the core. The back edge of the string is bent and inserted into the plug as close to the axis of the shaft as possible. This is very important, because it is from this point that the range of oscillation of the needle, and therefore the accuracy of the pattern will depend.
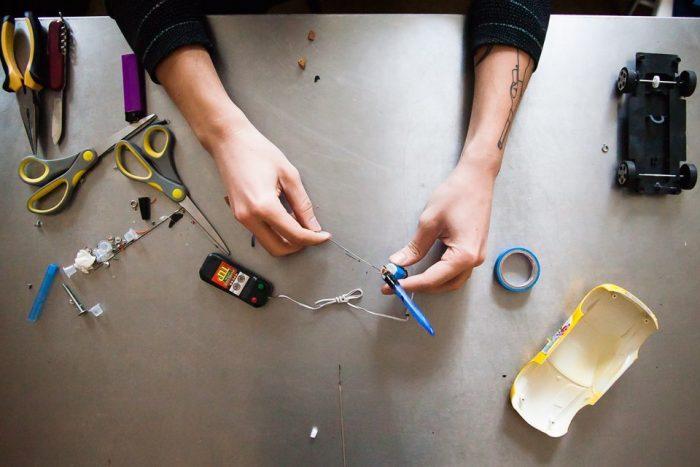
The string is inserted into the rod
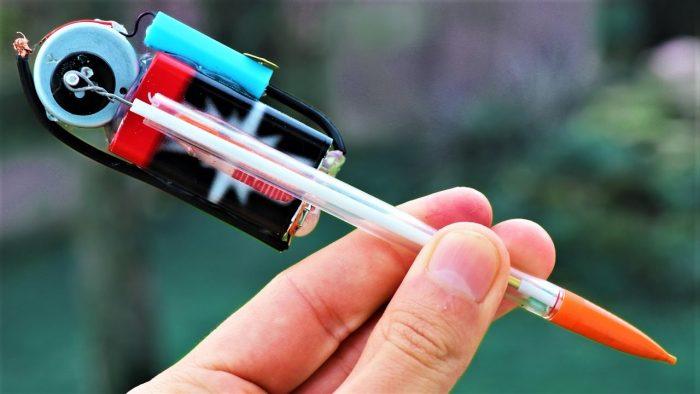
Step 10. If everything has been done correctly, when the motor is turned on, the needle will begin to make progressive movements.
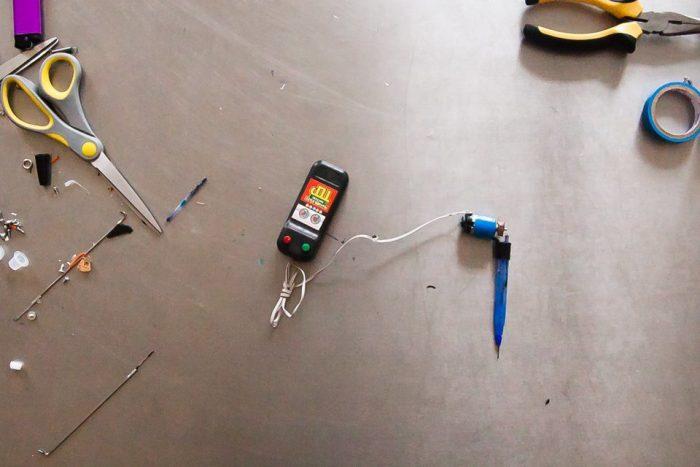
Tattoo machine assembled
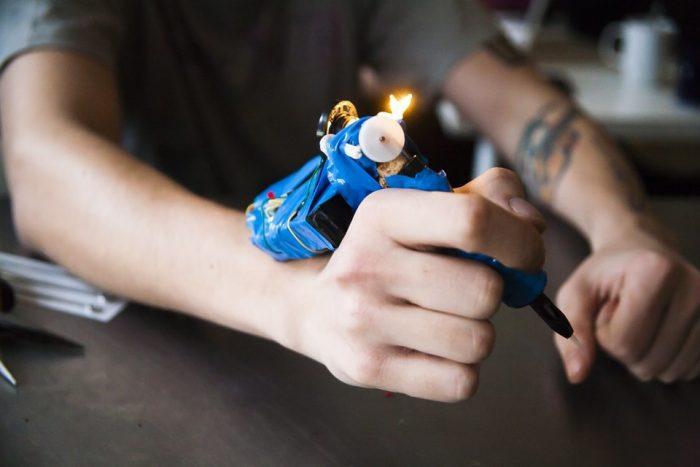
Step 11. Now it is time to check how the tattoo machine works. For a start the needle is disinfected with a lighter and alcohol, and skin is treated with special antiseptic. Further the motor is switched on, the needle plunges into ink. Everything, it is possible to begin to put a drawing!
We test the tattoo-machine
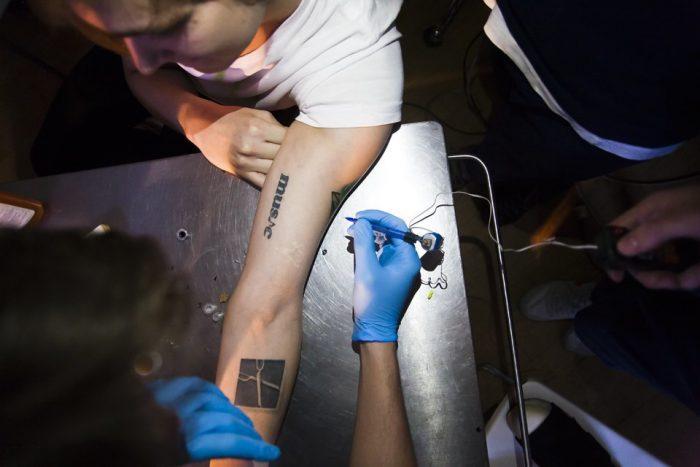
Needle beforehand it is necessary to disinfect
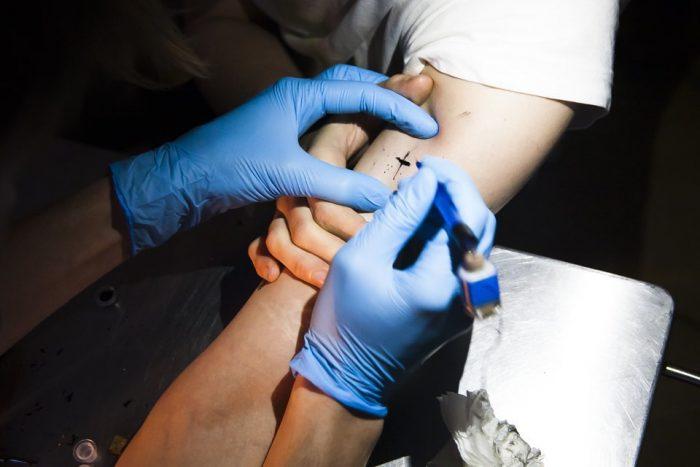
Self-made tattoo-machine in operation
Main mistakes, which can be avoided
Initially, the author of the master class used the bus-transformer, which has a complex design. The power unit of the toy was of an impressive size, so the tattoo machine was unwieldy and, obviously, not the most attractive. But it blinked with colorful lights and even played a simple tune.
Originally a Transformer Bus was used. But the tattoo-car turned out to be a bulky one.
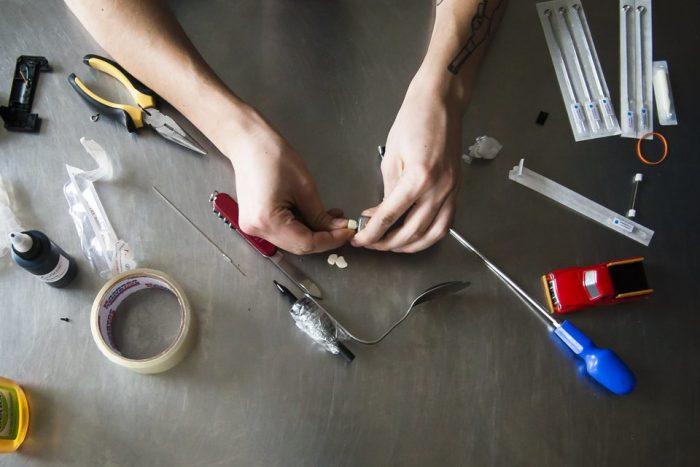
In the photo below, you can see that instead of a handle, you used a factory-made holder, and a regular spoon served as a frame. But all this turned out to be a waste of effort and time, and the strongest was just the simplest design.
This turned out to be a waste of effort.
The attempt to fix the needle on the shaft with a plastic gear was not very successful. The needle kept falling out of the wheel or clinging to it.
Plastic pinions were not a good idea.
I also questioned the use of an eraser to fix the needle. It would fall apart and interfere with the movement of the needle.
Using an eraser
In spite of all the troubles, this design was able to run for several hours, even though the needle kept coming out.
The machine ran for a few hours
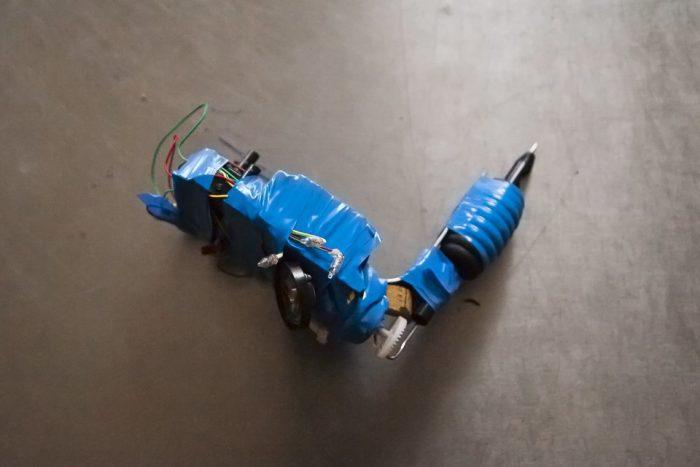
The second version of the typewriter had no such defects, except that the string was "walking" in different directions by about 1 mm. For the decision of this problem I coiled a thin tube of paper (1mm in diameter) and put it between the grip body and the string.
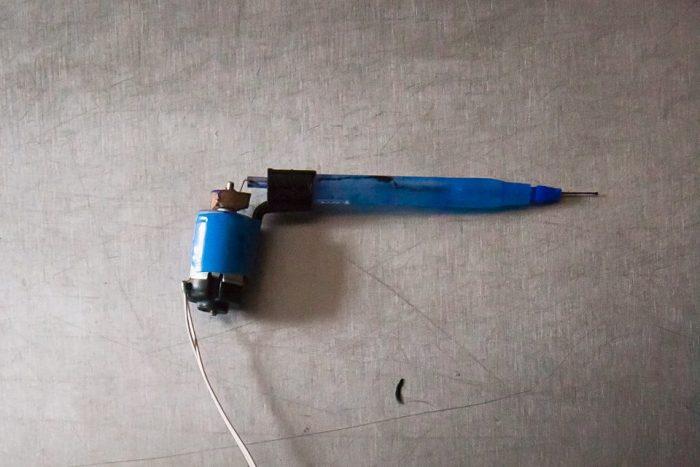
The second version of the tattoo machine
Tuning of the machine
How to adjust the departure of a needle of the tattoo machine
With cartridges this is usually done by rotating the holder. When using the premade, you do this by adjusting the holder and needle spout.
How to adjust correctly tattoo machine
First, let's talk about why and how to bend the needle bar. As you press the needle down, you may notice that all of the needle bar ends begin to look up and the configuration turns out to be something like this.
The needles that are pushed upwards will greatly interfere with the operation, so the needle at the base of the boom in the selected segment should be bent slightly to avoid such inconveniences:

When using modules, this procedure is not required, since the cartridge's mating position does not depend in any way on the pusher.
Next, let's move directly to the equipment. For convenience, we will disassemble the setup according to the type of machine. You can read more about the types of machines here.
Option #2. Tattoo machine from string, spoon and pen
Another budget machine design, for the manufacture of which you need to prepare:
- a motor;
- duct tape;
- automatic pencil or an old ballpoint pen;
- Guitar string.
Tattoo-machine from a string, a spoon and a pen
Step 1. The work begins with a motor. As in the previous option, any electronic children's toy will do. Here is what such motors look like.
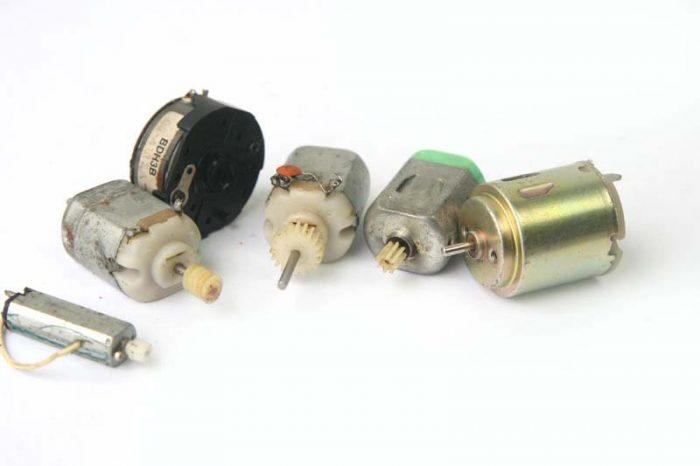
Motor motors from electronic toys

This is the motor we will use
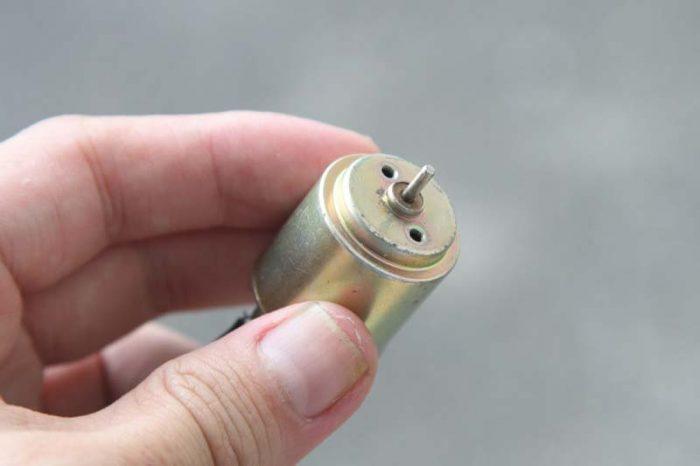
Any electric motor will do
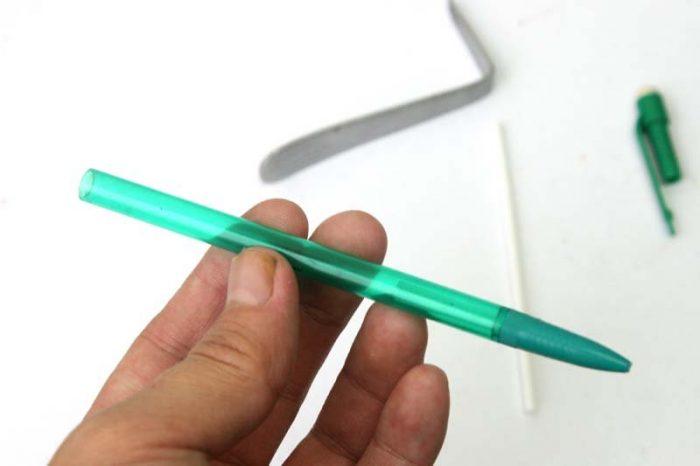
Step 2. Next we take an old automatic pencil.

Take an old auto pencil
All the guts are taken out of the pencil.
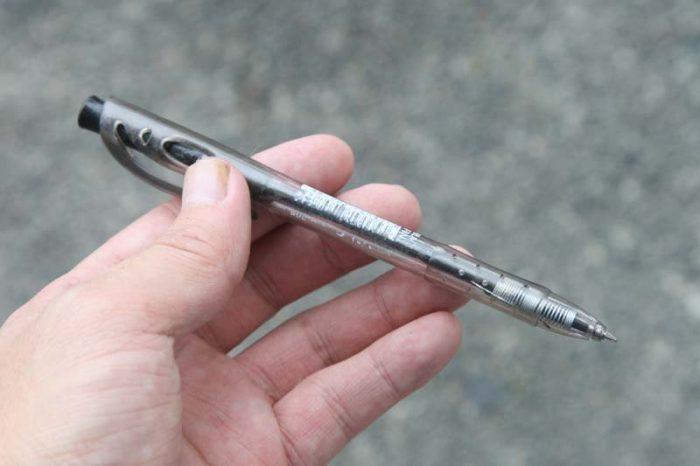
Even a ballpoint pen will work
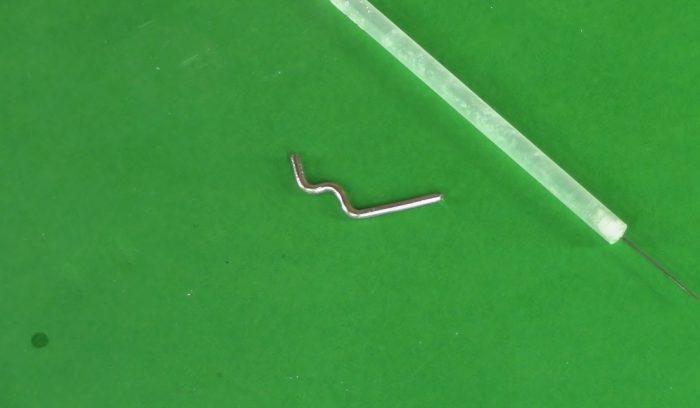
Step 3. To secure the motor, you'll need something sturdy. This example uses a spoon. The tattoo machine will only need a pen that bends into a "G" shape (as shown in the photo).
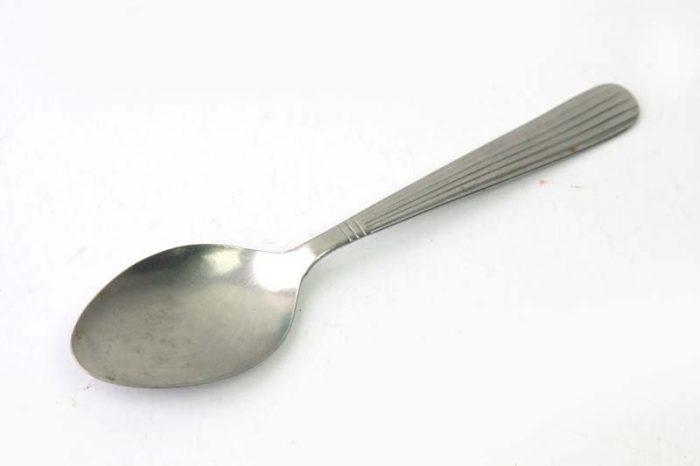
The spoon to attach the motor
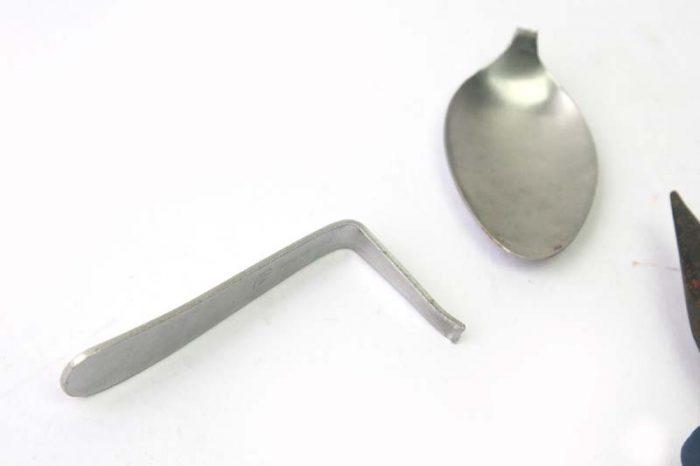
The handle is bent in the form of the letter "G".
Step 4. Now we take the body of a pencil. To it is attached a handle from a spoon, as much as possible reliably and tightly with a sealant.
The body of a pencil

A handle is screwed on the pencil casing
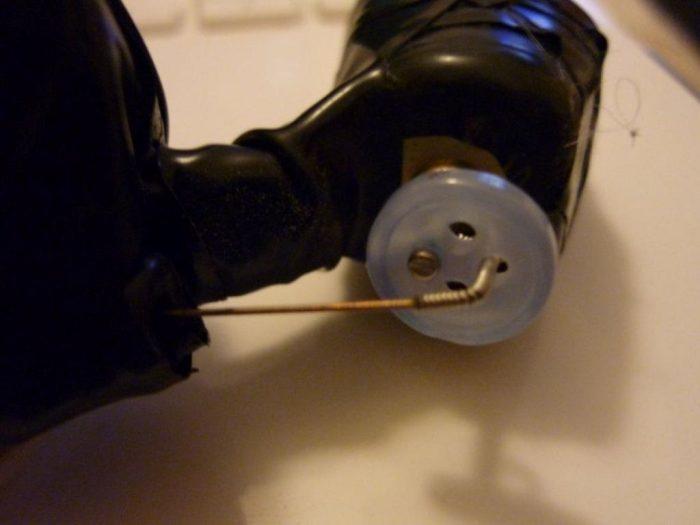
Step 5. There is always a small plastic gear on the shaft of any child's toy motor. This pinion is not removable, on the contrary - a button is glued to it with superglue.
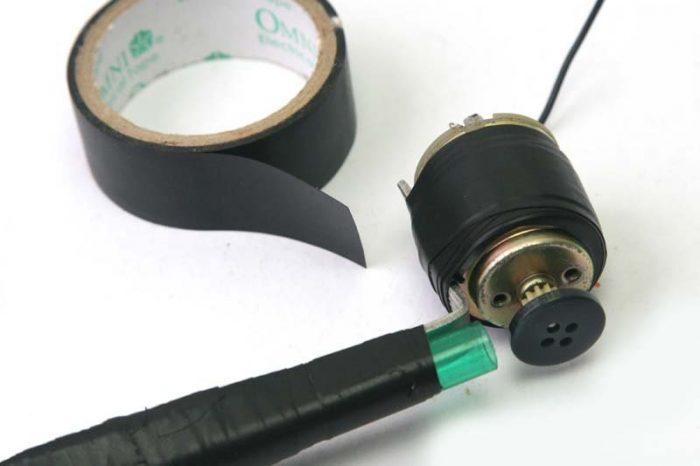
The button is glued to the pinion
Step 6. A string is taken and inserted inside the body. One end of the string is bent and placed in the button.
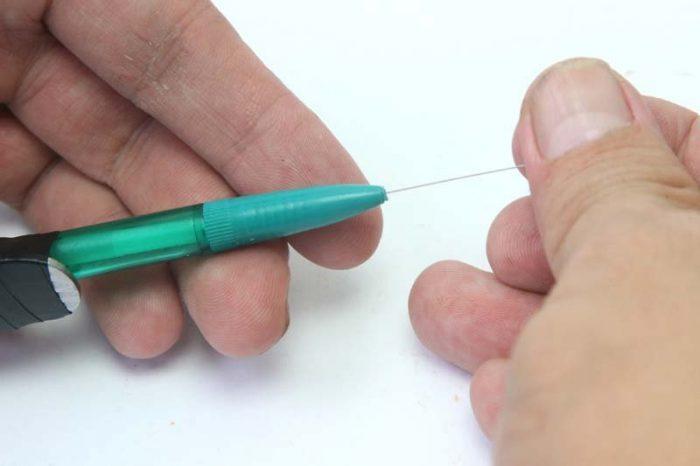
The string is inserted inside the body
The end of the string is bent.

The bent end is inserted into the button
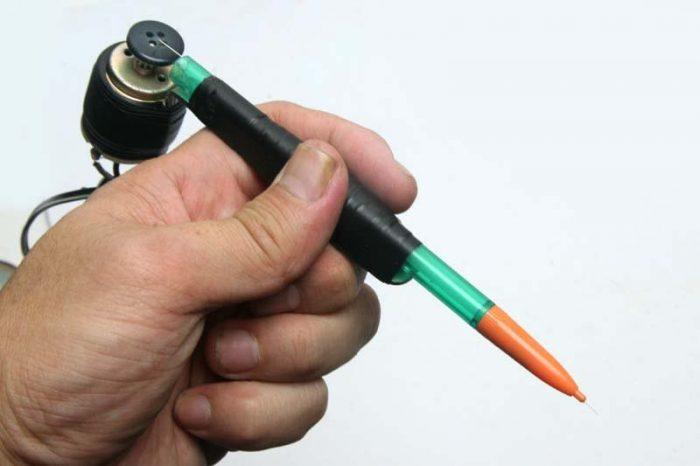
Step 7. The button making machine is almost ready, the only thing left is to attach power to the motor. For this purpose you can use a power adapter (voltage control should be in the range of 3-12W) or batteries. To make it more convenient, you can install a power button or put a switch.
All you need to do now is to connect the power to the motor

The switch .
That's all. Self-made tattoo-machine is ready to create masterpieces!

Finished tattoo-machine with your own hands
Side materials
As additional items will be needed:
- A pen or pencil - will serve as the body.
- A spoon, aluminum fork or toothbrush to staple or tie down - to attach the motor to the body.
- Duct tape or soldering iron, wire cutters.
- Power source - a charger with the right voltage.
- Gear, a button.
The list of names can be different. It should be based on what kind of machine is created and what exactly is planned to buy. Knowing how the device works, you can use any suitable parts.

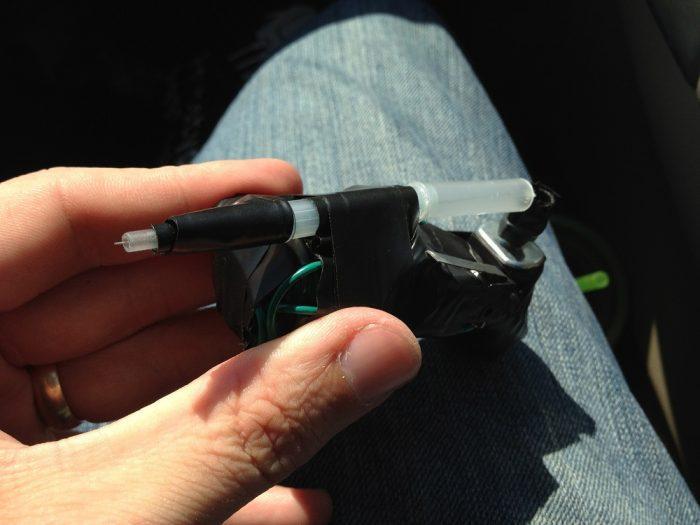
Option № 3. tattoo machine from a syringe (without string)
We offer you another variant of making a tattoo machine - this time not from a guitar string, but from a medical syringe.
Tattoo machine from a syringe
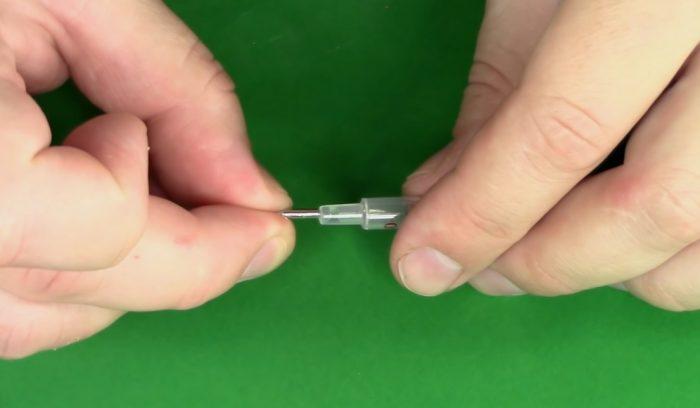
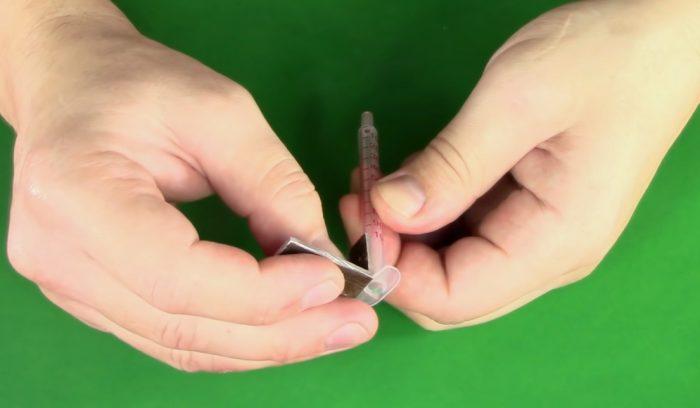
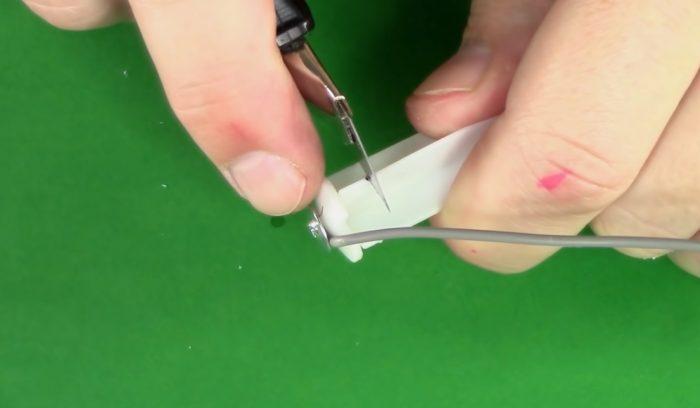
Step 1. First, a small medical syringe is taken and disassembled. The needle of the syringe is extracted with pliers (as on the photo).
The syringe must be disassembled.
The needle is removed with pliers.
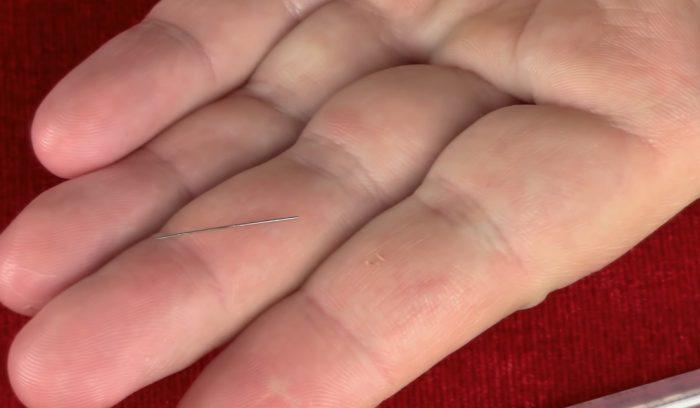
Needle removed
Step 2. Take a gel pen rod (preliminarily washed thoroughly). The tip of the pin is ground with a file so that the needle can pass freely through the hole.
The end of the stick is filed down so the needle can freely go through the hole.
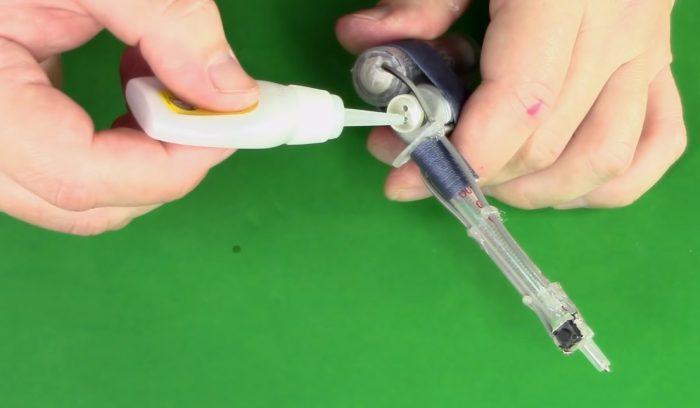
Step 3. Using superglue at the bottom of the syringe, the tip of the pen is glued to the bottom of the syringe to end up with the following.
The tip of the pen is glued on
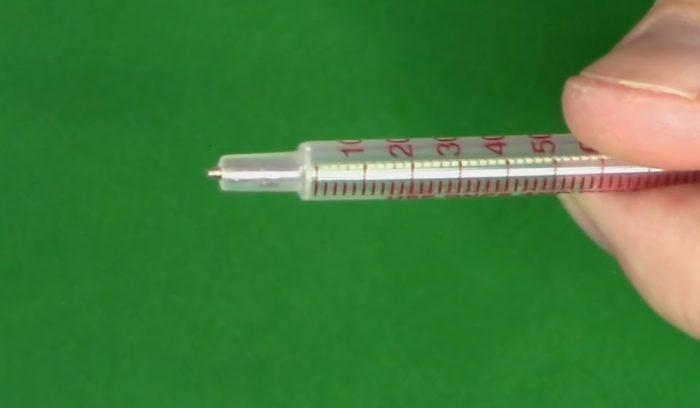
Here is what it looks like
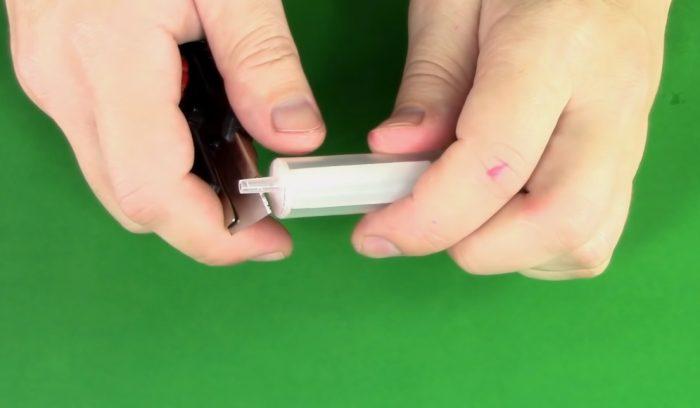
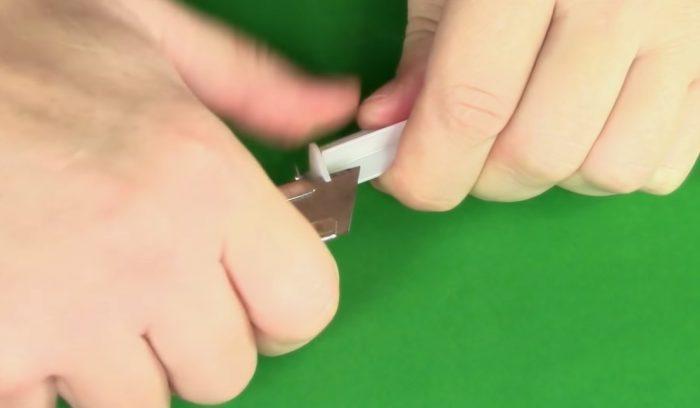
Step 4. The top part of the syringe is cut off on one side (it is better to use a stationery knife).
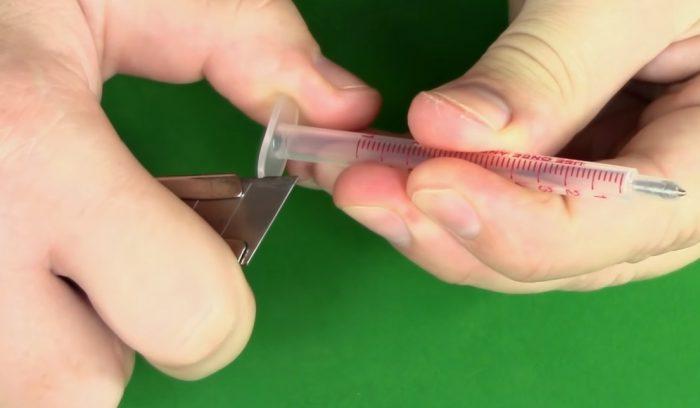
Trimming the upper part of the syringe
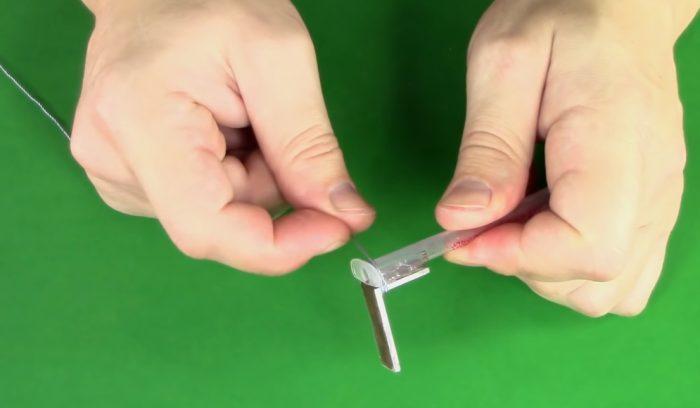
Step 5. Take a metal corner (as noted earlier, it can be made from the handle of a spoon) and with the same superglue is glued to the syringe (from the cut side).
Metal corner
Gluing a corner
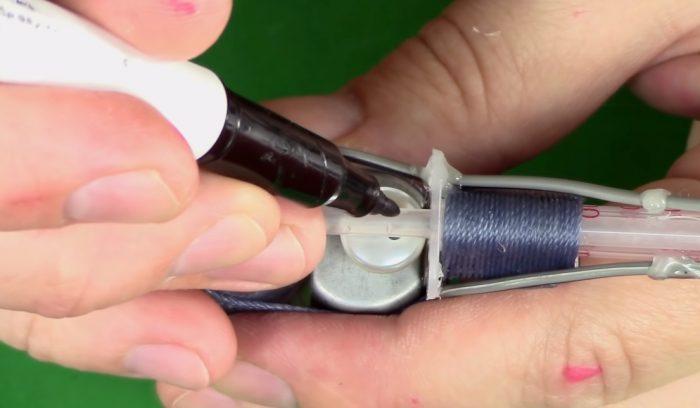
Step 6. The corner is additionally attached with a strong thread (kapron). Then the thread is poured with superglue.
The corner is attached with a thread
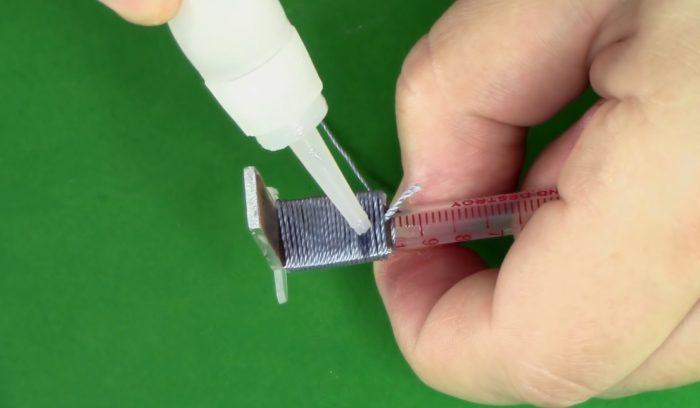
String is sprinkled with superglue
Step 7. An electric motor from a child's toy is glued to a free part of a corner.
An electric motor is glued on
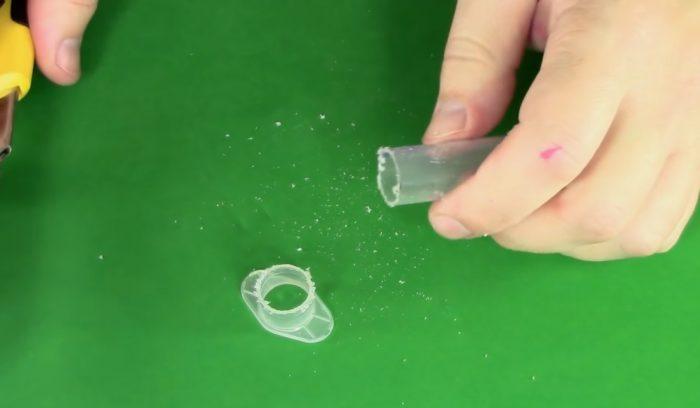
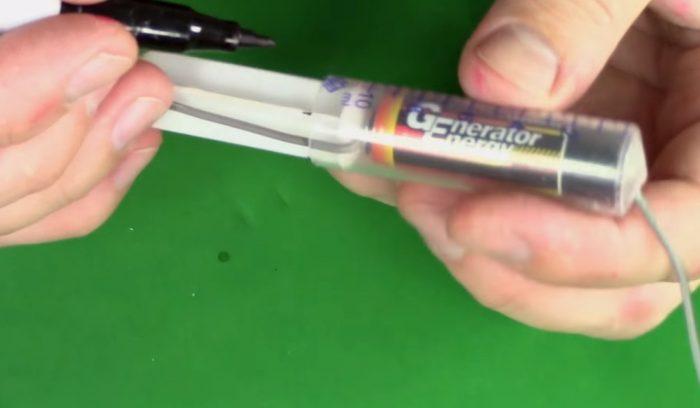
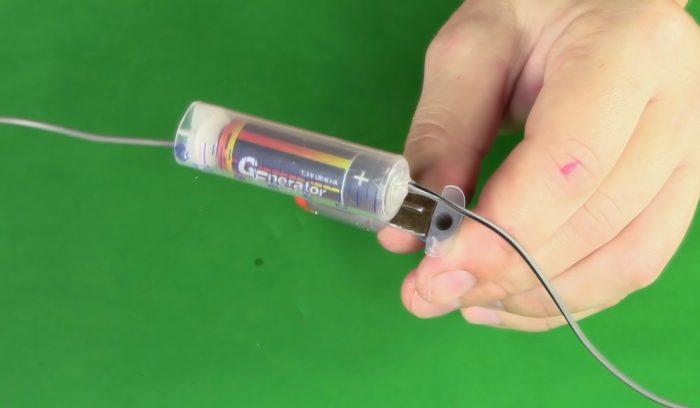
Step 8. A large syringe is taken and the tip is cut off.
The tip of the syringe is cut off
The battery is inserted inside, then the piston is put in place. A line is marked about 1 cm above the battery.
The line is marked.
The syringe is cut along the marked line.
The syringe is cut on the line
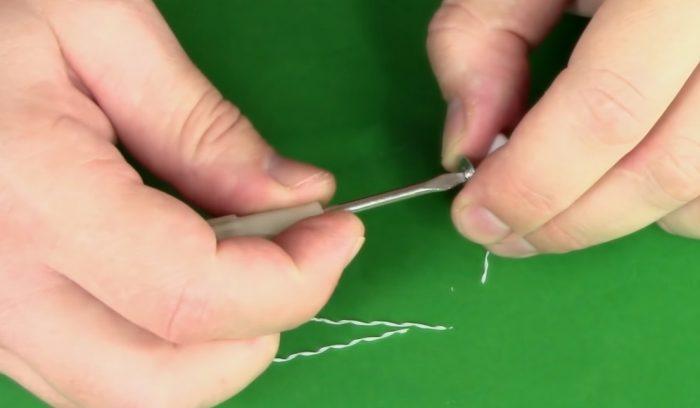
Step 9. The stripped (and previously bent) end of the wire is inserted into the syringe through the bottom hole and glued on.
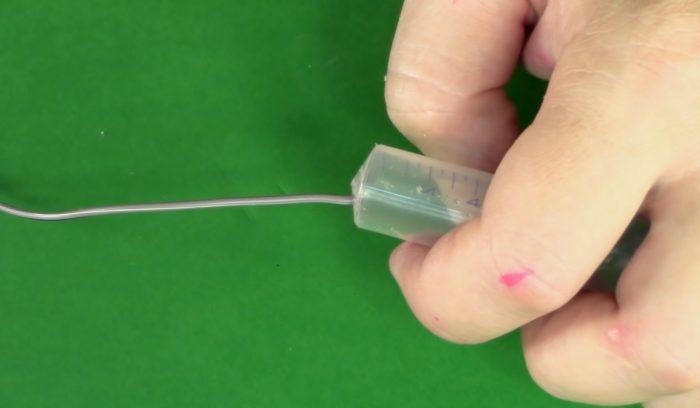
The end of the wire is inserted into the syringe
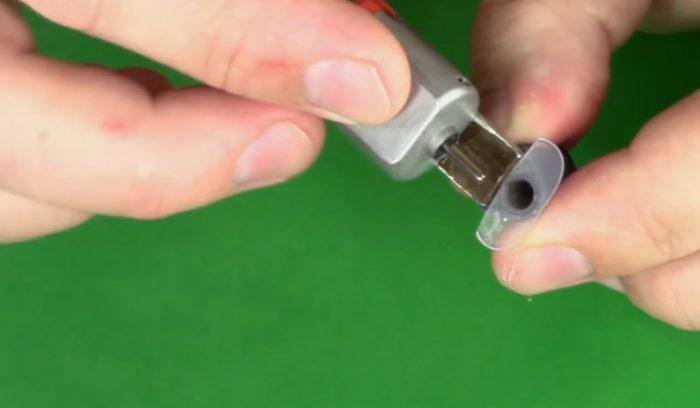
Step 10. A small hole is drilled in the center of the large syringe piston (as pictured).
A hole is drilled into the piston
A screw is screwed into the hole (not all the way through).
Screw is screwed into the hole
It is necessary to make a cut-out on the syringe's lower part (the one which ejects liquid).
The cutout is made
Step 11. The end of the second wire is put on the foot of the screw, also stripped. Then the screw is screwed all the way in.
The end of the second wire is put on.
Step 12. The piston is inserted into the syringe, marking its (the piston's) protruding part. The piston is then trimmed to the mark with a knife.
The protruding part of the piston is marked
Trimming the piston
Step 13. Assemble this design.
Assembling this design
Using the same superglue, the construction should be glued on top of the motor.
The design is glued to the motor
Step 14. In addition, a syringe with a battery is taped to the motor. Then the thread is soaked with glue.
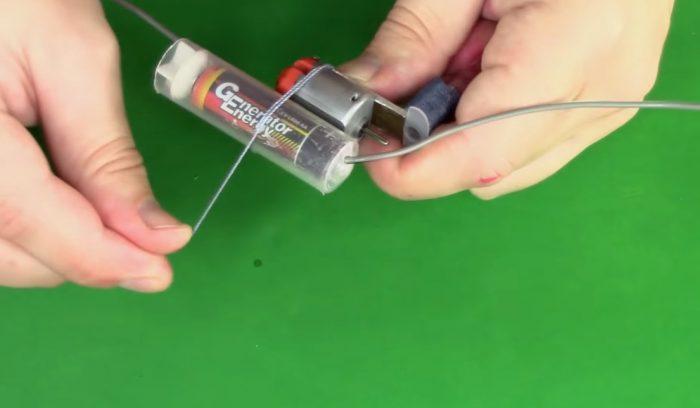
The syringe is rewound with the thread

The thread is soaked with glue
Step 15. A small button is taken (from the same toy). We solder the ends of the wires to it: one wire leads from the syringe with a battery to the motor, the second - from the motor to the button, the third - from the button to the other side of the big syringe (plus and minus). This is what you end up with.

The ends of the wires are soldered to the button
Step 16. The button is glued to the bottom of the tattoo machine handle. The wires are also glued down so they don't get in the way. A heat gun is used.
The button is glued
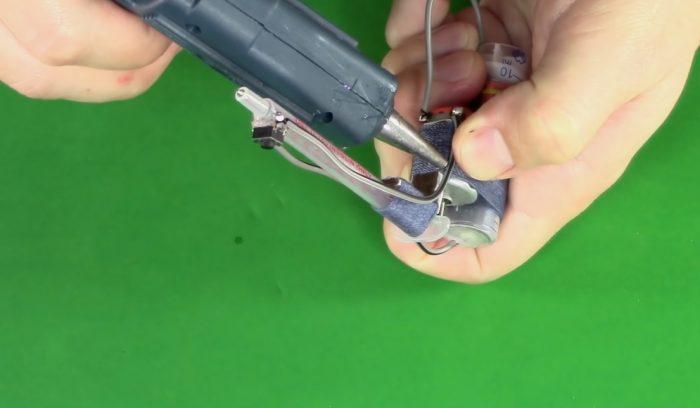
The wires are also glued.
Step 17. Take an ordinary button, put it on the motor shaft. The button is glued on.
Button is glued.
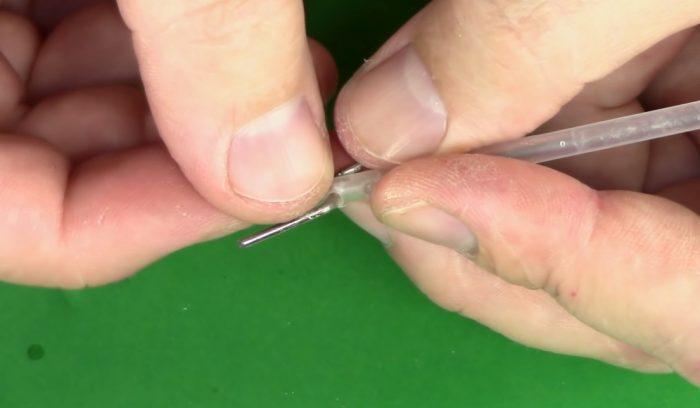
Step 18. A pen rod is inserted into a small syringe, with a trim line marked on top. The rod is cut off.

The cutting line of the rod
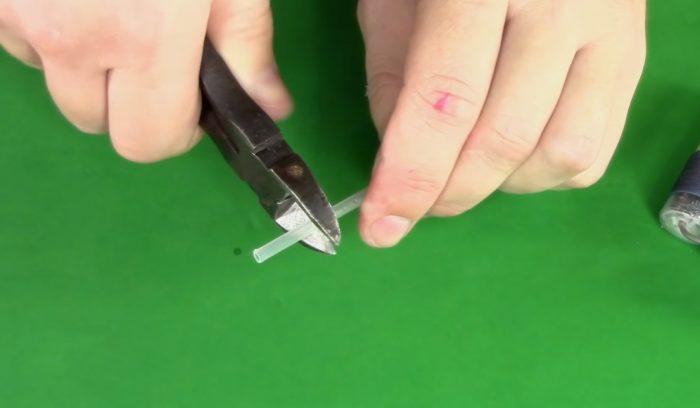
The rod is cut off
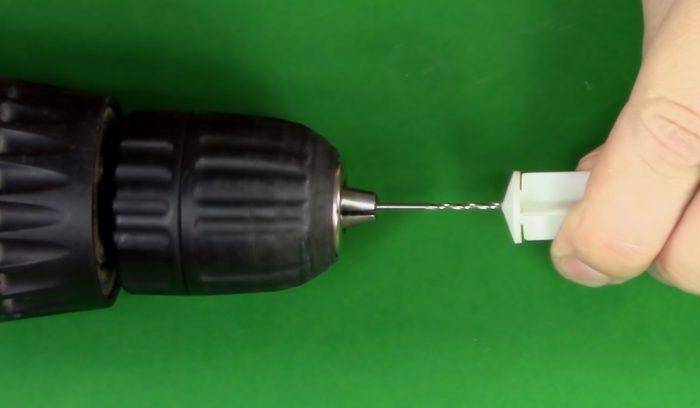
Then the rod is inserted again, a point is marked on it opposite the free hole of the button. A through hole is drilled with a thin drill bit.
A point is marked on the rod
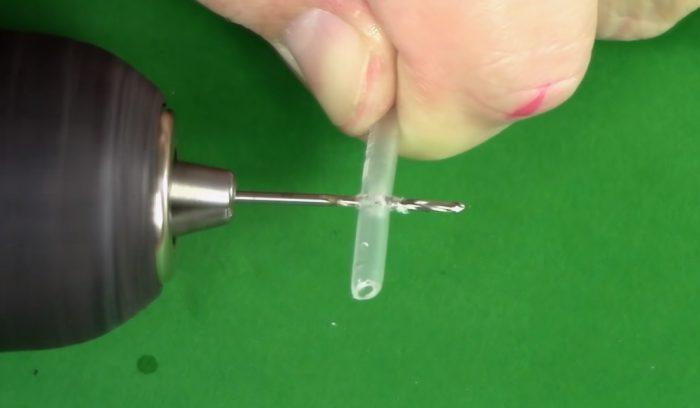
Drill a through hole
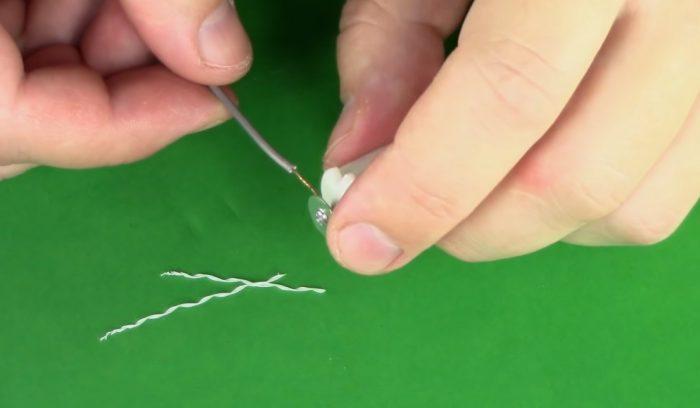
Step 19. Cut off a thin strip of paper (about 0.5 cm wide). The end of the strip is glued to the needle (from above), and then it is wound around it.
The strip is glued to the needle
The strip is wound around
Step 20. The needle with the paper is inserted into the bottom hole of the rod, glued.
The needle is inserted into the rod
Step 21. You take this metal part (as in the photo), you can make it yourself.
This part can be made by yourself
The part is inserted into the hole on the rod, and then secured with a strip of duct tape.
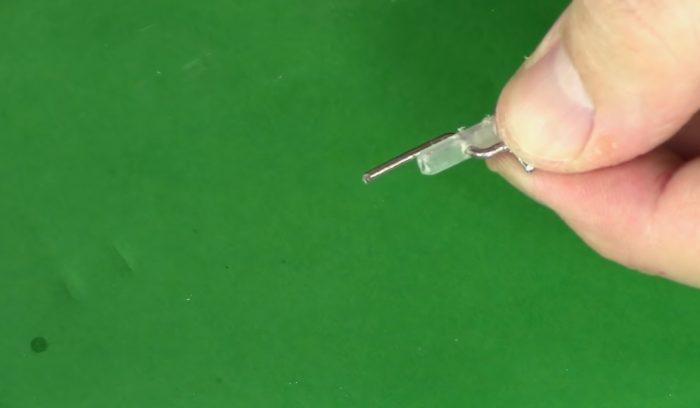
The part is inserted into the hole.
The tape is used for fixation
Step 22. The stick and needle are inserted into the syringe, the free end of the metal part is inserted through the hole on the button.
The end of the part is inserted into the hole on the button.
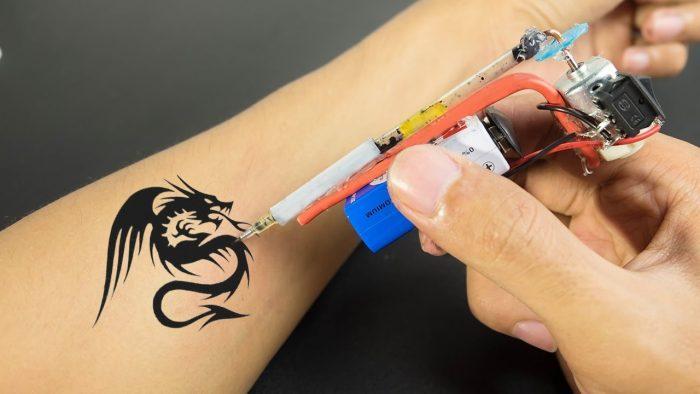
That's all in principle. It remains to check the operability of the tattoo machine. Press the button. Does it work? That's good!
The syringe tattoo machine is ready.
The machine is tested on a lemon. Everything works great!
Video - How to make a tattoo machine without string
What is the power?
To begin with, we should mention the power equipment. These are all the things that supply current to the motor or coils of the tattoo machine:
- A power cord;
- power supply;
- clip cord;
- pedal.
Choosing the cord
There are two types of power cords for tattoo power supplies: a large one with a ground contact, and a small one without a ground contact. Both types are very common in consumer electronics, and you can easily figure out which cord you need for your power supply.
A typical switching-mode power supply with a two-pin mains connector. Its main advantage is compactness, but solid power.
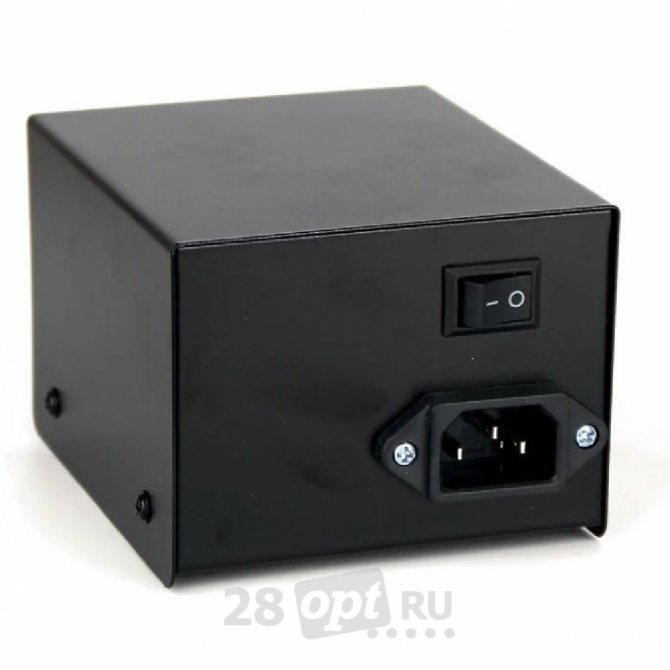
A big plug and socket on the power supply
However, there is another type of power supply - voltage regulators without built-in converter of alternating 220 volts into constant 12...20 volts. This format is very popular among builders. Its advantage is compactness of the regulator itself. In its size it can be smaller than switching power supplies. Due to the design features, they do not need a power cord - its role is played by the actual converter of the mains voltage, which is plugged directly into the socket.
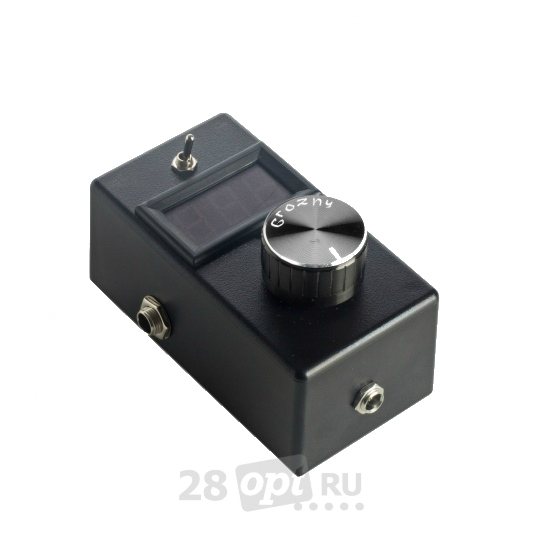
A typical example of such a solution is this power supply from Ivan Grovny. The unit is only a voltage regulator, but the real power supply, a voltage converter, is plugged into the socket, and is the familiar to many adapter - a weighty black box with a plug on one side and a wire on the other.
The disadvantage of this solution is that now you have to ask questions about the current power not only to the "power supply" from the builder, but also to the little box that is plugged into the socket. It may well not produce the desired 3 amps, and no sophisticated block regulator from the builder will not fix it.
Connecting the Power Supply
Power supply is selected by the current it is able to output. To the tattoo-machine for beginners, as a rule, enough 1,5 ... 2 amperes - it will approach the corresponding unit. The more professional machines from billers, or from world-renowned manufacturers, usually require 3 amps, and without a powerful power supply they simply will not work. The tasks of the power supply are:
- To smoothly change the voltage output, thereby giving the craftsman the opportunity to adjust the machine optimally;
- to provide enough power reserve to avoid voltage sags at high loads;
- provide long-term - up to several hours - operation.
To connect the power supply is simple. On the one hand, it connects to 220 volts. On the other, it has one or, more often, two jacks to connect the foot pedal and the typewriter. The machine and pedal are connected with clip cords.
Connectors on power supply for pedal and tattoo machine
Connecting Clip-Cord
The Clip-Cord is a low-voltage cord for connecting the pedal and the tattoo-machine to the power supply. There are two types - with RCA connectors at both ends, and with RCA on one side and terminals on the other side. Look at your power supply, tattoo machine and pedal and you'll see at once what connects to what. Clip cord must be:
- flexible, so as not to hinder the movements of the master;
- Strong to withstand numerous kinks and jerks;
- Reliable to withstand a large enough current without loss or heat.
Connecting the Pedal
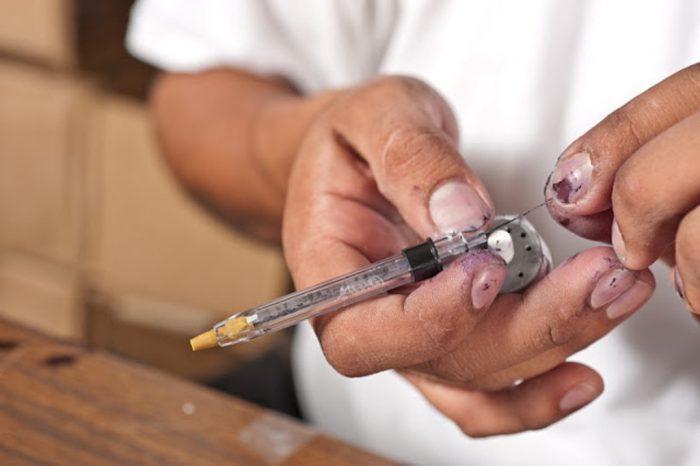
The pedal is an ordinary switch controlled by the foot. It usually has screw terminals, and requires an appropriate clip cord. The exception are push-button "pedals." These are switches with fixed positions - essentially a button built into the Jack. It does not need to be held with your foot all the time, it is controlled manually.
How to handle the string of homemade tattoo machine?
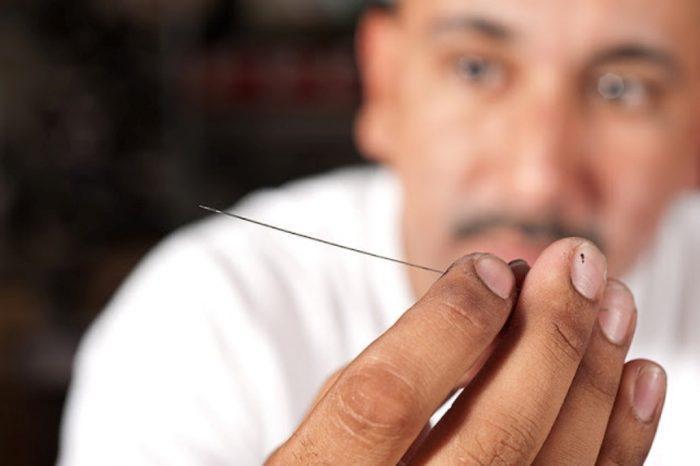
On the Internet it is hardly possible to find a comprehensible description of how to process a guitar string. And this step is one of the most important! If it is not done correctly, the string will be worse to beat, will cause more pain, will spoil the clarity of fine lines. That is why we will tell you about the processing of the string as much as possible.
The string must be pre-treated
So, take a string and roughly mark how long you need. For example, one end of the string take the pliers, and the other slightly pull the hand. Where the string will have a sharp tip (try to choose a place close to the pliers to save consumables), bring a lighter and heat (this will require another hand, so you can't do without an assistant). The string should be taut. The string will first become red-hot in the heated area, and then will thin and burst.
Initially, all strings are elastic, so they do not hold a straight shape. To "talk" it, heat it red once. After measuring the desired length, bite off the string with pliers. The end that will be attached to the motor, bend it with a letter "G" (do not overdo with the length, otherwise it will cling when the machine works).
The end of the string is attached to the motor
In the severe prison (or army) tattoo-machines, the string is sharpened on everything, that is at hand: at first, on "nullivku", then on a matchbox, and in the end - on glass (if something is absent, it can be crossed out from the list, but it will take more time to work). A much better option is a knife sharpening stone (when sharpening, the tip of the needle should be pressed with your finger). In this case, the shape can be any - cone-shaped, like a sewing needle, or flat, like a "spatula", beating in one plane a thin line, and perpendicularly - a wider one.
Another important point! The tip of the needle should be slightly bent so that it springs and hits the same point. If the tip is not bent, but left straight, then when it comes out of the machine, it will start hitting where it goes, and therefore even lines will be much more difficult to carry out.
Tattoo-machine made by the hands
After preparing the string, we recommend washing it with soap and water. Why not alcohol? The matter is that soap dissolves various biological substances, and Alcohol "burns" them to the metal surface.. Although it is better to combine both methods. If you can not have several strings at once, then burn the tip with a lighter. But note that the properties of the metal deteriorate over time, it becomes quite brittle.
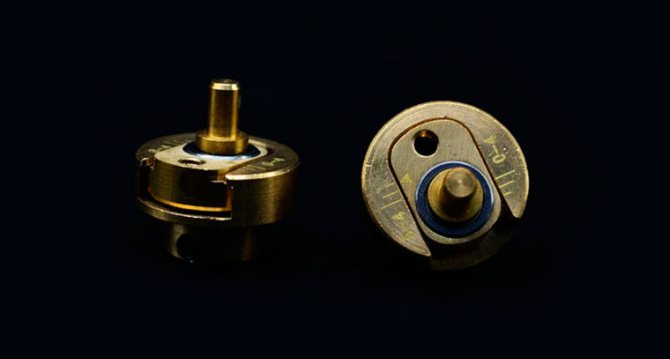
Direct-drive
Everyone's favorite failsafe twist is adjusted by:
- Increasing the voltages.
- Changing the eccentric
The voltage adjustment will help you work most comfortably on different tasks: with dots on low voltage, with fat contours and dense paint on high voltage. Ask your elders and find the perfect one for your application technique.
Changing the eccentric will help increase or decrease the stroke of the needle or plunger, making the machines softer or stiffer.
Adjusting the tattoo machine
One making of tattoo-machine by your own hands is not enough - its mechanisms should be adjusted in such a way that the device worked without failures. Practice shows that there are some regularities that should be kept in mind. If you eliminate the small inconsistencies, you will facilitate your work.
String out - is one of the biggest problems. The string can bump into the spout of the handle (or whatever you used instead) and pop out of the fixture. Adjust it so that when the string on the platter is at its rearmost position, its sharpened end only comes out of the body by about 0.5 mm.
Adjusting operation
The height at which the motor is seated The height at which the motor is seated is also important. Here you can use a piece of tubing from an ordinary ball rod, which will bend the string closer to the roller. It looks like a nipple system, but it will greatly reduce the number of sprays due to the weak attachment of the string.
Also, when you first dip the spout into the paint, all the air may not come out. This can cause a foamy droplet on the spout - it would seem that there is a stock of paint, but there is nothing left on the skin. The solution: blot the hole at the spout with a rag (where an air bubble is formed) and dip it in the paint again.
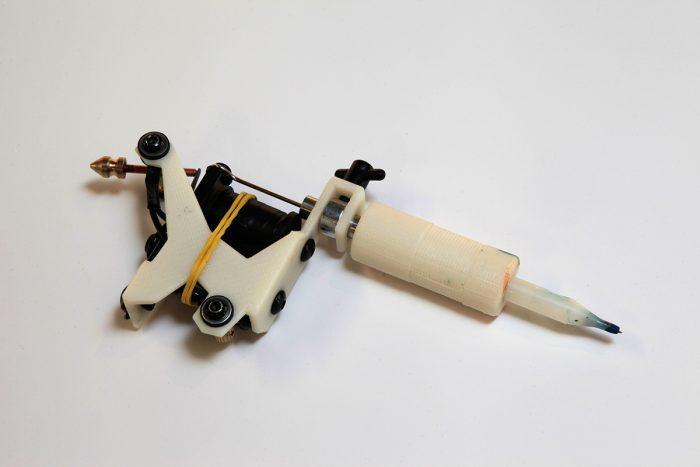
This tattoo machine is printed on a 3D printer.
The information you are about to meet, in Russia almost no one will open to you.
Not even because it's a terrible secret. It's much simpler: most of the misguided teachers themselves don't know about it. Those who know about it are usually successfully engaged in tattooing and not engaged in teaching. Naturally, many of them are happy to share their tips and tricks with their friends, but you still have to have such friends and be able to understand the answer correctly and correctly.
Many of the tricks that cool masters use, they themselves do not realize doing it on purpose.
Consequently, they can't explain it clearly.
In my time, I meticulously questioned and watched a lot: what and how they do, repeating each step myself.
I myself, like a dumb sheep, at the beginning of my career, sat around party people and made money on hieroglyphics, not really asking questions of any development...(I was a little better than my surroundings))
Once I went to a convention in St. Petersburg, I had an epiphany and saw how fucked up I was. Then began the search, acquaintances with new tattoo artists and constant visits to well-known masters.
In the end, I collected a thousand times more chips over a period of time than I had done in all those years. of my previous "self-development..
To summarize. The rules of tattooing
We have figured out how to make a tattoo machine at home, and therefore it remains only to get acquainted with the basic rules that must be observed when applying tattoos.
- The person to whom the tattoo is applied, beforehand, should eat a heavy meal. This way the blood will go to the stomach and, accordingly, the bleeding will be reduced - it will be easier to beat, because the paint will not be washed out of the skin.
- The person must be sober .. After drinking alcohol, the blood pressure rises, the blood vessels dilate, and therefore the bleeding increases.
- For wiping the skin one should use a clean cloth (cotton cloth, bandage) soaked in boiling water. (So the tattoo will heal faster and the crust on it will be much less), but not alcohol. The thing is that alcohol, which leads to burns, interferes with the healing process. It is only possible to sterilize the already clean equipment additionally.
- After application, the skin should be washed with soap and water.After that apply a healing cream (often "Spasatel", "Bepanten") and for 24 hours put a bandage, so that the wound does not rub against the skin.
Tips for healing
And in summary - a small advice for beginning tattoo masters: if badly made any tattoo, you can overlap her another after healing. And not even once. And even after several years.
Necessary accessories
In the absence of the possibility of buying a set for beginners, as well as spending money on the salon, you can cope with the task, relying on their strength. Not everyone immediately dares to such an event because of the unusualness and novelty of the procedure. But as in any other case, showing persistence and purpose, it is possible to realize it!

The tools are always available for sale, and many of them are in the home piggy bank of the master. Since the main elements are the needle and the electric motor, you can use a sharpened guitar string #1 or #6. If you do not have access to an instrument, it can be replaced with an ordinary needle included in the bead kit.
Even easier to find an electric motor, which is equipped with toy cars, electric shavers or players for scrolling cassettes. If you do not have them at home, thank you that you can absolutely inexpensive motor at the market in the section of radio goods or a used spare part. The power should be at least 12 V, the best option - 18.
Features of the execution of the needle
During the operation, it is necessary to ensure the tension of the string for an even image. A thin string from a guitar is cut at the rate of 20 mm longer than the tube, in this case a rod from a pen or pencil. One end is sharpened sharply and the other end is attached to the motor, close to the axis of the shaft. It is this position of the needle that will provide the correct range of oscillation affecting the accuracy of the pattern.
When carrying out the procedure, you should not forget about the precautions, providing sterile conditions in the room. Applying a tattoo can damage the skin. It is necessary to avoid touching anything with the string, rod and needle, for which you need to work wearing gloves. After all manipulations, the needle and pen will no longer be needed.
What about the paint?
About the preparation of paint for tattooing at home, it should be noted that it is better not to prepare it yourself. You can also splurge on a special ink. It will be safer than using pen gel or green. You know, such materials are not very good for such an event.
No matter what kind of paint you end up choosing. You should dip the tip of the needle of the switched on machine into it for ten seconds, and then inject it under the skin. This principle is used throughout the entire workflow.

Connect the power supply.
You can use any charger that is rated for at least the voltage of the motor you are using. For more convenience, you can install a switch or button.
After you have finished working with the tattoo machine - throw away the needle and the tube (pencil or pen).
If you neglect these instructions, you risk getting an infection in the wounds and you won't get a beautiful tattoo. The skin before applying paint should also be treated with special antiseptics.
Step-by-step instructions
- On the shaft of the motor should be found a gear. A button is attached to it with superglue so that the holes remain free of glue. It should be left to dry for a while.
- Cleaned of ink and washed with water, the rod of a pen or mechanical pencil is treated with an antibacterial compound. On the side of the ball, the tip of the rod is sawn off a little to allow the guitar string to fit unobstructed. Its length should match the size of the rod.
- From a spoon a staple is made to fasten the motor and the body. It is in this case represented by a pencil or pen. The part of the spoon intended for eating is broken off, and the handle is bent in the letter "G". As a result, a staple is formed.
- Ballpoint pen and staple are fastened with duct tape along the handle. It is necessary that its end and the place of the bend coincide, being at the same level, not to miss. Similarly connect the motor to the button.
- The string from the guitar is inserted into the handle, the end is bent to the letter "P". At the end of the process, it passes into the buttonhole.
The algorithm is quite simple. No complicated manipulation or special parts are assumed. Next, you need to check the assembly on a piece of leather taken from a jacket or bag and turn on the charger. You can also test the machine on a banana peel. The video on the website will tell you in detail about the sequence of operations.
The main thing is protection
The next step is to use a barrier protection. Put a special bag on the tattoo machine. The most important thing is that the bag completely covers the machine, does not interfere with the movement of the needle and did not fall off during the work. Put the special bag on the clip cord. For convenience, put a bandage gum on the clip cord connector and run it through the bag in peace. Don't pull the connector completely out of the bag, just poke the pins through the clip cord protection itself. This is quick, convenient, and functional at the same time. If you have an RCA connector on the end of the wire, secure it with a bandage band, or adhesive tape.
The use of barrier protection is extremely important, as it has a direct bearing on the hygiene of the tattooing process. The tattoo industry has long been accustomed to disposable needles, and has been developing disposable modules - a needle and a tip in one cartridge. Disposable tips also long ago and tightly entered into a life of tattoo masters, not uncommon and disposable grips. Machines, and power equipment, were and remain durable equipment. The worst thing is that this equipment is quite complex shape - it has many corners, protrusions and recesses. All of this contributes to the accumulation of contaminants that are difficult to remove later. A disposable guard effectively prevents them and helps the handyman keep his equipment clean.