The popularity of Halloween is growing every year. Around the world, on October 31, millions of people transform into evil spirits and have fun celebrating All Saints' Day. Traditionally, the image on Halloween should be intimidating, so the masquerade costumes, attributes and, of course, makeup are used.
If there is almost no problem with choosing a suitable costume (you can buy it in a store or order it online), then to complete the image you need to master the techniques of applying "scary" makeup. This is especially useful if you decide to reincarnate as a zombie or an outlaw, whose face and hands should surely be decorated with bloody wounds and scars.
In this article you will learn how to draw a scar on your face or hand at home.
How to draw a scar on the face yourself?
To draw a scar on the face, you can use both theatrical makeup and ordinary decorative cosmetics. Let's start with a simple and accessible option, which uses ordinary decorative cosmetics. You will need: foundation, sponge or cotton pad, lipstick or lipstick. With the help of a foundation, prepare the place for the future wound. Then use a soft coral or pale pink lip pencil to draw the outline. For more naturalness the line should not be clear and flat. Use a sponge or disc to flatten the outline a little. Repeat the line, using a pencil or lipstick a shade darker. Then flatten it again.
A voluminous torn scar can be created with theater makeup, foundation, a toothpick, a brush, and liquid latex.
- With a brush, apply the latex to the face, creating a base for the scar.
- Wait 1 minute for the latex to dry a little.
- Use a toothpick to make the ripped edges and depth.
- Use a fat red theatrical makeup and brush to draw out the hollows and edges. Add depth to the scar with black paint.
- For more realism, you can apply prop blood or red watercolor on top.
This method of application is resistant, so you can use it to draw the scar not only on the face, but on any part of the body.
PVA glue and flour scar
What if what you need is not a thin scar, but a but an ugly, ugly scar.
? In that case, a simple remedy will help you: a mixture of PVA glue and flour. Add a spoonful of flour to the glue (there should be less of it). Apply the resulting elastic mass to your face and give it the appearance of a scar. Divide the mass into two parts to form a cut. Wait until the ready mass dries, and then you can cover it with paints or shadows to get the desired scar effect.
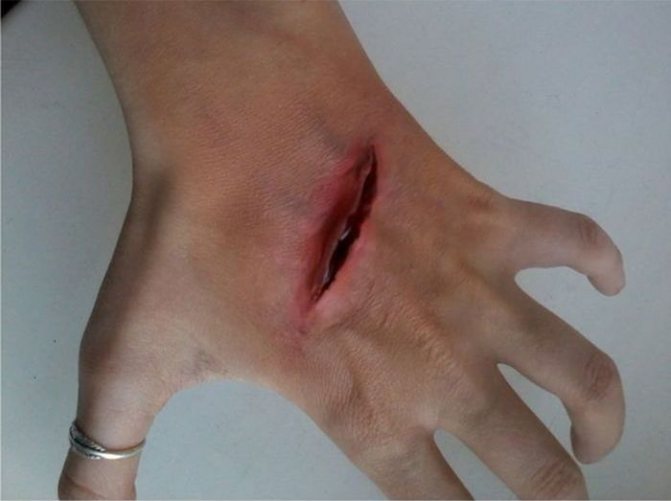
How to draw a scar on my arm?
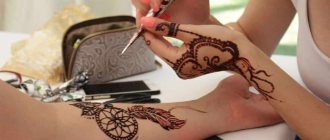
Usually to complete the image also draw scars on the wrists or on the contour of the veins. The main thing is to keep the wounds on the hands as long as possible, because during the celebration they can easily be damaged by water or clothes. Therefore, it is better to draw a scar on the hand, using a technique with latex. A hardened scar that imitates cuts on the wrists can be created with ordinary chewing gum, which will be its base. To make such makeup stick firmly to the body, use nail glue. Afterwards, apply foundation and draw the contour with red paint.
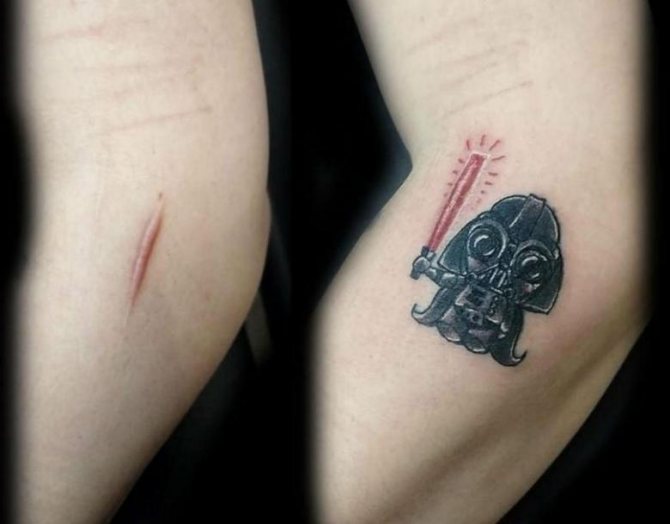
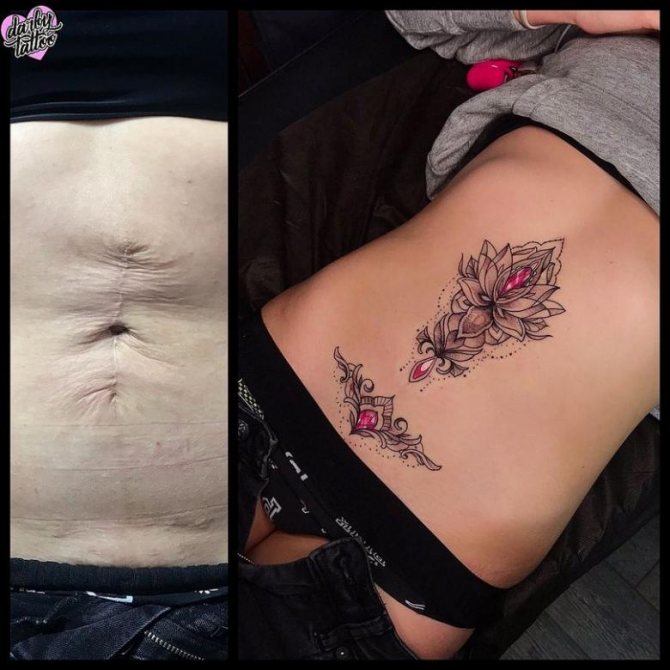

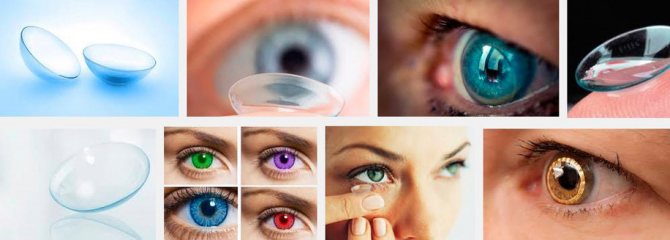
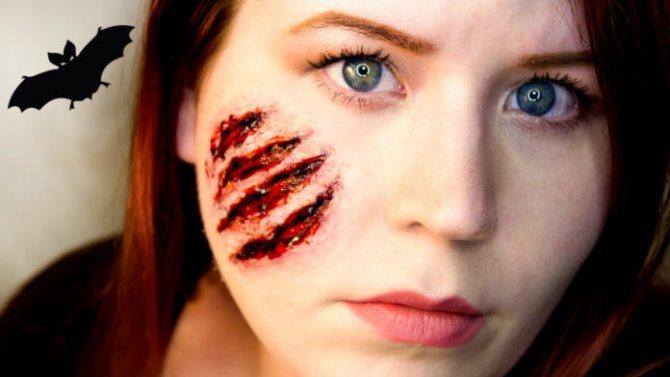
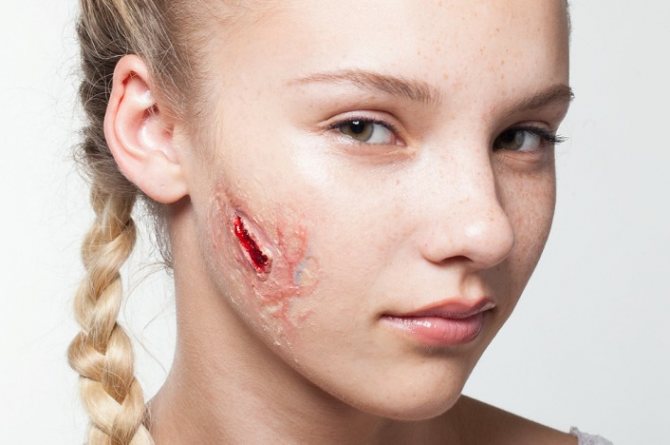
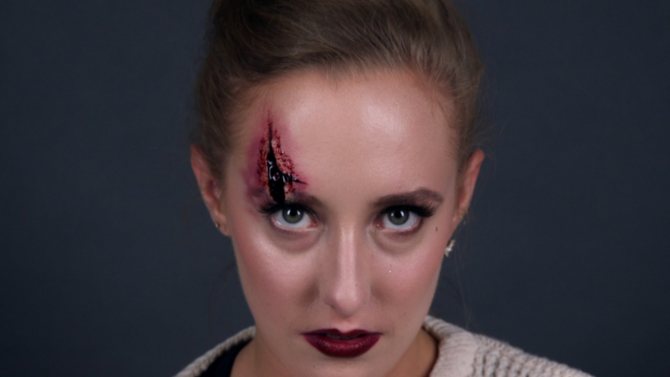
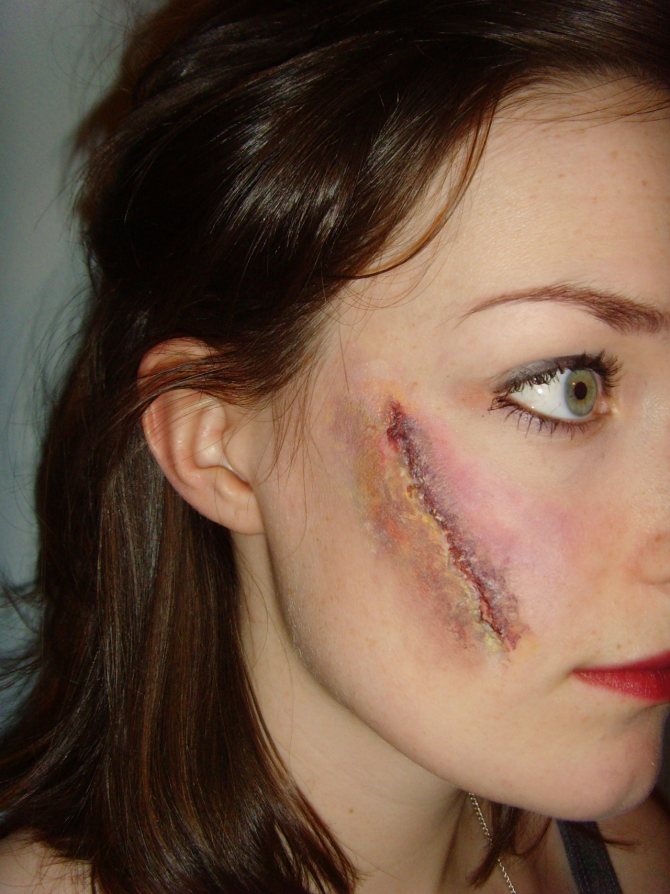
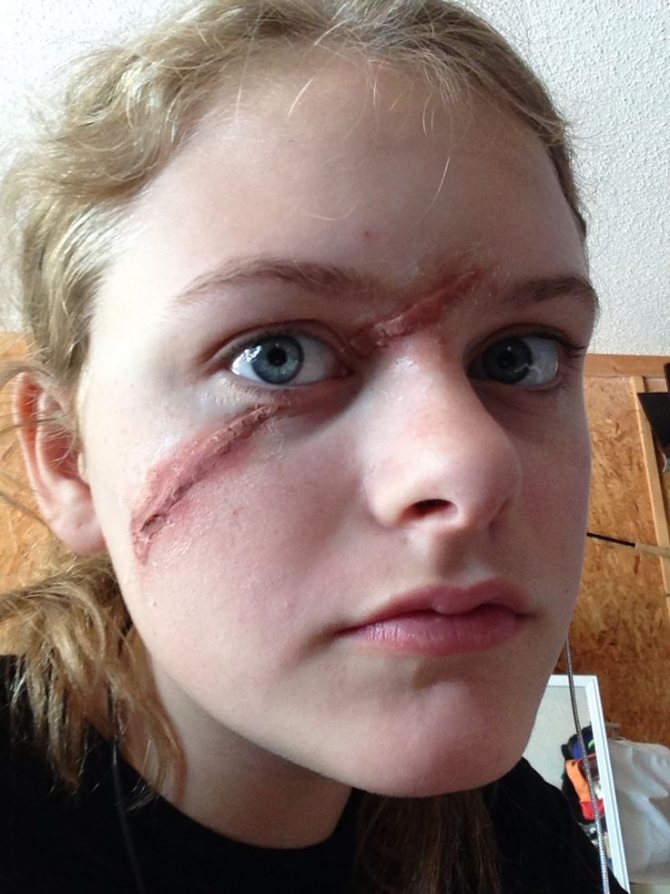
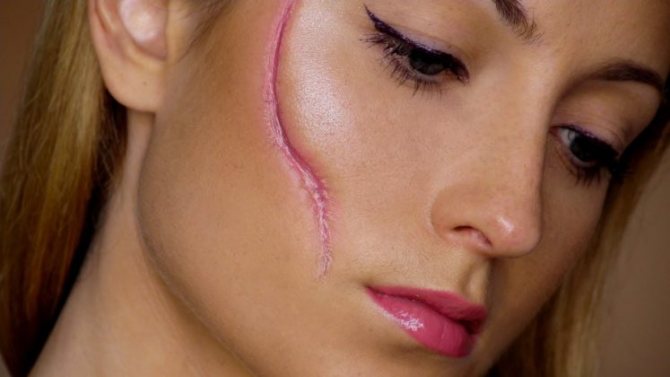
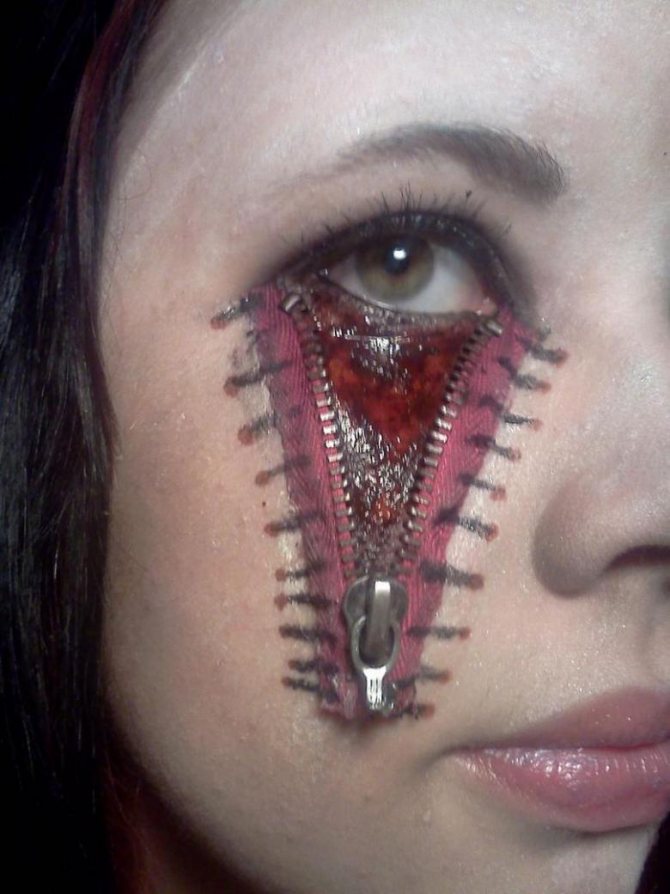
Photo gallery of makeup ideas and images with scars, cuts and wounds
To make a scar or cut for Halloween at home you do not need to have the skills of a professional makeup artist or special cosmetics. The main thing is to approach the work creatively to create a realistic image. Just do not overdo it, so that the painted scar looks aesthetically pleasing.
For inspiration, you can see pictures of Halloween scar makeup:
How to draw a simple scar with a pencil?
The technique of applying a scar with pencils is not complicated, but require a certain skill. To create a scar you will need: watercolor pencils (red, brown, black), water, a brush and tissues.
In today's master class, you will learn how to make an artificial cut or wound on your hand at home for Halloween. Materials and tools can be found freely available, something to buy at the store, something at the drugstore.
For this you will need:
- paint: brown, red, blue, blood; - paint brush; - absorbent cotton; - PVA glue; - foundation; - stack; - alcohol; - artificial blood.
Choose a place on the body where the wound will be located. Just keep in mind that such makeup will have to be removed, and it will pull the hairs on the skin. Therefore, try to choose a less hairy place. Treat this area with alcohol. After that, apply a thin layer of PVA glue as much as your wound will occupy.
Now make a backing out of a piece of absorbent cotton. It should be thin and the edges should blend into the skin. We attach it to the glue you just applied to the skin.
This absorbent cotton is covered on top of the glue. There should not be any clots of glue in the process. The edges of the wound should blend into the skin.
It is necessary to make two blanks from absorbent cotton for the convex part of the wound. It will be two walls at the top with a blunt end and smoothly going to zero at the bottom.
Fix the walls at a distance of about 0.5 cm from each other with the blunt end up. Semi-transparent ends of the bottom spread in different directions.
This blank on top should be completely covered with glue so that it is already like a wound. The top edge of each wall should be very thin, so you can achieve the desired effect by using a stacker. The workpiece should dry properly. This is the disadvantage of working with glue, as it takes a long time to dry.
The foundation should pick up as much as possible under the color of the skin. Only after the glue dries, we cover our artificial wound on the hand with foundation. Again, we let it dry.
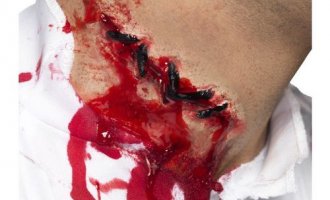
Now there is the most creative stage of creating the wound. Paints can take both special makeup, and for drawing. All the recesses are painted with dark brown paint. The borders need to be shaded. All of the most convex parts are painted red. The rest of the wound can be left light, or you can add some translucent bruises mixed in with the bloody paint. Finally, we fill the inside of the wound with artificial blood, which you can also make yourself from dye, water and gelatin.
At the end, fill the inside of the wound with artificial blood, which can also be made on your own from dye, water and gelatin. Be sure to smear the blood around the edges of the wound and splash a couple of drops on the skin. This is how easy it is to make an artificial wound or cut with blood on your arm or other area of the body at home.
As a reminder, last time we showed,
Despite the fact that the tradition of celebrating Halloween in our country has recently appeared, this fun and a little spooky holiday has managed to gain great popularity among young people. To have a lot of fun, you should not only choose a costume, but also think about makeup.
To create the image of a zombie or the risen dead, you need to learn how to make fake scars and open wounds. Made by professional makeup artists imitation wounds for Halloween look very realistic. If desired, similar makeup can be learned to do it yourself.
To give the "wound" a natural look, it is worth using professional makeup. Very convenient special sets designed to create makeup for this holiday, they include not only paints, but also various accessories - overlays, artificial blood, etc. But if you could not buy special tools, do not get upset. You can make a wound for Halloween, using ordinary cosmetics, which is in the arsenal of almost every girl.
If this is the first experience, you should not take up the task of making a complex makeup, it is better to confine yourself to a relatively simple version - a cut or a scar. Consider how to create this makeup step by step.
To make an artificial wound on the hand, you must first prepare the materials. Depending on the complexity of the idea, you may need:
- PVA glue, even better if you have at your disposal silicone glue for gluing false eyelashes;
- Food coloring in red and blue;
- Decorative cosmetics or makeup: foundations, blush, eye shadow (it is good if there is a large professional palette);
- a sharp knife;
- brushes, cotton buds and swabs, sponges for applying foundation
- food gelatin, two-ply napkins or toilet paper (white), plasticine.
If you want to make Halloween makeup even scarier, you can stock up on plastic fake razors or shards of "glass. These things can be fixed in the wound to make it look realistic and intimidating.
ВNever try to use real blades or glass! Using these items to create makeup can cause serious injury!
Next, you need to think about how to protect your surroundings from the appearance of stains. Furniture should be covered with paper or plastic wrap. To avoid damaging the makeup when changing, it is advisable to put the costume on first before proceeding with the makeup.
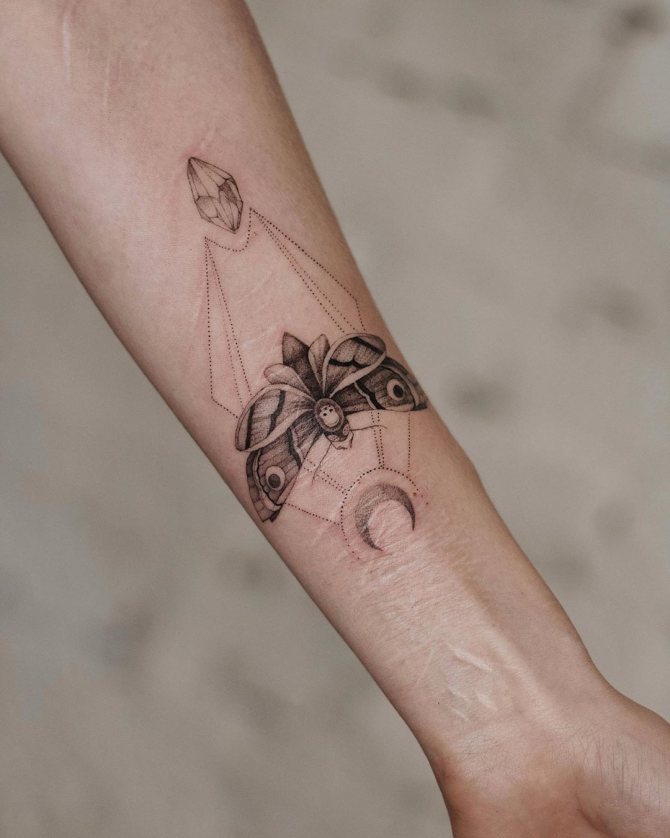
When you can cover the scar
When there is a scar, as a consequence of something, and there is a thought to overlap it with a tattoo, it is necessary to contact a tattoo salon for advice. It is necessary to take into account the condition of the damaged place. The process of regeneration and healing of the epidermis is always individual.
Every person's body is different, so everyone's recovery is different. It may depend on the immune system and the presence of chronic diseases. It is recommended to wait a year before covering the scar with a tattoo. From the state of the tissue in the scar will depend on the feelings in the process of drawing, as well as the clarity of the image.
It should be understood that there will not be the result that the owner expects. Tissues in the area of the scar are heterogeneous, sometimes the pigment can not hold, because of this comes out and the outline of the image is non-uniform. That is why it is necessary to turn to professionals in their field, who have had the appropriate experience.
The most important thing to consider is not to do a tattoo on a fresh scar, no matter in what area of the body it is located. The skin will renew itself for a long time. Otherwise, the drawing will be distorted beyond recognition.
Recommendations:
- Wait for the epidermis to fully heal.
- Choose a professional tattoo artist who has had experience in covering scars with a tattoo.
- Find information about the tattoo parlor and read reviews, see photos of works.
How to draw a scar on my face without help from others?
To draw a scar on the face you can use both theatrical makeup and ordinary decorative cosmetics. Let's start with the usual and affordable option, which uses an ordinary decorative cosmetics. You will need: foundation, sponge or cotton pad, a lipstick or pencil. With foundation prepare the place for the future wound. Then a soft lip pencil coral or pale pink color draw a contour. For more naturalness the line should not be clear and smooth. Sponge or disc a little blur the contour. Repeat the line, using a pencil or lipstick a darker shade. Then flatten again.
A voluminous scar can be made with theater makeup, foundation, a toothpick, a brush, and watery latex.
- Use the brush to apply the latex to your face, creating a base for the scar.
- Wait 1 minute to allow the latex to dry slightly.
- Use a toothpick to make jagged edges and depth.
- Use a fat reddish theatrical makeup and brush on the hollows and edges. Add depth to the scar with black paint.
- For more realism, you can put on top of a feigned blood or reddish watercolor.
This method of application is resistant, because it can be used to draw a scar not only on the face, but on any part of the body.
Artificial scars at home - step by step instructions
There are quite a few ways to create an artificial scar on the face. But most non-professional masters prefer real makeup more affordable means. For example, the usual decorative cosmetics, without which no modern girl can do makeup.
The main steps:
- Level the complexion with a foundation of light shades. It is better to take a tone of unnatural grayish-beige color, which will give the whole image a painful look.
- Using light strokes, apply gray shadow to the place of the future scar and blend it well. This method will help to create the volume of our scar.
- With the help of a dark red lip pencil we draw the contours of the future scar. What it will look like on the face depends entirely on your imagination. Note only that the ripped scars look much more realistic and frightening.
- Let's paint the finished contours with the same lip pencil.
- On top of sketches in several layers we'll apply medical glue or collodion, which can be purchased at the drugstore.
On a side note! Instead of medical glue, you can also use regular PVA. But keep in mind that it is more difficult to work with and the effect may be short-lived. - Let the liquid dry for 5 minutes and apply transparent powder on top.
- Add volume to the scar with a liquid facial corrector.
- Gently use a thin brush with a matte pink lipstick to add color to the scar.
How to draw a scar on the arm?
Usually to finish the look also draw the scars on the wrists or on the contour of the veins. The main thing is to keep the wounds on the hands as long as possible, because during the celebration they can simply destroy water or clothing. Therefore, it is better to draw a scar on the hand, using a technique with latex. Scarred scarring that mimics cuts on the wrists can be made with ordinary chewing gum, which will be the basis for it. That such a makeup held firmly on the body, use nail glue. After applying foundation and draw the contour with reddish paint.
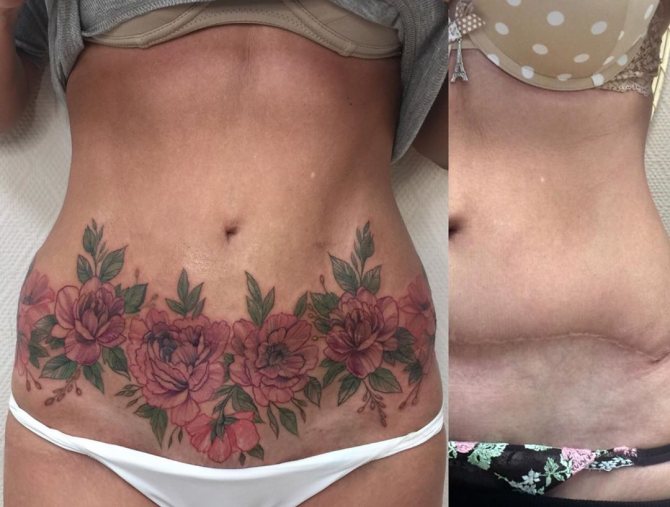
Tattoo Places
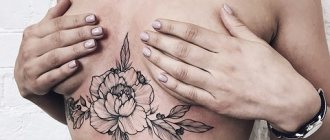
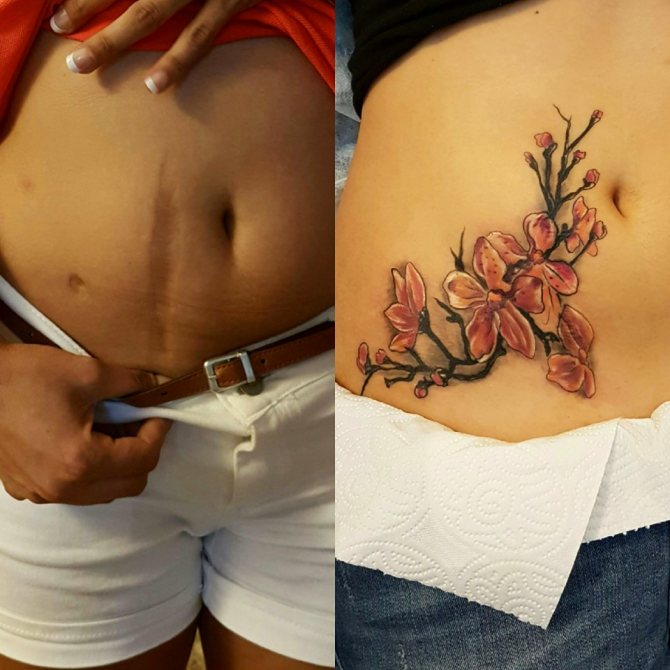
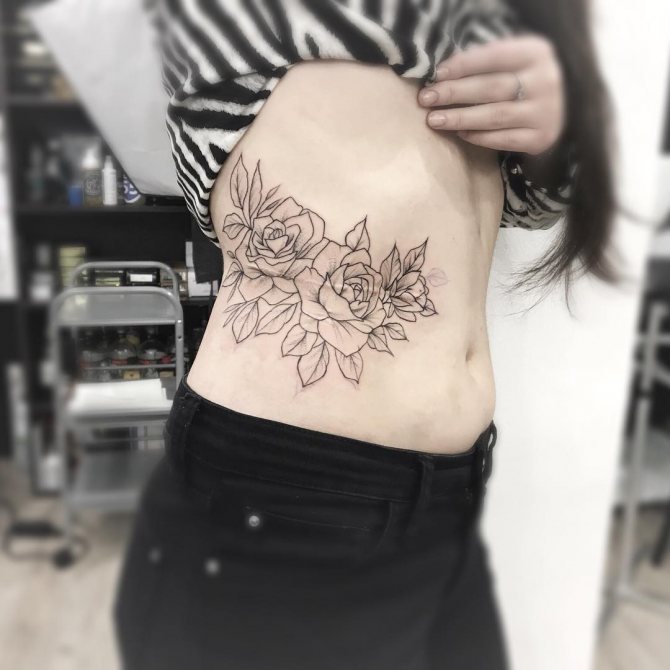
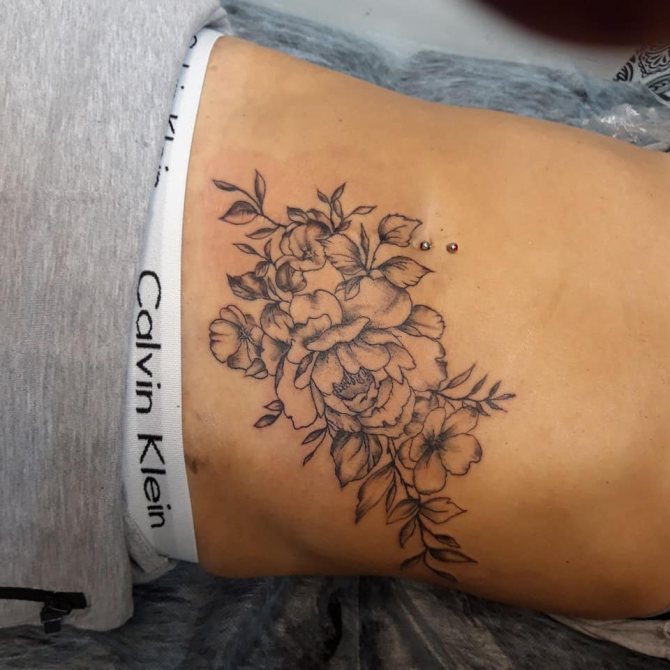
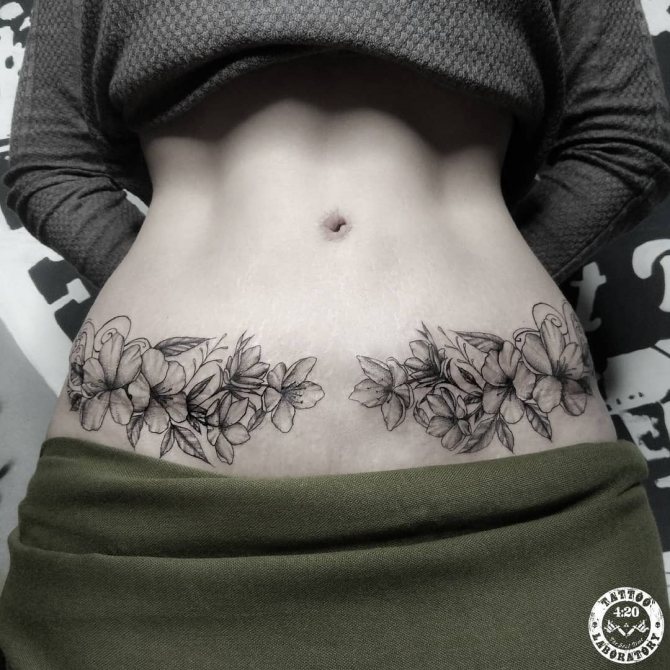
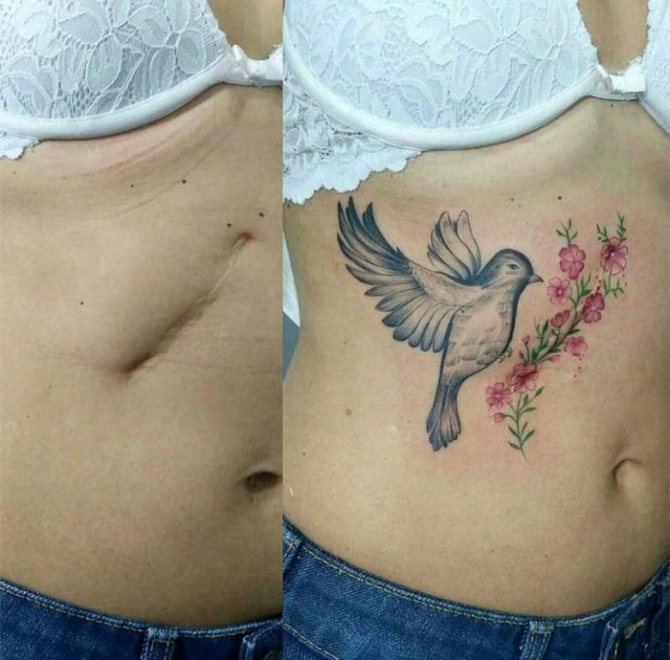
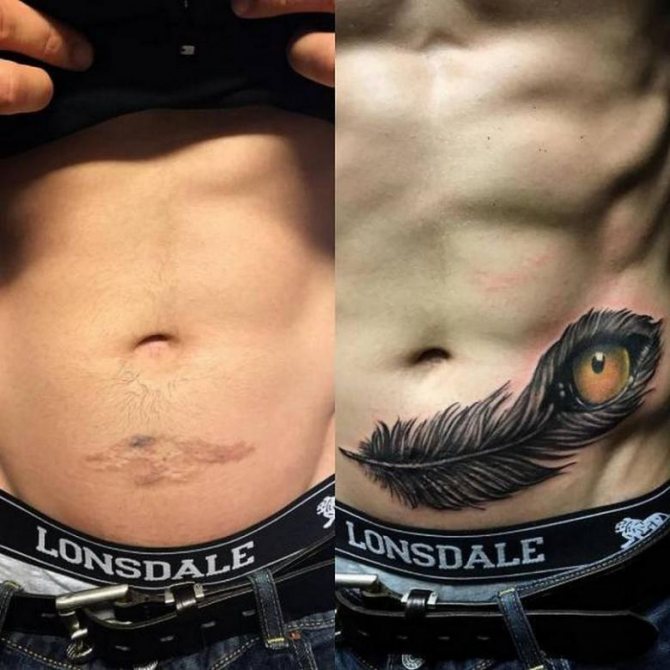
Tummy
Many girls and guys suffer from postoperative scars on the abdomen. This is where the vital organs are concentrated. Often girls after a cesarean section turn to salons for help. Just as many people with scars after an appendix.
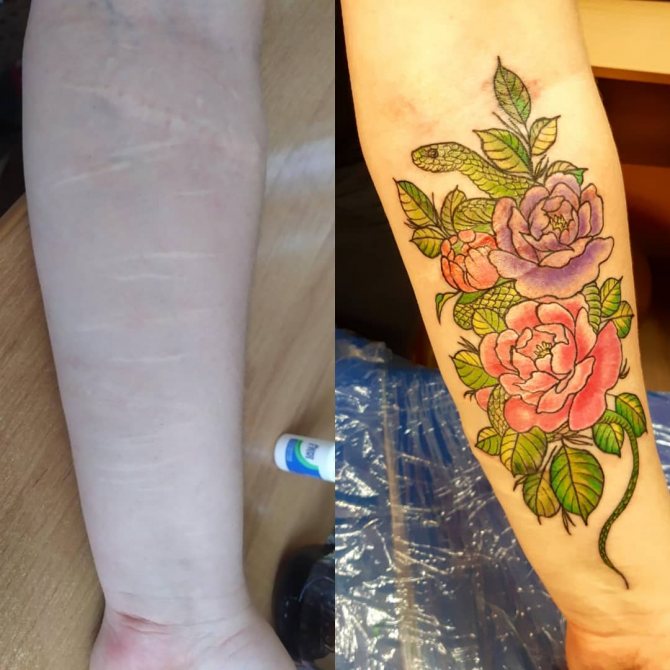
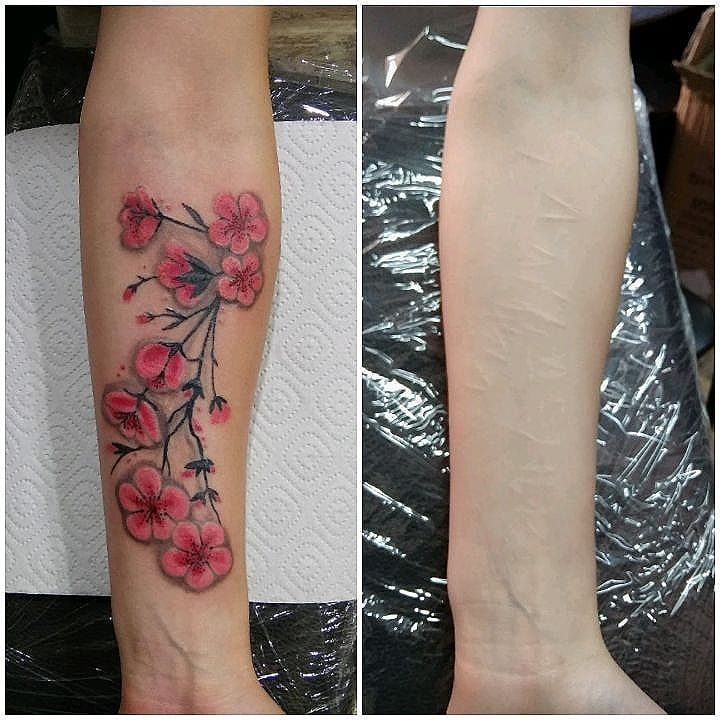
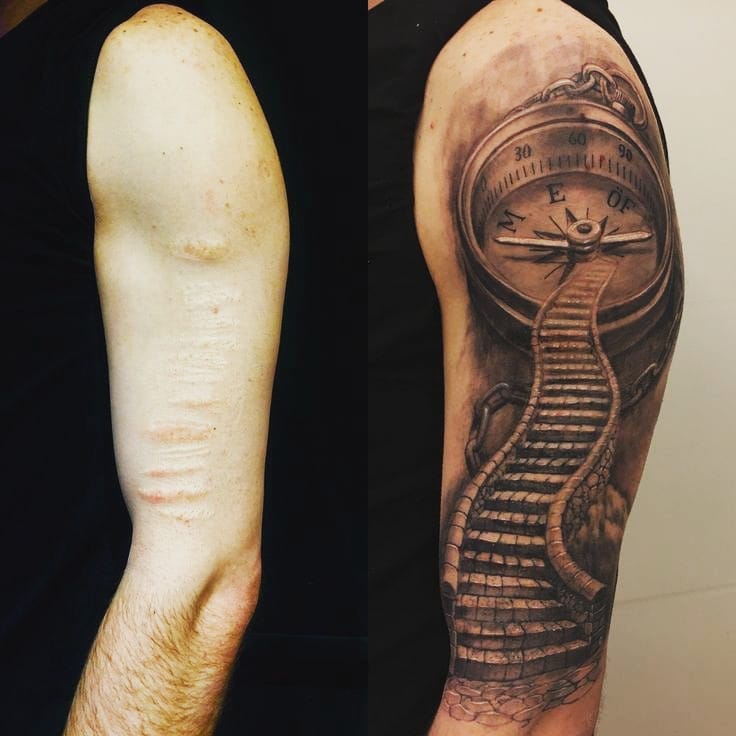
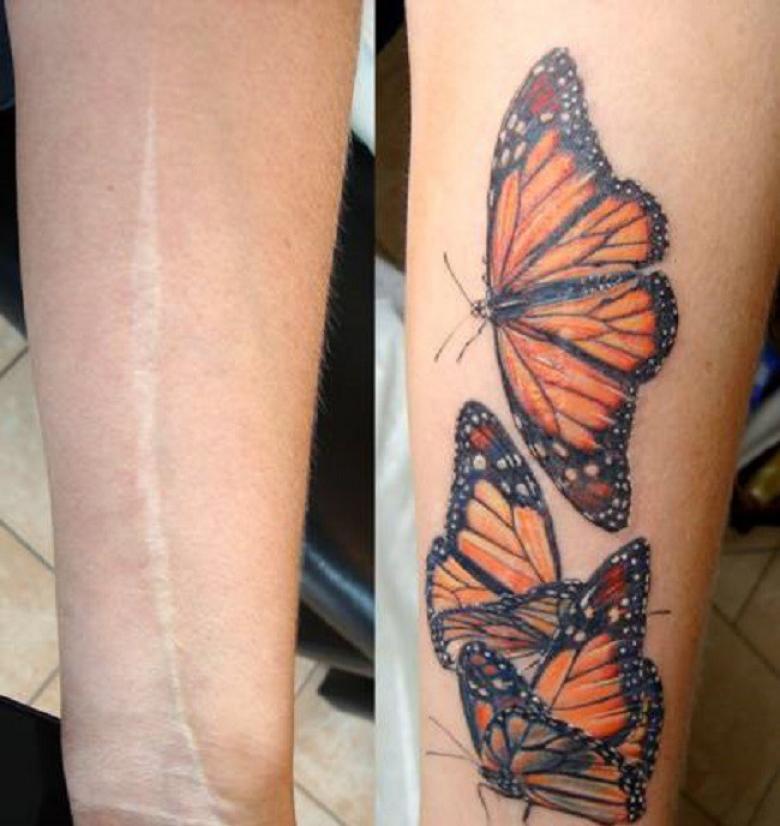
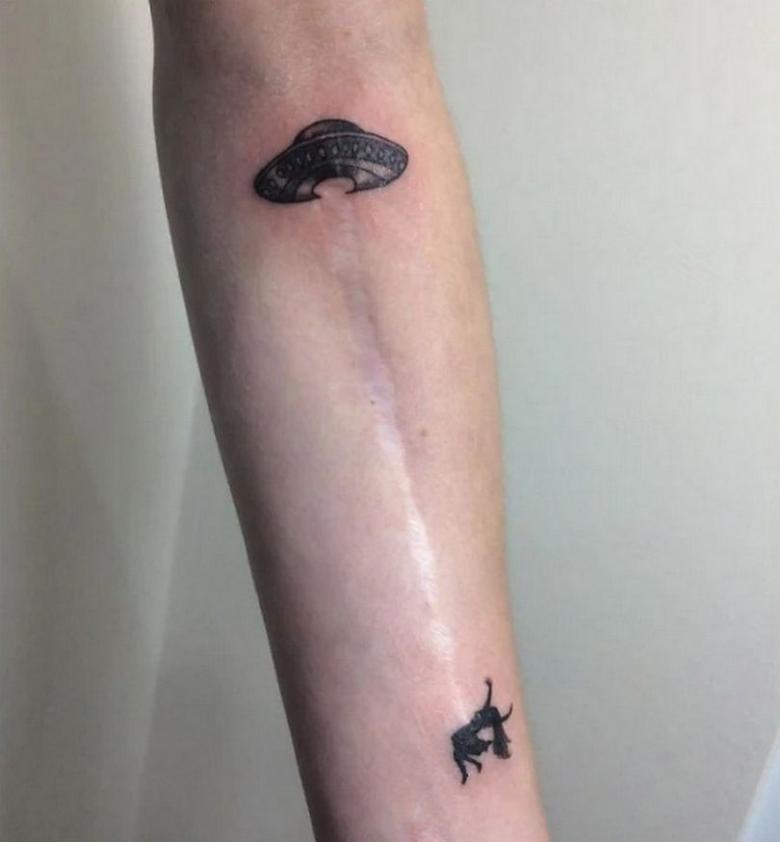
Arm
Statistics say that the most common scars are on the hands of young people. Growing up, people realize the absurdity of what was done and want to cover the scars with a tattoo.
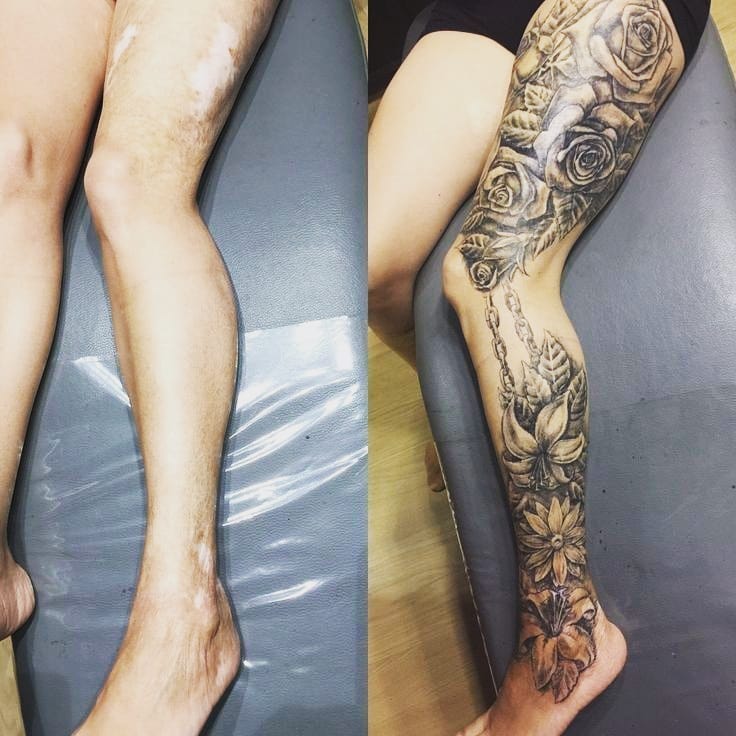
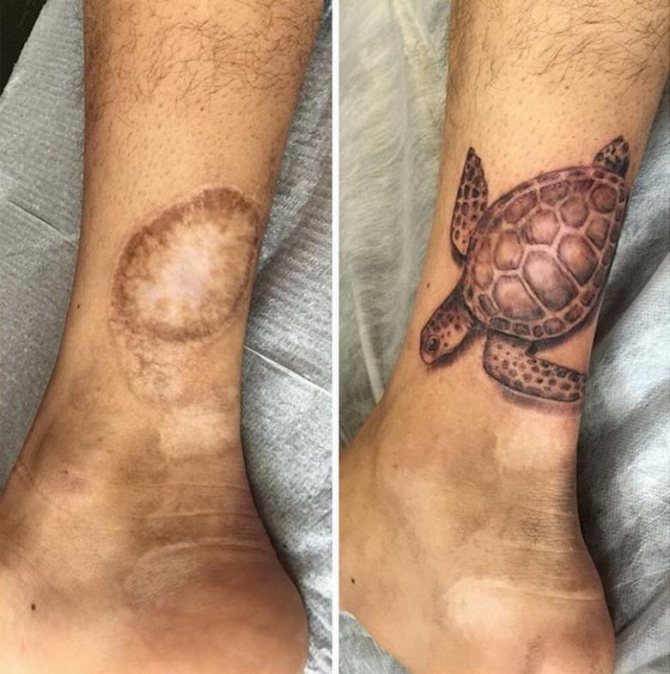
Foot
On the leg, you can score a large-scale tattoo with a story and fill it with a bright color scheme.
Face
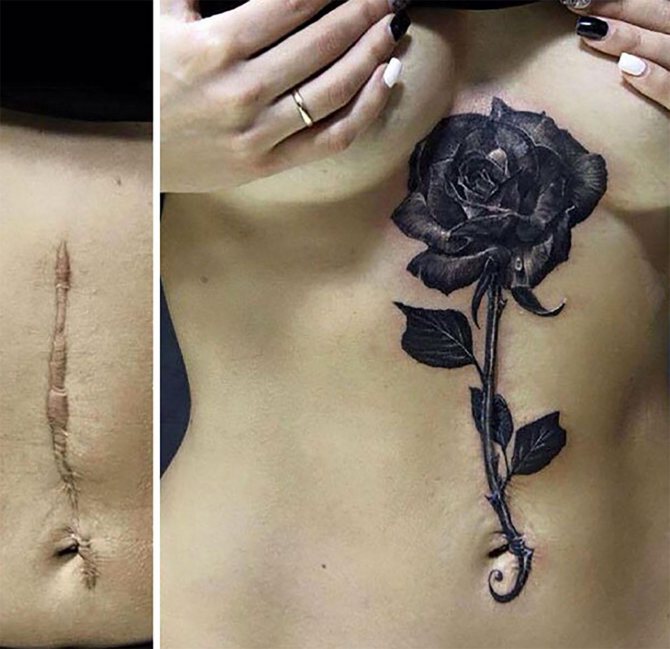
Unfortunately, the face is not immune to damage. The approach to the image, which will cover the scar, should be very delicate.
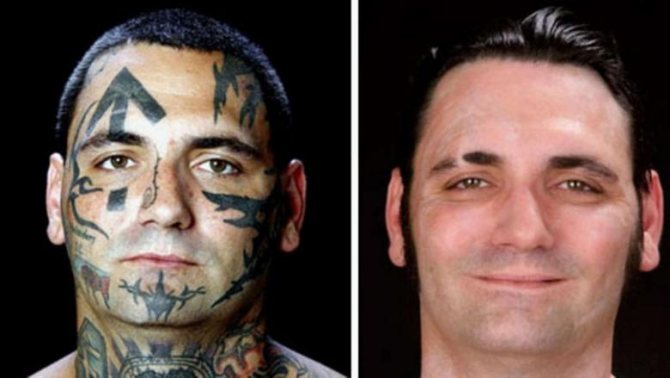
To be sure to hide the blemish on the skin, you need to communicate with the master. Order an individual sketch. A professional, based on the features of the defect and your desires, will be able to develop an image. Will make a tattoo that will not only hide the flaw, but also emphasize the beauty of the owner.
The main function of a scar tattoo is to make the defect invisible. The quality of the image depends on several factors, such as the condition of the epidermis, the time of scarring, tattoo care and the professionalism of the tattoo artist and his qualifications. Through compliance with the recommendations, you can achieve the desired effect and get rid of complexes.
Other ways
How to make a scar for a party really impressive? If you have sufficient financial resources, you can simply buy theatrical paraphernalia in a specialized store. As you know, special skin prostheses are used for this purpose in cinematography. You can also buy special wax and sculpt your own, unique and unrepeatable model of the scar. Some prefer the use of gelatin. Methods of applying makeup is a huge variety - it is possible that you may wish to invent your own personal version for a friendly party.
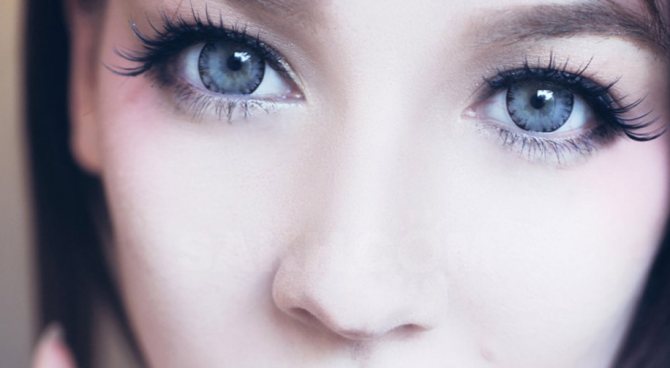
Contact lens fitting process
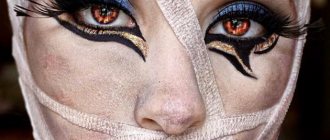
Selection by color. The first thing a doctor begins the process of fitting aesthetic lenses with is determining the natural color of the iris. For this purpose, a thorough examination is performed in the ophthalmologist's office. The walls in the room should be painted a neutral gray color. The eyes are examined in two states: in natural daylight and bright artificial light. Especially black or white capes are used on the clothes, so that their color does not interfere with the identification of the true iris shade.
For optimum selection of the model is also a good help is a special set of colored lenses. It contains samples of different colors and tones. Placing them on the patient's eye the specialist defines the degree of color darkening which corresponds more to the second, healthy eye.
Selection according to vision parameters. When lenses are made, it is also taken into account whether or not the patient has a refractive error. It is possible to make aesthetic lenses that can be used to correct vision. In the prescription for such lenses the doctor indicates the base curvature, diameter, color, pupil diameter (at different degrees of light), and the optic power of the lens.
Sometimes it happens that the existing imperfection is quite large. In such cases it is necessary to wear scleral lenses which can cover the whole visible part of the protein. They do not touch the cornea and can be worn for several days in a row. An ophthalmologist performs an optical coherence tomography, calculating all the necessary parameters of the eye, and then sends the data to an optics laboratory. One week later, the contact lenses for aesthetic eye prosthetics will be ready.
When ordering this type of lens, accurate determination of individual eye parameters is required. Aesthetic lenses are expensive, and even if they don't fit, a person will still have to pay. It is good to be able to try on a so-called transparent "blank" lens without a pattern beforehand, to see how it fits on the cornea and how comfortable it is for the patient. Then it is sent to the laboratory to be molded. When ordering the lens again, the price will be cheaper, since no more color and size measurements will be needed.
Large scar with blood
If you want to make a big scar, burn or festering wound, especially appropriate for a zombie image, you will need, in addition to eyelash glue, foundation, powder or beige eyeshadow, blush and makeup in different colors (red, white, black, shades of red), plain white tissues (toilet paper will also do, if it is not thick and white).
Sometimes it is advised to add glutinous boiled oatmeal or lumps of gelatin to make it more authentic. Separate the layers of tissue so that they are very thin, and tear them into small pieces. These will be scraps of flesh that have fallen away from your artificial wound. Glue them to your face with eyelash glue, spreading them out a little chaotically so that they overlap each other and are floppy.
On the side, so that you don't see the transition to the skin, apply makeup and foundation, and then paint on top with blush and shadow. With the makeup, make a splash of blood near the wound. When the design dries, it will look very intimidating. If you want to smear your scars with blood, it's best to choose store-bought prop blood for this purpose.
Ketchup does not dry well and is very runny; red paint, if it is not makeup, looks pale and unnatural. A thick syrup tinted with food coloring can be boiled and applied (but remember to make it more of a burgundy color); it will feel on the skin, though it looks good, and will tighten, especially in the first hours.
Do not use real blood for makeup! The first thing to do is to make up a person's face, and the second thing is to use it. First of all, as funny as it is, real blood is completely different from what we are used to in the movies and games, and that is exactly the resemblance that all Halloween trick-or-treaters are looking for. Secondly, raw meat or parts of it that get on your skin can be very bad for your skin and your health in general, especially if there are little scratches on the skin that we usually do not notice.