In this article we will tell you how to make a tattoo machine with your own hands, using improvised materials. This is an easy and convenient thing, which people who are fond of tattoos, dozens of them. The construction of a home-made tattoo-machine is simple, we will tell you nothing new, but we will describe the manufacturing process in details. We will tell you about some subtleties you might not know about, and of course we will give several step-by-step instructions.
How to make a tattoo-machine
Searching of necessary details
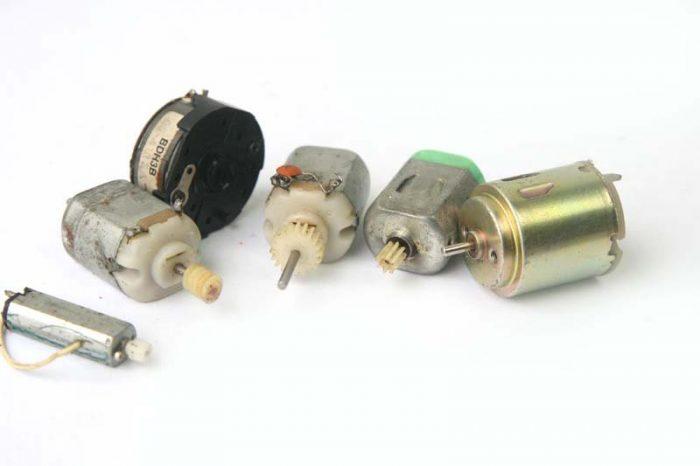
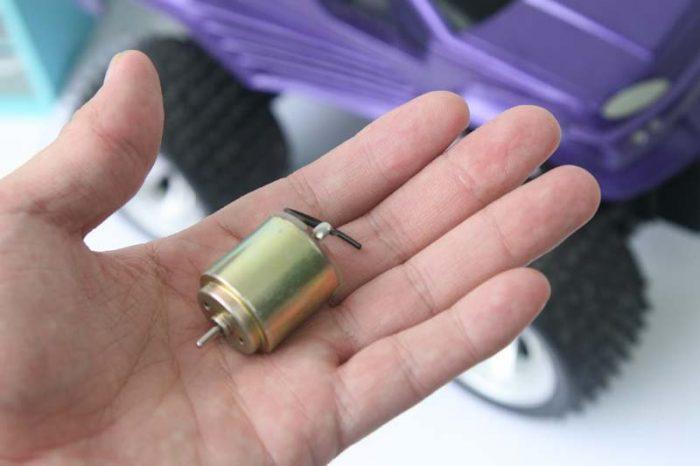
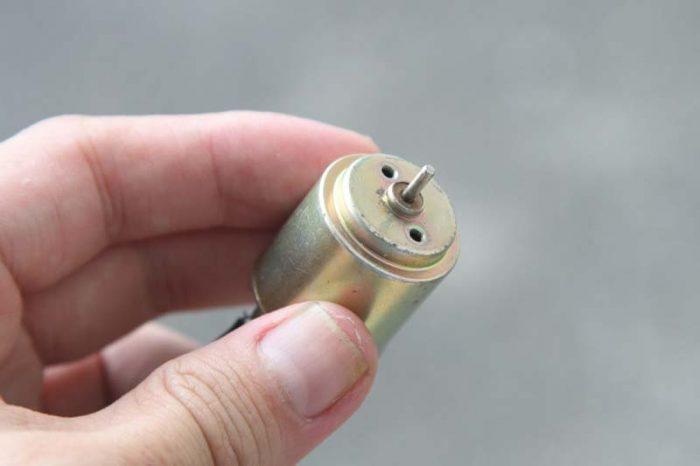
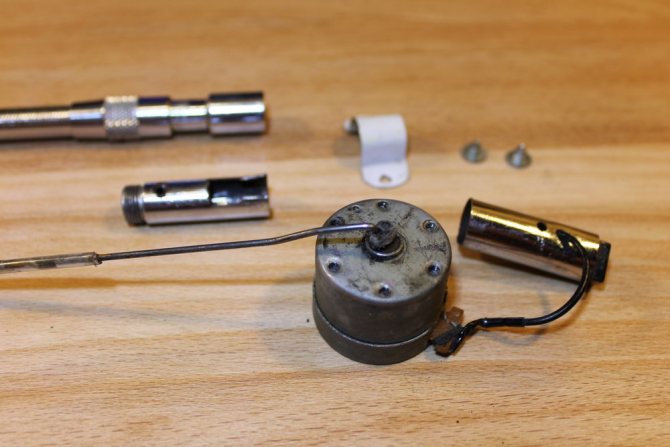
First of all, we need an electric motor designed for at least 12 volts (preferably 18 volts). Usually there is a small gear on the motor shaft. Take a small button with four holes and glue it to the gear with super glue. Be careful not to glue the holes in the button, they must remain open to secure the needle. Set the motor with the glued button aside to let the glue dry.
You can try using a motor from a VCR or toy car, but they are usually rated at 3~5 volts, which won't be enough for a homemade tattoo machine.
Needle file
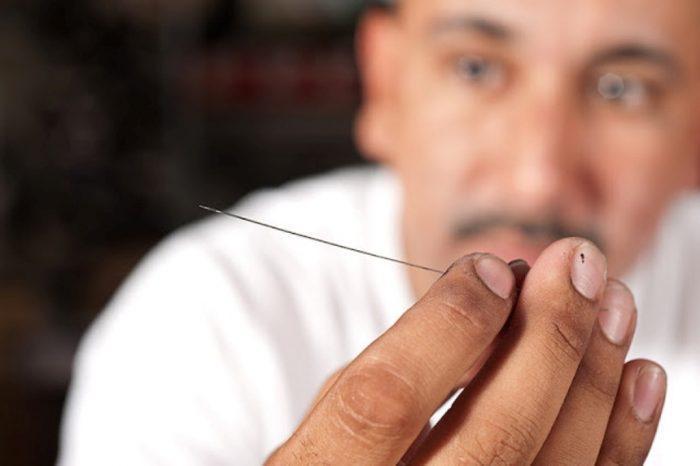
We will need a nail file to sharpen the tip of the string, which will serve us as a needle, to prick the tattoo.
After you have given your future needle a good enough point, you must remove the microscopic burrs left by the sharpening file. Sulfur from a matchbox is good for removing microburrs.
Then shorten the gel pen, with a gel ampoule, so that you were comfortable using a tattoo machine.
Adjust the size of the needle so that it is fixed to the electric motor, came out of the rod of the gel ampoule at about 3.5 - 4 mm.
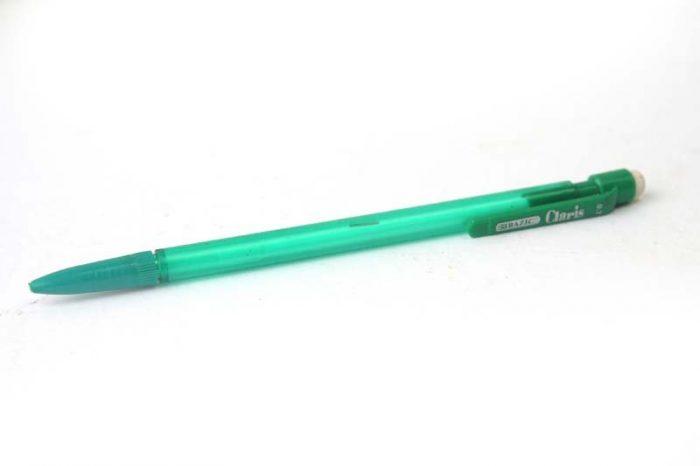
Find a suitable pen or pencil.
It will serve two functions at the same time:
- serve as the body for the tattoo machine;
- The rod inside the pen will guide the needle.
An ordinary mechanical pencil will be great for this purpose, regardless of whether it is plastic or metal.
You can use a regular Bic-type ballpoint pen. Blow out the rod from the paste, take out the ball and, if necessary, slightly widen the hole to allow the needle to pass freely through it.

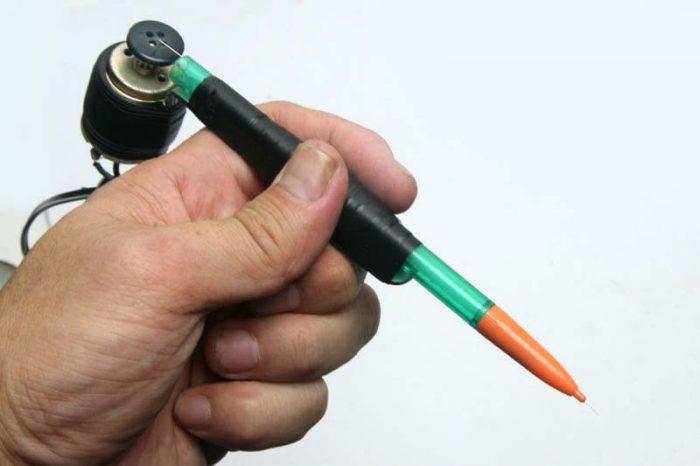
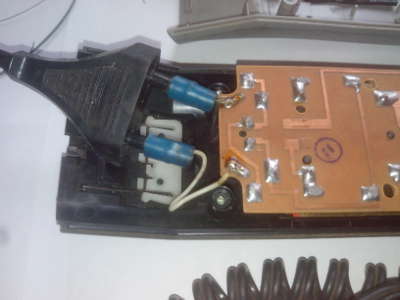
Electric shaver;
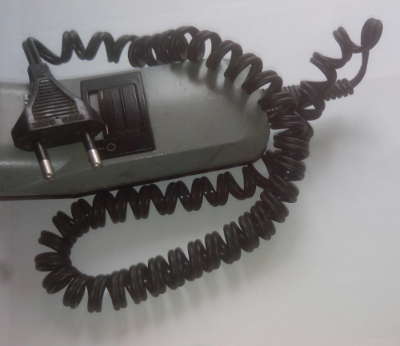
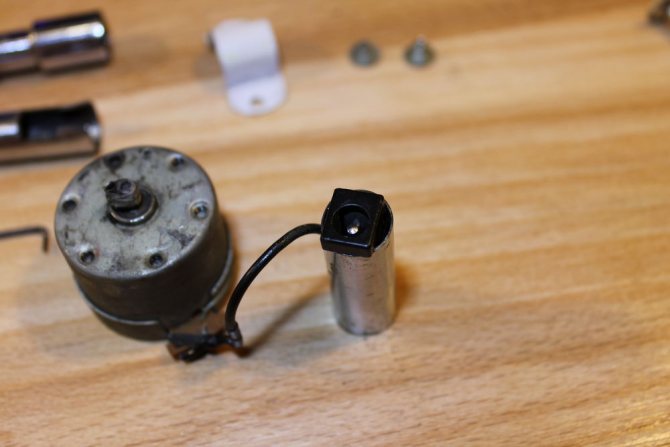
Remove the electric motor from the electric shaver. Where was the electric motor connect the wire convenient for you length, it will serve us as a "clipcord" - as in the professional factory tattoo machines.
Needle for tattoo machine
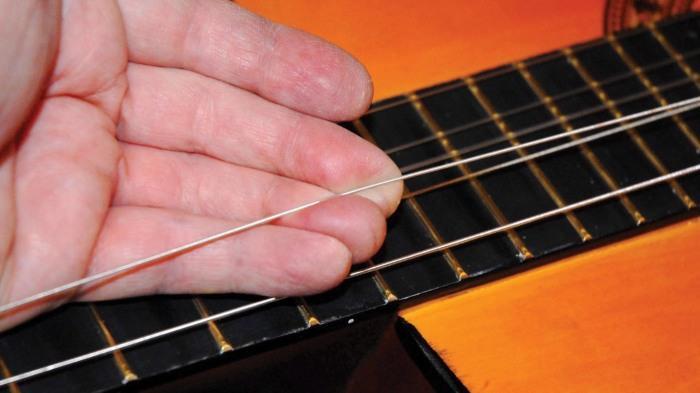
A metal guitar wire will be used as a needle for a homemade tattoo machine. Cut off a piece of string so that it is a couple of centimeters longer than the length of the previously made tube.
The needle should reach from the center of the motor to the tip of the tube after assembly (see next photos).
For disinfection - boil the needle for ten minutes. You can prepare several needles in advance. In that case, store them in a sterile jar.

Content
- Types of tattoo needles - design Classic tattoo needles
- Tattoo cartridges - the new wave
- Tattoo pins with long sharpening
- Round solder tattoo needles Round Liner tattoo needles, or RL
- Flat Shader, or FS tattoo pins
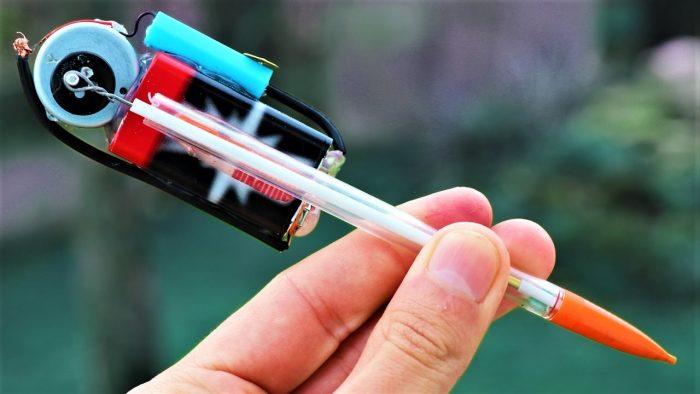
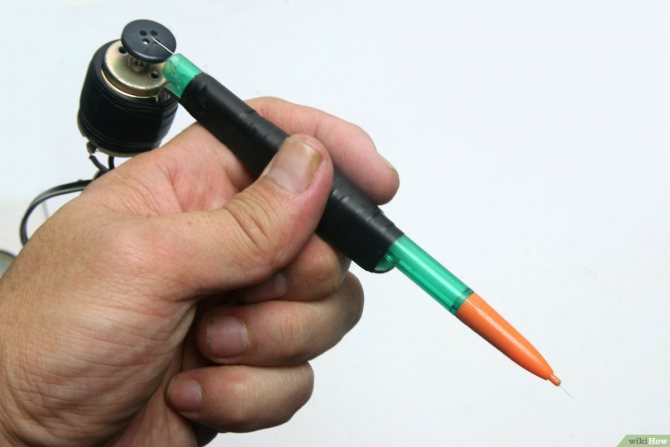
assembling the tattoo machine
Put the ballpoint pen and the staple together.
In the photo, you can see how you need to position the staple - the long part along the handle, with the end of the ballpoint pen and the bending place must be at the same level. Secure the parts together with duct tape. The connection must be strong to prevent wiggling and loosening.
In the same way, fasten the motor with the button glued to it.
Pass a guitar string through a ballpoint pen. After that, bend its end into a "U" shape and insert it into one of the holes in the button. Turning the motor, you will see that the needle of the tattoo machine moves up and down. If necessary, cut off the extra length from the needle.
Connect the power source.
You can use any charger that is rated for at least the same voltage as the motor you are using. You can install a switch or button for more convenience.
After you have finished working with the tattoo machine - throw away the needle and the tube (pencil or pen).
Do not reuse them under any circumstances! Failure to do so may result in the possibility of contracting diseases such as hepatitis and HIV.
Note:
This article is for informational purposes only!
To perform a tattoo on your body is not necessary to buy an expensive machine or seek help in a professional tattoo parlor. This equipment can be done at home with not much effort. If you look back in history, you can see that the first device for applying tattoos was made by Samuel O'Reilly, who took elements from the equipment for copying documents to reproduce the reciprocating motion of an electric typewriter.
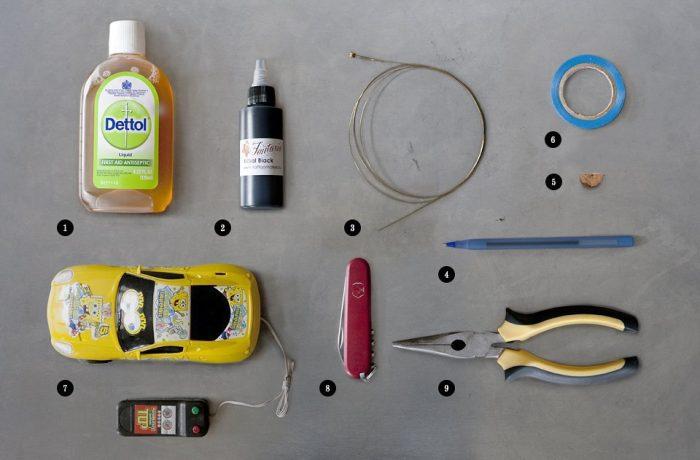
Initially it is necessary to prepare all the necessary parts that will make up the future product. To do this you will need
:
- A helium or ballpoint pen;
- The thinnest string with a length of 15 centimeters;
- A motor and a hub, which can be removed from a tape recorder or purchased at a radio market;
- a small plastic tube.
For the progressive motion of the needle, you need to find a pinion, which can be taken from the same tape recorder. Its diameter must match the size of the motor shaft. This is to make sure that the pinion sits tightly on the shaft and can't scroll. The final component of the product is a power source that will produce a voltage of 3-5V. You can use an ordinary power supply for this.
Before you can make a homemade tattoo machine, you need to squeeze a ball out of the paste. The paste itself will serve as a conductor for the needle. We put the string through the rod of paste. In the event that the string cannot pass through the small hole of the rod, you can cut off the rounded part in the place where the ball used to be located. You can also sharpen the string slightly, which will make it easier to pass through the pen. Before doing this, you need to make sure that the size of the string matches the length of the rod.
Next, we take a plastic tube and on a small fire bend it so as to obtain an angle of 90 degrees. On one side of the tube we attach the motor, and on the opposite side - the handle. The fixation can be carried out with the help of duct tape. When this step is complete, it is necessary to fix the string on the bushing
. To do this, a loop should be made at the end of the string, which should correspond to the diameter of the bushing.
The loop should be made so that it is not too tight, but, at the same time, does not hang loose on the bushing. Use a soldering machine to solder the sleeve to the pinion. It is necessary to maintain the correct distance from the bushing to the center of the shaft. This directly affects the depth of entry into the skin of the needle.
It should also be taken into account that the smaller the gear is selected and the closer the sleeve is to the center, the more strokes will be applied. By moving the knob toward the motor, you can adjust the speed of the strokes. If you want to properly make a homemade tattoo machine, the assembly video will serve as a good visual aid.
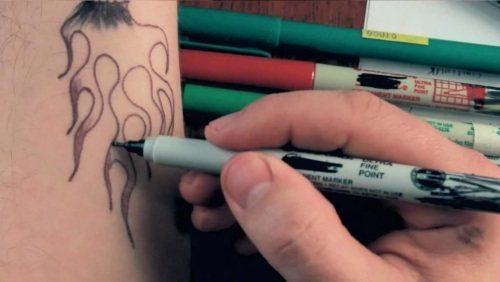
To check the resulting product in the work, you need to initially prepare a solution based on black ink. To get a more accurate drawing, the sketch of the tattoo is first applied to the skin with an ordinary pen. During the application of the tattoo, there is no need to rush to press the needle to the body so that it can banish enough ink. If on the body after the machine remains a smooth black cut, the machine is working properly. Be sure to treat all parts of the typewriter with alcohol before tattooing, so as not to get under the skin infection.
Self-made tattoo machine, of course, significantly reduces the financial cost. However, it is worth taking into account the disadvantages of such a decision. Making a tattoo by yourself with such a machine is not very convenient. The process itself can be accompanied by unpleasant sensations. This in turn can affect the quality of the picture.
Where can I get a tattoo at home?
Let's consider in more detail where it is fashionable to impose a tattoo. There are actually a huge number of options. They need to be sorted out. It is very popular and fashionable to do a tattoo on the arm, wrist, neck, back and shoulders. Very often we get tattoos where it is very popular and do not think about how beautiful it is. Today, tattoos are often done in intimate places.
Where can I get tattoos at home?
There are so many, . This place has a huge pain flaw, thus, be prepared to endure it. Also, this option is not much liked precisely because it is characterized by the fact that no one will see the tattoo. It will be only for you and your youngster. Basically, the signatures on the arm tattooing is highlighted. So few people can dare to do it and go for it.
So, just pick a tattoo and decide on a location. It may also depend on what size the tattoo will be, what pattern and design it will have. If you can pick up a tattoo, it will look aesthetically pleasing and beautiful everywhere.
So just prepare yourself to look really good. Be sure to prepare yourself to be able to pick your own tattoo. Today, tattoos are becoming a very popular art form that is constantly entering and changing our lives.
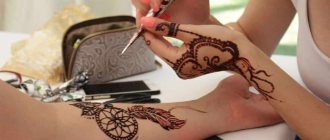
Getting a long lasting henna tattoo
Today, the place to get a tattoo is getting more and more interesting and interesting. We find it necessary to consider, How to do a henna tattoo at home
. There are a huge number of them. Thus, it is simply necessary to consider all their options and pick yourself the necessary option.
Let's consider in more detail, what are the options for tattooing in the intimate areas. First of all, there are so many So, how to do a tattoo at home video
. They will help you to choose the right tattoo, teach you how to make a sketch, most importantly do not let you make a mistake. With the help of videos you will even be able to score a tattoo at home.
Video of tattoos done at home
There will be a recipe of how you can compose a tattoo. You can find the video online. There are so many variations of how tattoos should be inked. First of all, there is a theoretical part of how to properly tattoo. There are other videos on How to make a tattoo at home recipe
And pictures. They show the result of what you then get and what it can lead to.
It is very important to choose the right tattoo and place for it, that way you will do everything correctly, you will not have any problems and disagreements. Videos and photos will help to see what you will have in the end. You will see what kind of drawing you have and what to do with it. The video will teach you how to do tattoos with henna, permanent tattoos with a tattoo machine and so on.
Just watch the video and it will tell you everything you need to know about tattoos. Today, tattoos are constantly entering our lives. They change it and develop it. So you need to learn all the options and varieties of tattoos. It is not difficult. They are what we are going to look at in our article. It is very important to know about all tattoos and their styles. This way, you can just pick the perfect one for yourself.
This instruction will tell you how to make a tattoo machine at home. In order to make a tattoo, you can not go to an expensive master or buy special equipment.
With not so much effort, it is possible to make the necessary equipment yourself.
To work you will need to find the following parts at home:
- An electric motor.
A child's toy motor with a voltage of at least 12 volts will do. A motor with a lower voltage is not necessary - it will be too weak for this purpose. - Power supply.
Any power supply with at least 12 volts will do. - A gel pen or a mechanical pencil (plastic or metal).
It will serve as the body of the device, as well as guide the needle inside the machine. - Bracket.
It will be used to attach the motor to the gel pen. The staple can be made from metal, for example from an ordinary tablespoon, removing the part that is used for eating. Instead of a spoon, you can use a toothbrush by heating the plastic handle with a lighter and bending it into a "G" (an example is shown in the picture). - Insulating tape.
- Needle.
An ordinary guitar string is used as the needle (it is better to buy a new string in a specialty store). Choose the thinnest string. - A button with 4 holes.
The most popular materials
Tattoos of Elena Letuchaya
This article describes how to make the simplest tattoo machine with your own hands
. There are a lot of similar articles on the Internet, but this one is even too detailed. Most importantly - it describes all the bugs I had during the process (and there were quite a few).
Lyrics
In this article I bring up the ancient art of tattooing. This artisanal method beat their first army "partaks" our friends, fathers and grandfathers. To those who considers that the tattoo made in such conditions - it is unsanitary and ugly, I advise to look. here (yes-yes you are right, there are admirers and such style of tattoo, of which I am).
To all those who want to repeat:
Let's break this down in order:1.
The motor may not necessarily be a 9V, but this is the best option. You can buy the motor at a radio market, I for example got it from an old tape recorder.
2.
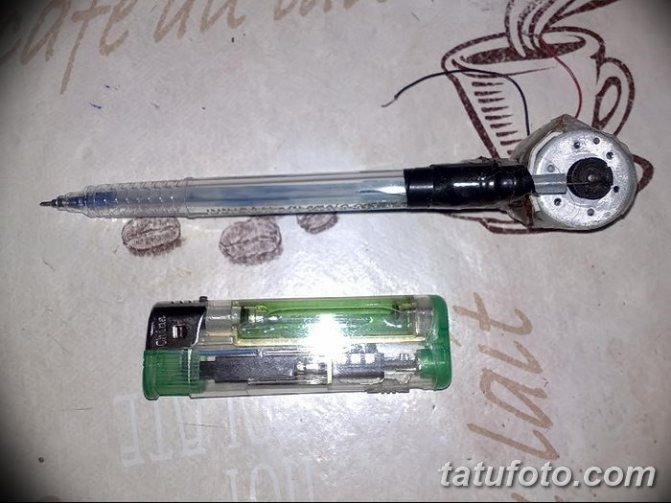
The pen is the most important element of our typewriter and it has to meet some requirements. I've tried many kinds of pens in order to
of making a rotary tattoo machine
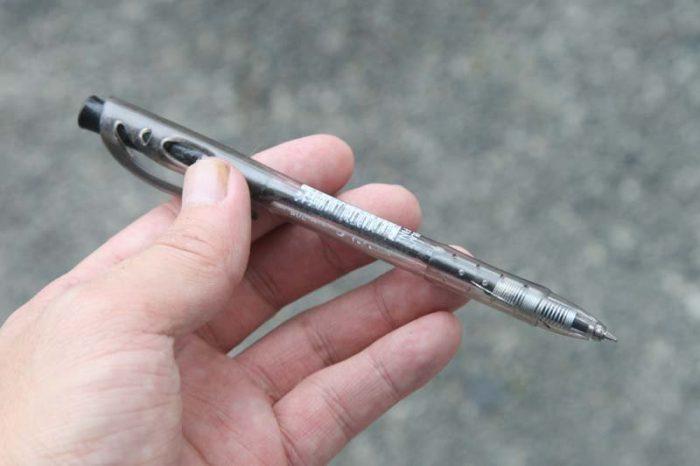
and I finally found the best one. The pen has to be a capillary pen, now a little more detail...
This is what a capillary pen looks like, as you have noticed it has a metal tip through which the string goes perfectly, which means this is what we need! The price of such a "tool" is not as high as you might think, I, for example, bought such a pen for 32 rubles
.
Take any power adapter for 9 volts 1 amp (you can use a transformer from a game console like SEGA or the like) and a nail. Connect the transformer into the socket and the plus from the transformer screwed on the string, and the minus on the nail. Then put the nail and the string in the water, but make sure they do not touch each other. We do not immerse the string in water completely, but only 2 to 3 millimeters. In the aftermath of the chemical reaction, the metal of the string will break down and sharpen. The reaction must be continued for 15 minutes, then the string must be washed and as a result we get a sharper stake for the tattooing machine.
You can use a regular Bic type ballpoint pen. Blow the rod from the paste, take out the ball and, if necessary, slightly widen the hole, so that the needle can pass freely through it.
Introduction to the professions
Explaining to the child how to make a car from cardboard with their own hands, parents or kindergarten teachers can easily in the form of a game introduce the baby to different professions, develop his research interest, accustom him to work, bring up attentiveness and assiduity.
For lessons with your child, it is best to prepare in advance, so his interest is not lost in the long process of preparation. Master classes on how to make a car out of a box will also allow an adult to better navigate in the world of cars.
Together with children, you can make models of any purpose, explaining the subtleties of any profession at the same time. For older children, it is necessary to find more complicated options. And for kids, it is better to choose simpler designs, so that the child does not get tired and cold to the creative process. Having studied the details of the upcoming assembly, you can prepare the necessary items without a child, and with him only to collect the model.
Homemade toys children are amused with great pleasure. Making a fire engine with their own hands out of a box can go smoothly into a game about firefighters. Classes devoted to an introduction to any profession can be held in the technique of application. Thus, the device of the fire engine and how to train rescuers, kids can be told while they glue the details on a sheet of paper.
Ideas for joint creativity can be selected a huge number. There are no limits to their imagination. Girls can be offered to make a washing machine for dolls or equip a toy kitchen. Such a craft is guaranteed to be remembered by the child, and the toy, made with their own hands, for a long time will bring joy to the baby.
You can arrange a doll house for Barbie or a large garage for cars, pasting it with colored paper or paint. Homemade toys develop aesthetic taste in children, and the creative process is able to stretch more than one day. After all, doll house can be a long time to finish and beautify. For example, to think up and make furniture for the dolls of cardboard, add curtains for the windows, build a library of tiny books.
Of course, you can also use store-bought toys to organize a story game, but no purchase will not replace the joy of creating a toy with your own hands.
Staple
Before the actual application procedure two days before it is best to clean the area of the skin where the tattoo will be located, using a scrub. This will allow you to clean the skin and keep your design visible for quite a long time. Also, experienced masters recommend removing hair from the surface of the skin, this will help to make the picture more accurately and evenly.
How to make a tattoo at home?
Can take quite a long time. Therefore, it will be better if you leave a few hours in reserve.henna tattoos at home
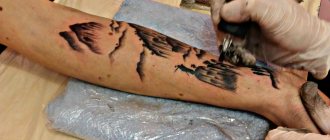
The application process itself
Rubber pad
Contact screw
How do I get a tattoo at home?
Let's look at where you can get a tattoo, and more importantly how you can do it. First, you will be able to get the necessary services in a salon. There you will be given everything you need, what you want, and most importantly, how you want it.
- There are masters there who are always ready to help and provide the necessary services. So the salon is the first option.
- The second option is at home, here already characterized by the fact that you can get services at someone's home. This is not always legal.
And there is a variant, when very often start to put tattoos on their own. That is, you will simply be able to apply the necessary object to yourself. All you need for this is a machine and the necessary ink. There is absolutely nothing complicated here. The only downside is the complexity. It is very difficult to put a tattoo on yourself. It is practically impossible.
Let's consider in more detail how it is necessary to make a sketch, if the rules or something else. First, it is necessary to make a sketch of the drawing. Naturally, first it is necessary to pick up the drawing itself, then come up with its color, size and background.
How to prepare a sketch at home and start hammering
This is how you can make sketches. It is best to draw the part of the body where the tattoo will be, then it is necessary to draw a drawing there. Next, we color it with the colors in which the tattoo will be made. It has to fully match the size and shape. Next, the sketch that you have must be made with the background that you need, the colors.
The sketch is carried to the master, and he makes the tattoo. Often you can make a sketch in the salon itself. There provide these services. It is possible to do and How to make a tattoo at home with a needle
sketches. The important thing is that you can ask for help from a friend, who will definitely help you and tell you what to do.
You can download from the Internet already prepared sketch that you like. Finding a sketch is not difficult. You will be able to prepare it yourself and not rely on anyone in this matter. You will be able to do, for example . This is very convenient. You will be sure that you do everything correctly.
What about the paint?
In the preparation of tattoo ink at home, it should be noted that it is better not to prepare it yourself. It is possible to splurge on a special ink. It will be safer than using pen gel or green. You know, such materials are not very good for such an event.
No matter what kind of paint you end up choosing. You should immerse the tip of the needle of the switched on machine in it for ten seconds, and then inject it under the skin. This principle is used throughout the entire workflow.
Plug in the power source.
You can use any charger that is rated for a voltage no lower than the electric motor you are using. You can install a switch or button for more convenience.
After you have finished working with the tattoo machine - throw away the needle and the tube (pencil or pen).
If these instructions are ignored, you risk getting an infection in the wounds and you won't get a beautiful tattoo. The skin must also be treated with special antiseptics before applying the paint.
With a permanent marker "Sharpie".
A temporary drawing applied with the permanent marker "Sharpie" will last about a month. You can make a drawing in any color. But black looks the most believable.
The marker has a fairly thick rod, so it is better to choose an uncomplicated drawing. The image is applied by hand or through a stencil.
First it is necessary to pass a preliminary test for an allergic reaction. To do this, a small strip is applied to the skin with a marker. If in an hour the skin is not red and no other undesirable reactions appeared, you can apply the tattoo.
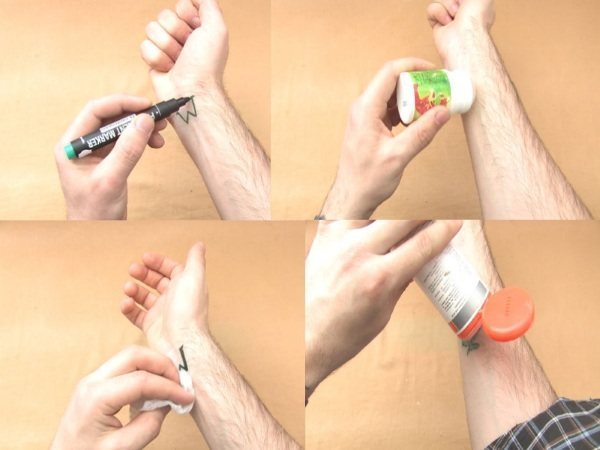
On the prepared skin, the image is applied and generously dusted with talcum powder. The rest of the powder is blown off the skin. To fix it, spray the tattoo with a varnish of strong fixation and dry the image. It is not necessary to pour a lot of varnish, it will dry out the skin. Excess nail polish is gently washed off with a cotton swab dipped in water.
Instructions
- Unfold the gel pen and remove the paint from it. Using a needle, "forge" the ball out of the metal rod. Use a file to cut off the tip so that the string can be inserted and move freely back and forth.
- Halve the tube handle for ease of use and string economy. Cut off the tube that had the paint in it, leaving a piece as big as the floor of the previous tube. This is done to limit the vibration of the string while working.
- To attach a motor to the tube, you need to take a metal holder from the pen and tape a sketch to the motor. With a red-hot needle for the size of the string make a small hole in the roller of the motor (just do not do it in the center).
- Measure the necessary length of the string. Use pliers to tighten it, and then use a lighter to heat it where the future sharp tip should be. When it starts to heat up, it will get thinner and break. Use a knife sharpening stone to sharpen the string. Insert the string so that the tip looks out of the rod by 4 millimeters, and the other end of the string bend the letter G and insert it into the hole of the roll. Twist the wires with micromotor wires and connect to the power supply.
At home to make your own tattoo machine, if you have all the necessary components can be for 15-25 minutes. Before you start to work with it, you should adjust, so that the string was stretched, and not beaten anywhere. It is also necessary to take a power supply with adjustable power, in order to increase or decrease the speed of the instrument.
Preparing
Before you make a tattoo machine, you need to prepare all the parts to assemble. The first thing to do is the handle. Disassemble it, clean the ink from the rod, and rinse it under running water. Make sure that the rod is clean. Then you have to "knock" the ball out of the rod. Put the rod back in the pen, and then move the pen around on sandpaper or a block to grind the ball away. Do this until you get rid of the ball completely, but make sure that the hole on the rod is not too big. It should be so that the string goes freely through the hole.
Now take a pen (the frame itself, not the rod) and cut it in half. The upper part is no longer needed. Do the same procedure with the rod of the handle.
Now take a cork from wine, cut off a small piece from it in the form of a circle.
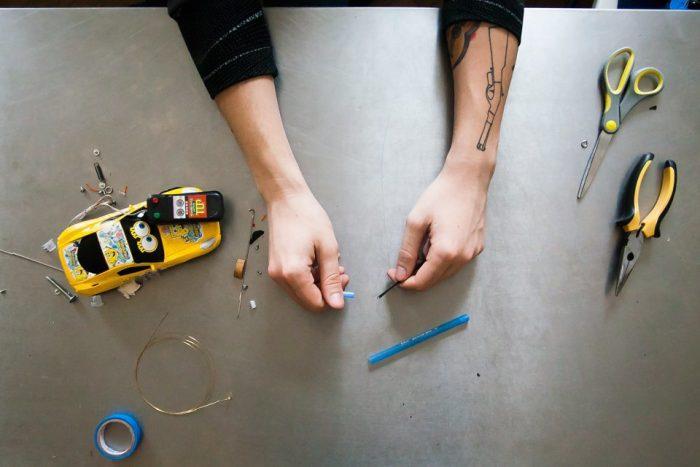
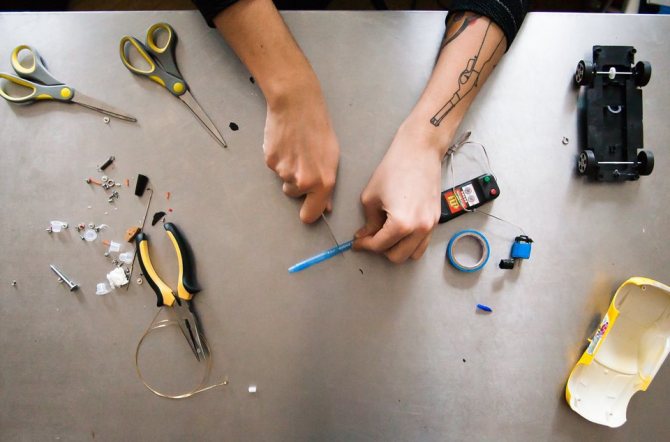
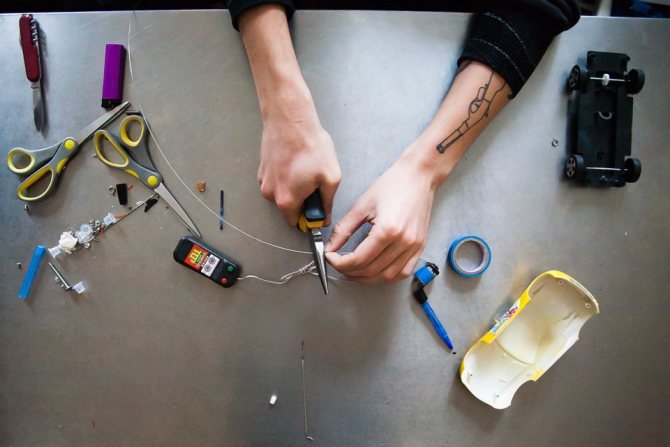
It is also necessary to take out the motor. Take your time, very carefully, so as not to damage the mini-motor, disassemble the toy. Take care not to damage the connecting wires between the motor and the remote car. You will need everything except the body. When everything is prepared, proceed to assembly.
How to assemble a domestic model of a radio-controlled car
To assemble this model, we will need the following components:
- A simple model of a car of any manufacture;
- VAZO parts for opening doors, 12-volt battery;
- Equipment for the organization of the radio control;
- Sturdy batteries with chargers;
- Radiator;
- Electronic measuring equipment;
- Small soldering iron with solder;
- Locksmithing implements;
- A piece of rubber to reinforce the bumper.
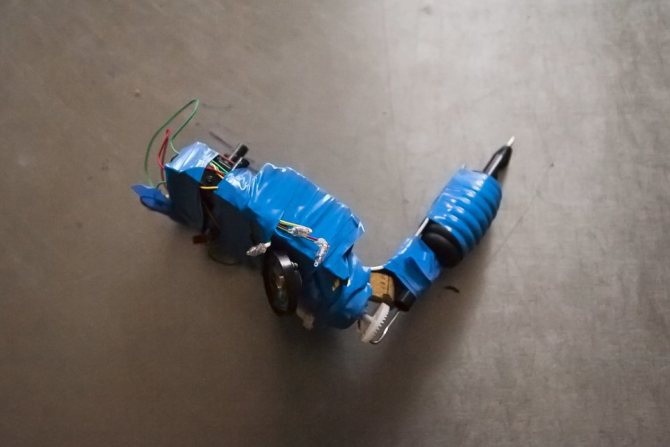
Approximate assembly diagram of radio-controlled model is shown in figure.
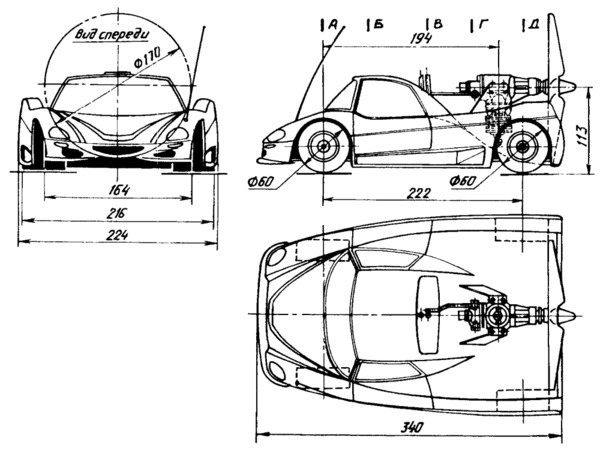
Let's proceed to reading and assembling the scheme, to the fascinating process of creating a unique mini-machine. At first we make assembly of a suspension. We take the VAZ joints and pinions for assembling the gearbox. It is necessary to cut threads on pins and body to install gear wheels and solenoids. Connect the reducer to the power supply, check, and then fix it on the machine. To effectively protect the system from overheating, install a radiator. The plate from it can be firmly fixed with the usual bolts. Next comes the installation of the power driver and radio control chips. Completely install the car body. Our mini-machine is ready for a real test.
Varieties of cars from paper
There are quite a few options for creating beautiful cars from paper. Let's consider the most common of them.
Assembly according to the instructions. There are special instructions on how to make a car from paper, which can be easily found on the Internet. In order to make such a car will need to download a scheme, print it on a printer, then remain to cut it out and glue it.
A sports version
To create it, you will need a sheet of paper of a rectangular shape
It is important that its sides had a ratio of 1:7. First of all bend the upper right corner and similarly the lower left corner
After fixing, the angles go back. As a result, we get the marks.
After that you need to bend the top element, while tucking it inside. Then again, bend the triangles to the central part of the sheet. The sides of the sheet bend, and the lower part of the fold.
Simple version
Part located on top, bending down, thus occluding the lower part. Upper right corner to bend, thus we get a windshield. Finally figure is recommended to unfold.
Race car
Requires the sheet to bend in half along the long side. Connect the corner with the opposite side. Carry out a similar operation with all the corners. Thus we get two squares with intersecting lines. Triangles relating to the long side, folded to the inner side.
Then the long side combines through the midline. One triangle is needed to create the hood of the car, for this need to bend the sides in the direction of each other.
The triangle on the other side is tucked into the folds formed on the hood. It only remains to bend that fragment, which will represent the spoiler.
Fire truck
When creating such a model, one paper will not be enough, so you should prepare glue and scissors in advance. You will need a special blank made of dense material to create it.