Many girls dream of a beautiful drawing on the body, especially in the summer season, but not everyone dares to such a transformation of the body as permanent tattoo. There is a solution - mehendi. It is a technique of henna painting on the body. The direction, is related to body art, biotatu and temporary tattoos. It can be changed every two weeks, how to henna drawing on the body, how to choose henna and where to buy cherished multi-colored tubes at a normal, not overpriced in five times, read about it in the article by our author Catherine.
Mehendi at home
As we remember from previous article, mehendi is a very ancient art. And originally intended only for the rich and powerful. So what prevents us from plunging into the magical world of Indian and Turkish fairy tales? Why not dare and make a couple or three mind-blowing patterns on your body? How do you henna paintings on your hands, feet, neck, chest, and whatever else you want to decorate?
It's quite simple, really: a bag of henna and a couple of nights and you're the guru of the ancient art.


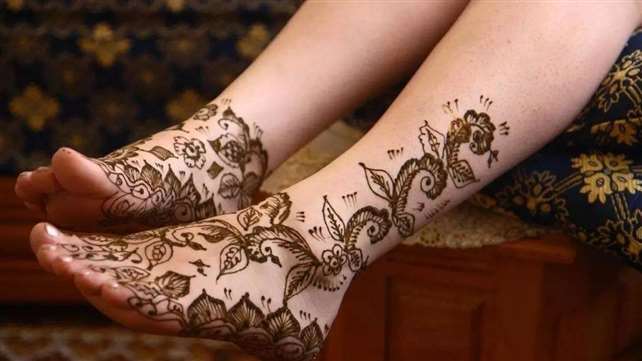
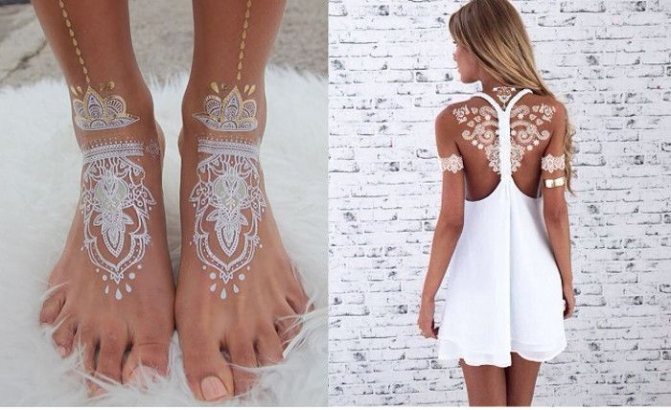
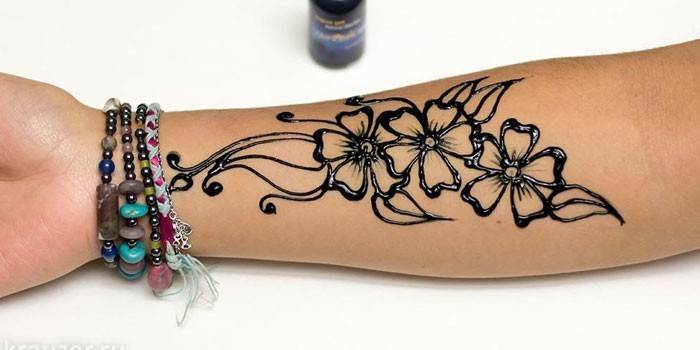
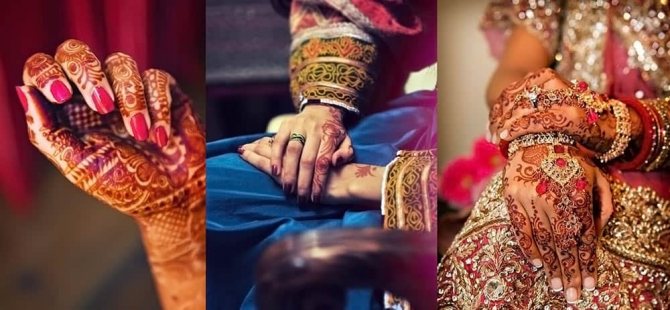
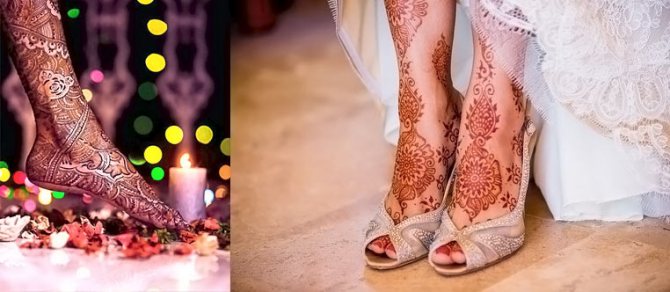
Mehendi painted on your foot
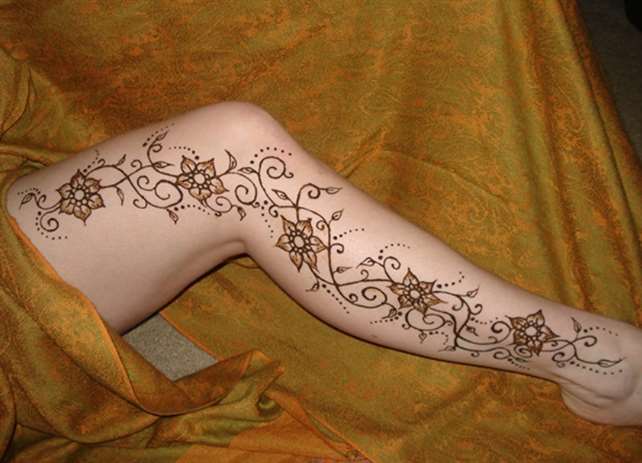
When decorating your leg with henna images, you need to pay attention to the location of the painting. It is believed that mehendi on the right leg is done by people seeking to find their purpose in life, to know themselves.
The left leg is painted by goal-oriented and self-confident people, the right leg - selfish people, the left - people with low self-esteem.
How long will mehendi last
Previously, we told you that the life of such a stylish and sexy jewelry is from one to three weeks. Several factors affect the longevity of the pattern: - First, Skin. More precisely, the place that you are going to paint. The best way such a biotatu is kept on dry skin areas, namely on the palms and feet. But they sweat - you're indignant and you'd be right. But it's all relative.
Yes, they sweat, but the sebum in these parts of our body is produced in a much smaller amount than, say, on the stomach or back. Therefore, to hold the henna drawings there will be many times longer. Unless, of course, you will not run barefoot on the pebbles and sand and rub dirty kitchen utensils with your hands every hour ... - Thus, the second factor affecting the life of the henna drawing is poured: Care. Accordingly, the biotatu will "live" on your body longer, if you wash with soap and washcloths less frequently. Therefore lazy individuals should not be seduced Further read a detailed report on how to make mehendi.


Mehendi painting on the body
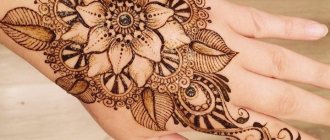
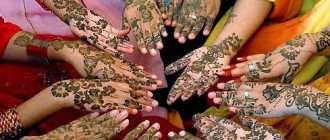
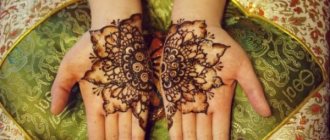
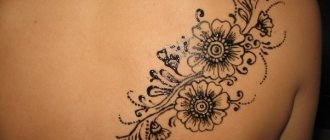
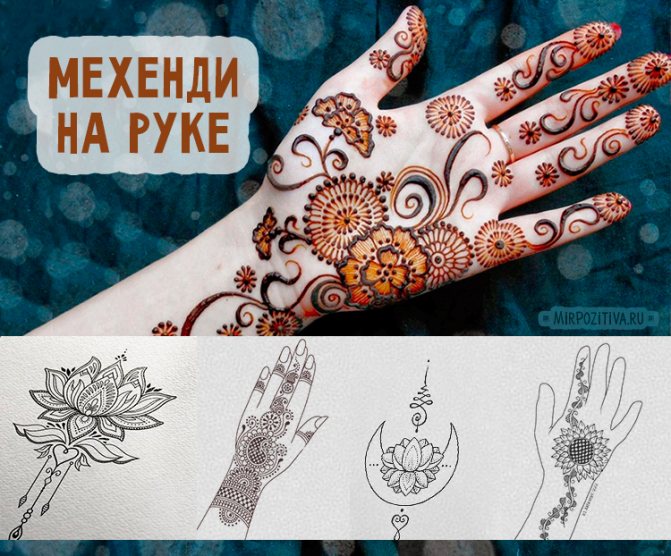
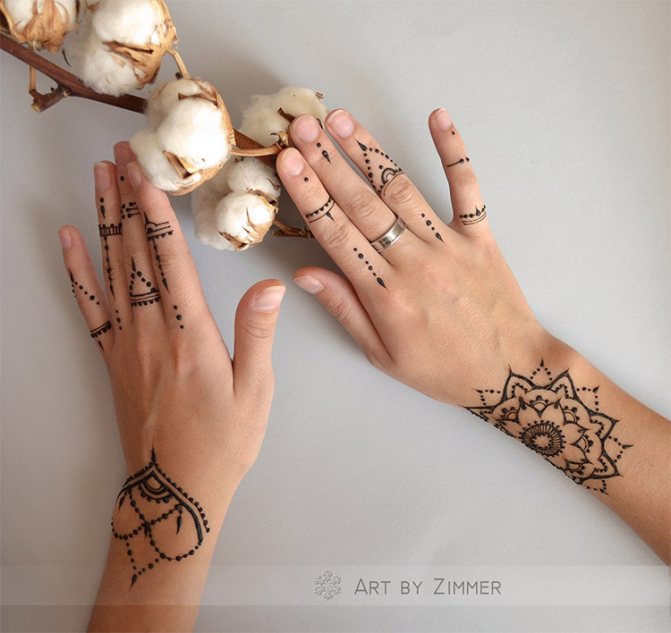
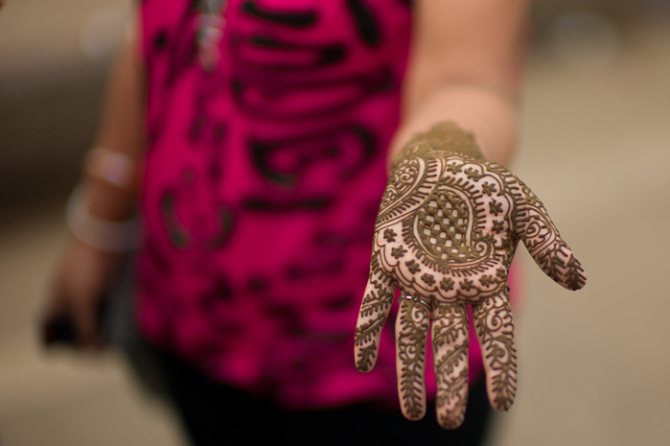
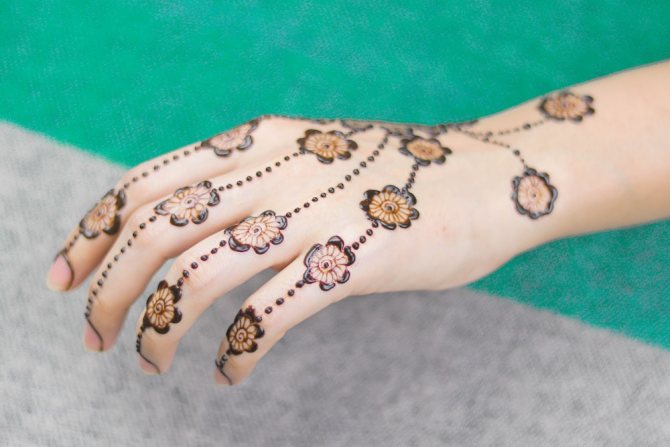
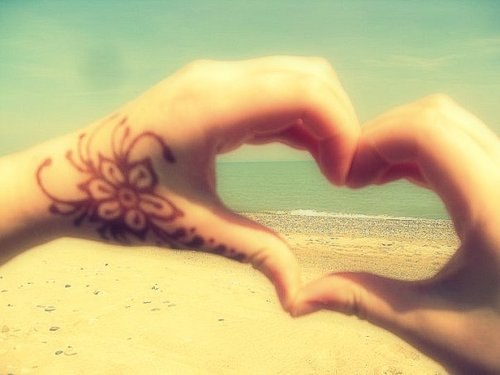
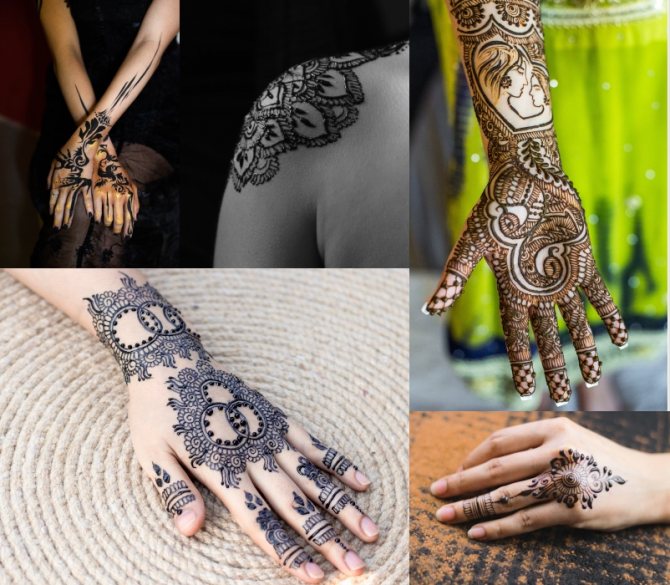
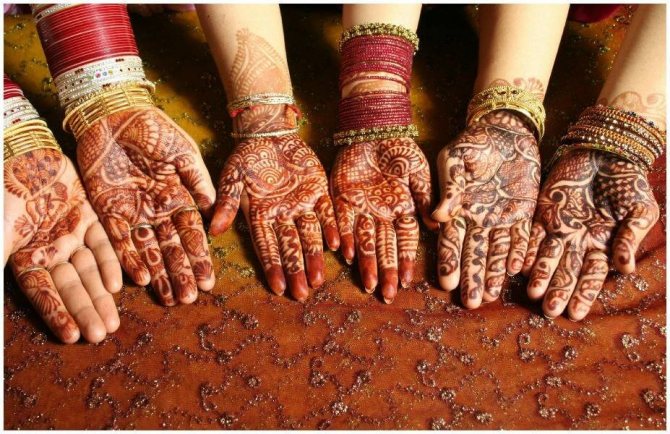
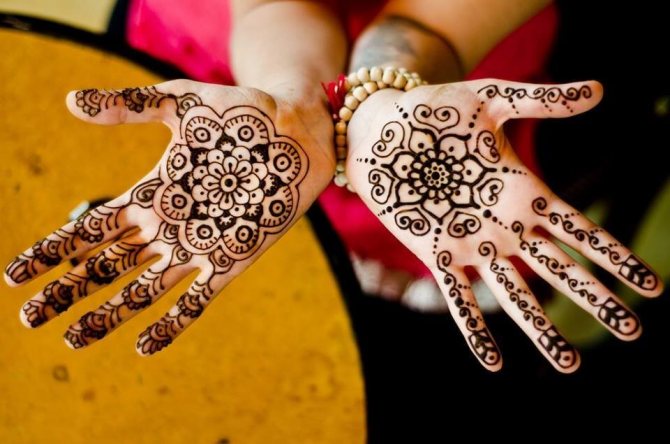
It is allowed to draw henna on any part of the body. Drawings on the collarbones, back look beautiful. Most girls depict animals, flowers or elegant lace. Thanks to such images there is a sense of confidence, uniqueness.
How to draw henna at home?
Of course, you can decorate the body in any salon of your city, offering such services. You can also do it during the holiday season. By the way, it will cost you less abroad. Have you ever wondered why mehendi is so popular on warm shores?
- First of all, the profits from tourists;
- Secondly, the drawings look beautiful and sexy on the beach;
- Thirdly, the warm southern sun contributes to excellent penetration of paint in the upper layers of the epidermis, as a result of which the picture becomes brighter and more saturated...
But if you are going to splash in the sea forever your doodle will stay only in the memory of your camera. Actually, it's not the worst case scenario: in any office with strict business style the painted pens will fail the whole dress-code *victory* But what to do if you want to save money? Well, then welcome to the community of anonymous beginner artists. Although, if you are an artist "with experience", then for you this case is a trifle. In other words, the online magazine "Korolevam.ru" offers you to learn how to draw henna at home. How? Now we will tell you in detail!
Preparing for a tattoo
Preparation for a henna tattoo takes place in several stages:
- Select the location where the drawing will be located;
- Choose the desired design;
- Consult with the tattoo artist about the size and location of the tattoo;
- One day before getting a tattoo, try to avoid sunlight on your skin. Do not visit a tanning salon;
- Wax your skin;
- The area of the skin should be cleaned from dirt, degreased with alcohol, and exfoliated (you need to remove dead skin particles). Cosmetologists say: the smoother the skin, the more guarantees that the tattoo will last longer;
- The last stage is applying the tattoo.
Who should make a henna tattoo? Exclusively a beautician.
What is needed to draw henna: a mini review for beginners
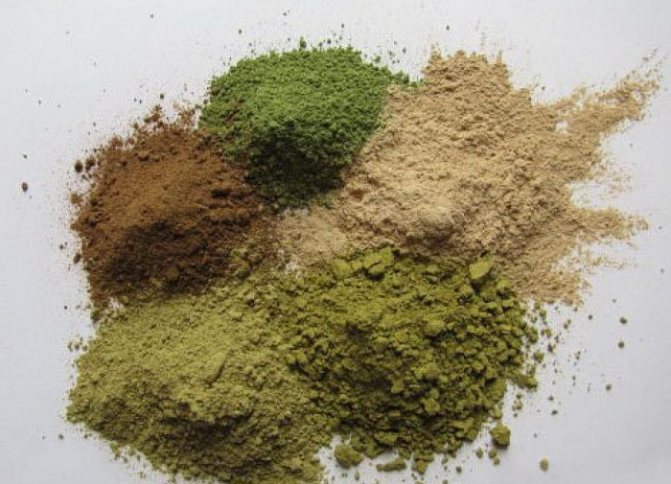
Initially it is necessary to take care of acquiring paste for painting.
Where to find paste for mehendi
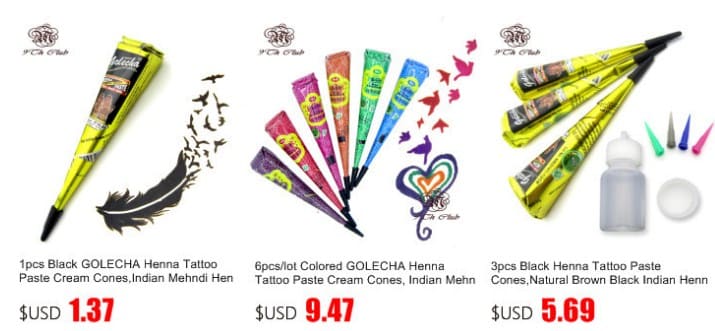
Such paste is sold in mehendi drawing salons. You can also find it in Indian shops and at Indian exhibitions that take place every year in all major cities.
Composition of paste for henna drawings
If you decide to buy such a paste, then pay attention to the composition. Besides henna and lemon juice there should not be other dyes and preservatives!!!
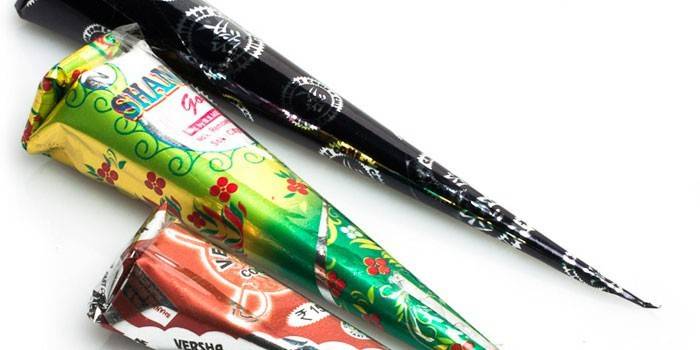
Most often it is sold in small cone-shaped bags. It should have a shelf life of no more than three months.. Otherwise you will be in a bad mood, and manifested rash instead of the desired pattern ... With which, incidentally, you also run the risk of one to three weeks ...
However, to properly draw henna on the hand, you do not need to buy ready-made paste. You can make it yourself. There are several effective ( eco-friendly and safe!!!) recipes, which we will share with you now.
Why a few? Because the classic process of making dye paste is quite long. It takes at least 24 hours. And there is a simplified recipe that is perfect for all impatient and hurried girls, girls, women ... Everyone, in short

What kind of drawing to choose
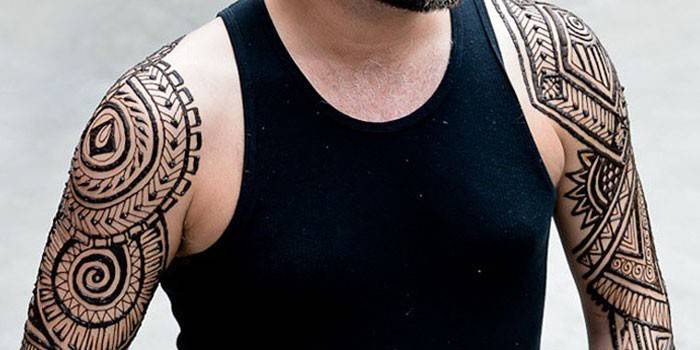
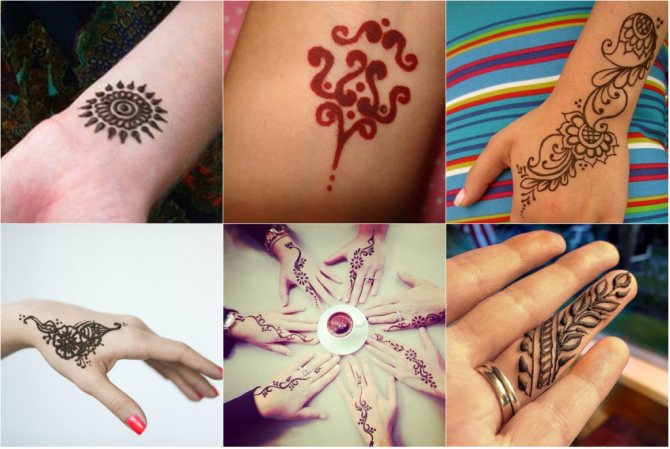
Mehendi is most often not just a drawing, but an ornament. There are four main styles of mehendi:
- Moroccan
- The Moroccan style is the strict lines that repeat the lines of the hands. - Arabian
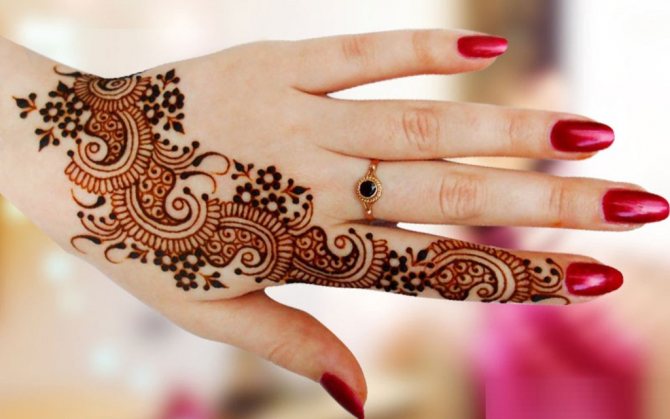
- floral ornament, decorating a small part of the hand. - Indian
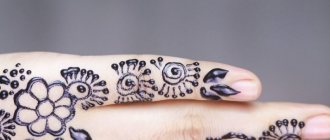
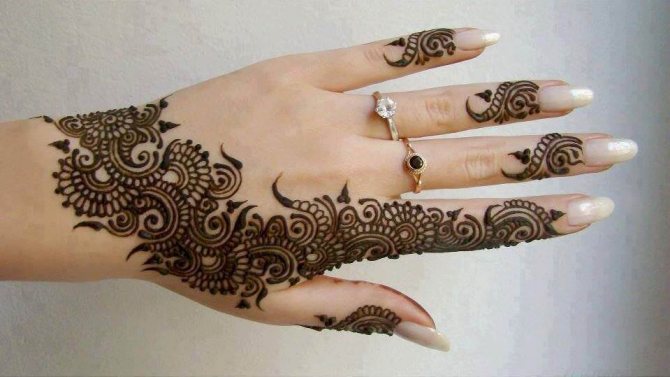
- floral patterns and ornaments and images of Indian deities. Dense pattern with small details, covers the entire surface of the hands and feet, creates the effect of socks and gloves. - Asian
- is similar to the Indian style, but the pattern is applied to the fingertips as well.
The fifth style is called modern
. These are any drawings that do not belong to the previous four styles. They are applied to the hips, back or chest.
View mehendi sketches on popular websites. Here is a selection for inspiration:
Images on Pinterest by "mehendi" Group on mehendi VKontakte with 30,000 followers Instagram of a mehendi master from Moscow
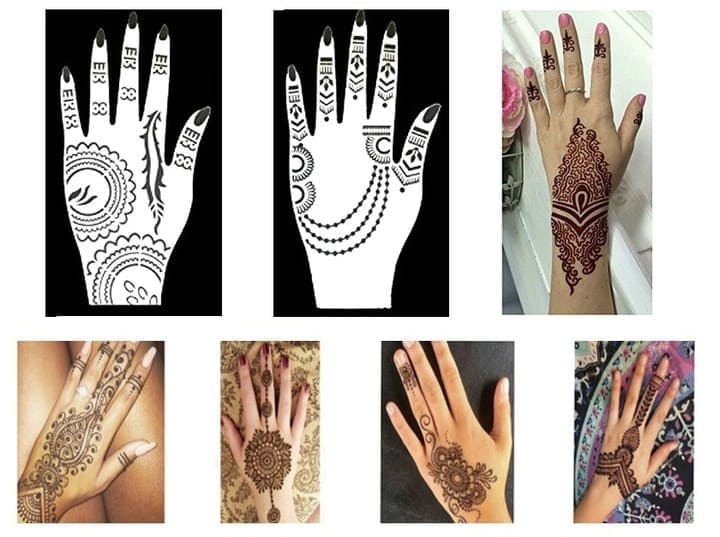
If it is important for you that all lines of the drawing are perfectly straight, you can ask the master to draw not by hand but on a stencil. By choosing a stencil you will know exactly how the ready work looks like and you will be able to try it on yourself.
You can buy the stencils for mehendi before your visit to the master. They are sold in popular online stores.
According to such a stencil, you can put a drawing on any part of the body. Photo: Leonardo
Cooking henna paste
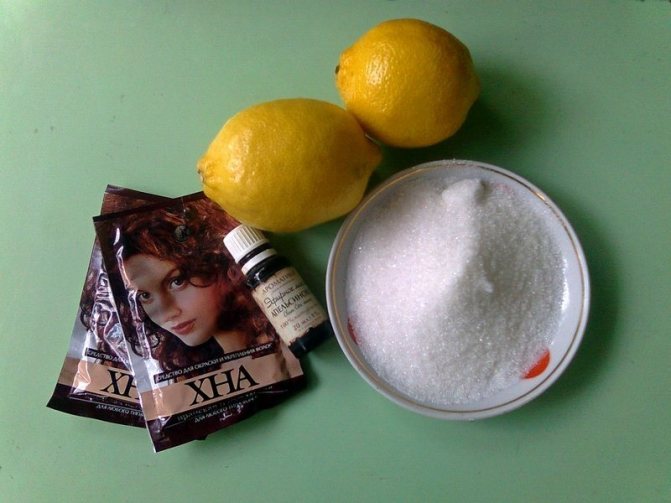
Recipe for mehendi paste #1: classic
The classic recipe is designed to yield 100 grams of ready-made henna paste. This should be enough to paint two hands up to the elbows. So, for a classic recipe for making henna paste you need:
- henna itself (bagged powder 20 g - or 1 tablespoon with a slide)
- Squeezed and strained juice of two lemons
- 1 tsp. sugar
- essential oil (tea tree/orange/sandaline/eucalyptus/lavender)
- a small glass or plastic bowl (no metal ware)
- 24 hours of operating time
We would like to point out right away that before you begin preparing the paste, test the essential oil that you will be adding the night before for an allergic reaction. To do this, apply a couple of drops of oil to your elbow bend as standard.
If there is any reaction, be it irritation, rash, swelling, cough, runny nose, etc.-exclude it from the paste or replace it with another. You can also test henna. Masters say that henna causes almost no allergies, but your health is only in your hands. We should also warn you that the ready-made pasta in both recipes can be frozen, but it is better to use it within three months of preparation. And unfrozen fresh pasta is better to use within two or three days.
Instructions for cooking:
The actual cooking. Recall that this recipe cooks pasta for 24 hours.
Take a spoonful of henna (see above, how much exactly) and a quarter cup of lemon juice (water does not dilute henna, for the manifestation of the coloring pigment needs exactly an acidic environment). Mix the porridge until a homogeneous structure. By the way, sift the henna a few times and remove all the large particles.
Or sieve the henna a couple of times to remove all the lumps. This is to make fine lines without effort and blots. The mixture should resemble a thick puree.
Now close the bowl tightly, wrap it in cellophane (cling film will do nicely - it will safely block all the oxygen) and put it in a warm place for 12 hours. Or even heat it a little in a water bath or on minimum (!) power in a microwave. Once the 12 hours are up, take out the cherished bowl. Add the sugar and essential oil (1 tsp each) and stir. Thanks to these ingredients, the manifestation of color on the skin will be brighter and more saturated. Now it's time again for lemon juice. Add it to the mixture by a teaspoon until the desired consistency.
And the consistency should resemble toothpaste or thick sour cream. Why is there no exact dosage of the right amount of lemon juice? Because it all depends on the individual absorption capacity of the henna you choose. Carefully watch the consistency: if the paste will be too liquid, then the drawing will be blurred and flow (in this case, add a little henna and stir it), and if the paste will be too thick, it will be difficult to squeeze and apply on the skin. Once the mixture has the desired consistency, tightly close the bowl, wrap in clingfilm and again "send" in a warm place for 12 hours. And that's all - you can draw henna on the hands at home. Here is a video lesson recipe:
Cooking henna paste. Recipe #2.
- a couple teaspoons heaped black tea
- an equal amount of ground coffee
- A couple teaspoons squeezed and strained lemon juice
- 500 ml of boiling water
- 2 tablespoons of sifted henna powder (40 g)
- 4-6 hours (if you have more time, it's to your advantage)
Tea and coffee in this recipe act as gas pedals of the appearance of color on the skin, as well as giving extra brightness and richness to the shade. This is, after all, an express method. Pour the tea and coffee into the boiling water and boil the whole thing over medium heat for one hour. The henna can be sifted in advance or while you boil our "coffee tea". Once the "coffee tea" is boiled, mix it with henna to the consistency of thick sour cream. Do not forget to stir and rub the lumps, because they spoil the quality of the pattern when the mixture is applied to the skin. In the ready "potion" add lemon juice (above, how much). Well, now it's a matter of little things: let the mixture infuse. That's as much time as you have - that's how long you should infuse it.
The longer you infuse, the brighter the pattern will appear on your skin. And if you cannot wait, let the paste cool down at least, so that you do not get burnt while applying it...

What should be used to cover the drawing after it has dried?
After application the pattern should dry about an hour but better 6 to 8 hours. The longer the paste dries, the more durable and vibrant the drawing will be. You can leave the paste overnight. Better yet, wrap the dried pattern in plastic wrap and fix it.
As another option, spritz the tattoo with a strong fixing hairspray (without alcohol). After the varnish dries, spray the design again. To fix the pattern well you need 2-3 layers of nail polish.
If you want the tattoo more vivid, while drying you can moisturize the image with lemon juice and sugar (in a 1:2 ratio).
Just don't overdo it! The drawing may "float" from the excess moisture. Better yet, hold the design under an infrared lamp or in the sun.
After drying, carefully scrape the paste off the skin with a special scraper, you can use the blunt edge of a knife or your own fingernail. The main thing is not to wash off the drawing! Remove the remains of paste with a cotton swab with lemon juice.
Then wipe the skin with any oil. Sesame and almond oil increases the brightness and shine of the drawing. Eucalyptus oil not only makes the image shine, but also creates darker shades of the tattoo.
You can wash the picture after about 4 hours, not before. Even better - after 24 hours, during which the picture gains color. To keep the pattern on your skin as long as possible, wipe it every day with vegetable oil. Do not take a hot bath, just a lukewarm shower is better. Do not visit a bath or a sauna.
Then the pattern will last from 10 to 14 days, and maybe up to a month. Then the tattoo will gradually lighten and then disappear altogether. Before the final discoloration it is possible to renew the figure, but experts do not recommend often to apply the figure to the same place. The skin should rest!
It is better to use up fresh paste within 2-3 days. Close the remaining mixture tightly and put it in the freezer. The mixture can be stored in the freezer for up to 3 months. When you need the paste again, take it out of the freezer and let it thaw at room temperature for an hour.
What to paint henna on my hands with?
And not just on your hands, of course. For such purposes, a syringe (without the needle, because we dare assume that the paste is too thick for the needle, and in general, so as not to prick ... ), wooden sticks, toothpicks, brushes or homemade polyethylene bag (pour the mixture into a cellophane bag, cut a little corner (or just pierce it) and - voila! - the bag is ready). Don't forget to prepare a cotton swab (a toothpick will do) beforehand, so that you can quickly and quickly remove the paint from the unwanted areas (or correct the drawing).
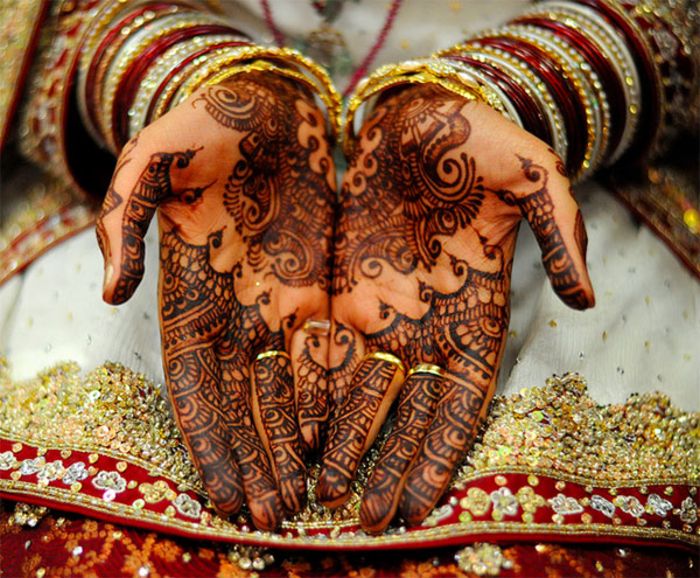
Let's say a few words about the manifestation of the paint: that is, the expectation and reality. The newly applied henna is quite dark, bright. After removing the henna in the first 10 hours the paint is pale, slightly orange. There is no need to be frightened and over-draw: the paint on the skin gains intensity within 48 hours from the time of application. The first 24 hours it is better not to wet the area with a pattern at all, so as not to lose the brightness of color. The pattern lasts long enough on the palms and feet, as well as the ankles and forearms - up to three weeks. But on the back, abdomen, neck, face - only 4 to 9 days maximum. All that is left are the memories of their former beauty (especially the enterprising ones have photos of them, too).
Instructions for mixing powder henna
Self-made syringe package
It's easy to make a syringe bag yourself. You need A thick and sturdy Polyethylene bag. It is convenient to use wrapping film for gifts and flowers. The optimal size is 20 x 16 cm. Roll a sheet of film in a cone ("cummerbund"), and at all seams and at the tip for reliability, tape or plaster well. The resulting syringe bag is two-thirds filled with paste, using a teaspoon. The upper edge should be several times bend several times and secure with adhesive tape..
In the lower sharp edge of the bag with a needle a hole is pierced. Through this hole the henna will get on the body to create the drawing. Read more about the drawing technique.
Storing the ready paste
It is convenient to store the paste in a syringe bag. Seal the hole in the tip of the cone. For this purpose, the tip of the cone can be bent and secured with a paper clip or clothespin.
The paste is stored in the refrigerator for up to 20 days. In the freezer - up to 4 months. Before next use, make sure that the paste has an even consistency.
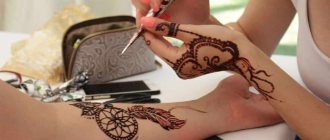
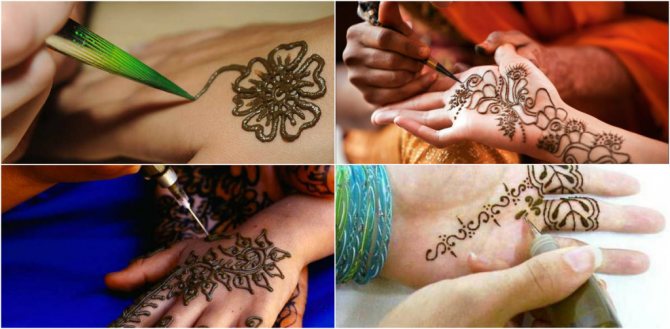
Drawing henna on the hands at home: step by step instructions
Well, again, not only on the hands. Before drawing, it is important to choose a place for it on the body. Again, it is better to do it on the palms or feet. But if you want to paint yourself all over from top to toe, then we do not dare to dissuade you; after all, creative impulses are worth a lot.
If you decide to paint your hand above the wrist or ankle (as well as any other part of the body), be sure to prepare your skin for the procedure beforehand! It is important to peel your skin (you can do it in a salon or at home), at least use a scrub or a hard loofah. A good wash the area with soap and water (do it with special care, until the creaking, otherwise bathing procedures in this area will long be prohibited) and be sure to epilirate. Here you have to decide for yourself what is better to use: a wax, epilator, shugaring ...
Only razor use is undesirable. During epilation you pull out the hair completely, and the razor only cut the visible top of it. Why are we talking about the fact that along with the skin you dye body hairs, so when the shaved hair will grow back, it will continue to wear the color of your "biotattoo" for a long time, much longer than the picture itself. This is one of the important principles of how to properly draw henna on the hands and body at home.
After all the manipulations performed, the skin should be degreased. You can do it with alcohol (sold in pharmacies), or with vodka (art gurus say that alcohol lotions and tissues are also suitable, but in a very extreme case...).
Then the skin can be treated with eucalyptus oil. You can, but if you are allergic, it is not necessary. And without fanaticism. A couple of drops on the area will be quite enough... After all, if you're not allergic, then hypersensitivity can manifest itself easily. A rash, scratches, nail scratches are possible... You may need to postpone drawing until the skin on the chosen area is completely healed.
In fact, why do you need oil at this stage? It is said to greatly enhance the skin's ability to color by increasing the drying time of the dye (i.e., the dye pigment takes longer to absorb into the skin) and opening up the pores.
Mehendi care
In order for a henna tattoo to last longer, some rules should be followed:
- Before applying the paste to the body, the area should be well cleaned or peeled. It is desirable to remove hairs to avoid unpleasant feelings when the paint dries and begins to peel off.
- After finishing tattooing it is not recommended to wash the painted over parts of the body for about seven hours.
- For the next few days it is recommended to clean the mehendi with almond, coconut or olive oil.
- Try not to rub the picture, not to apply different creams, so you will prolong the life of your tattoo.
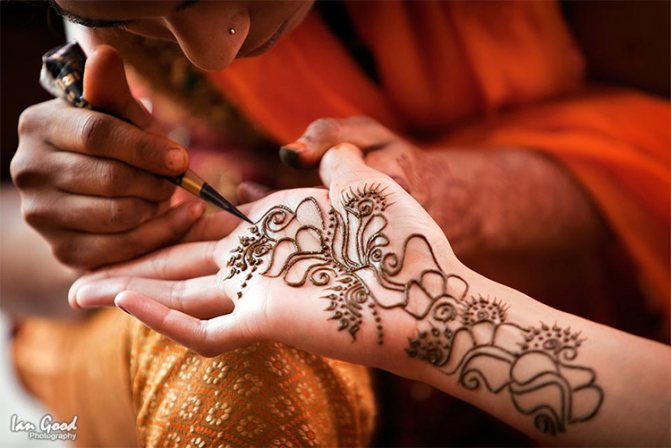
Applying a henna design
Before preparing the skin, it is important to puzzle over and how to properly make mehendi at home by yourself. If you are a skilled artist with properly growing hands, then the process of drawing will not be very difficult for you. But what to do if you can draw, but are afraid that at the crucial moment your hand will shake?
There is a way out: after preparing your skin for biotatu, draw the desired pattern on it with a cosmetic pencil (eyebrow pencil, eye pencil, lip pencil, but not waterproof) or with a water-based marker (as you understand, a permanent marker will do nothing unless you have absolutely no henna *rofl* ). This way you can move confidently along the drawing, excluding mistakes, blots and other nuisances.
What if you can't draw at all? No, do not despair: there is a solution for you too, and you just like everyone else will be able to flaunt in boho style. Or any other style. Just for you there are detailed videos on how to paint henna on your arm, leg, and wherever you want. Or a miracle invention: stencils. You can buy them in mehendi salons, on specialized websites and Indian exhibitions or even make them yourself (although it is quite time consuming and requires a certain skill).
Here are a few step by step video instructions:
The stencil can be attached to the skin with adhesive tape or scotch tape. Avoid "trapping" the stencil in the folds of the skin: the design will spread and lose its shape. Also take care not to accumulate too much paint on the borders of the stencil, because "too much" can disrupt the pattern, the smoothness of the lines and their thickness. If this happens, quickly erase the defect with a cotton swab or a thin match. The pattern is laid out with a paste a couple of millimeters thick (2-3).
This way it turns out thinner and more delicate. However, if it is thicker, the longevity and intensity of the pattern increases many times over. Here already you decide what is more important: the elegance of the lines or the longevity of the drawing.
About the tattoo
A temporary tattoo is not for life, but at most for a few months, maybe a year.
A henna tattoo is temporary.
If you come to a beauty salon and you are told that a henna tattoo will last for several years, then leave there at once. You are being lied to, and do not think about professionalism, but only want to make money on your ignorance.
There are also tattoos temptu, which supposedly will last 5 years and will not wash off. This is not true - first of all. And secondly, cosmetologists are against this kind of tattoo, because it will ruin the skin forever. Tattoo temptu is carried out as follows: the skin to a depth of 4 mm is introduced paint for permanent makeup. As part of such a paint: henna, titanium bioxide, water, glycerin, ethylene glycol, iron oxide. This chemical compound is distinguished by its unstable chemical state. In simple words - in a month or two, the tattoo will blur and remain under the skin as a dark spot. Visually, it will look as if you have stained the area. If this is the case, you need to have that spot on your skin lasered.
If you do not want to sacrifice your health and skin including - apply a henna tattoo. It will last 2 weeks and after - the skin will be in its original form.
Where to start if you don't know how to draw?
The best option in mehendi for beginners is to use simple, uncomplicated shapes. Geometric shapes (drop, rhombus, cross, circle, arc, dot, parallel lines, zigzags), plant ornaments (flowers, vines, curls, leaves, wavy lines) are quite simple and attractive.
If you want to draw henna patterns on a large area (such as the shin), you should mentally (or even with a pencil) divide it into several parts and draw each part separately. Subsequently, you will connect all the parts with adjacent drawings or lines.
From previous article you remember what each pattern means. Draw what you like and what you would like to show the world or attract into your life. The sacred meaning of the patterns will bring meaning to your creative process. Always start the drawing process with the narrowest lines, moving smoothly to straight lines. There are patterns that are easier to draw from their center part. Finish the process with rounded elements, without sharp corners and lines. To learn how to draw henna on the hands, you can watch not only a video, but also practice on a sheet of paper. You can, thus, not only learn how to confidently guide the brush on the hand, but also work off the basic elements and ornaments. You might even come up with a lot of creative and original patterns. Remember, it's always better to practice and get a little "hands-on" than to try to fix the wrong thing later. Mastery doesn't come at once, so it's important to be patient. The more confident you are in holding the brush, the better your drawings will be.
By the way, it is not necessary to apply exactly Indian and Turkish symbols. You can also draw a temporary version of the tattoo that you would like to "try on" yourself.
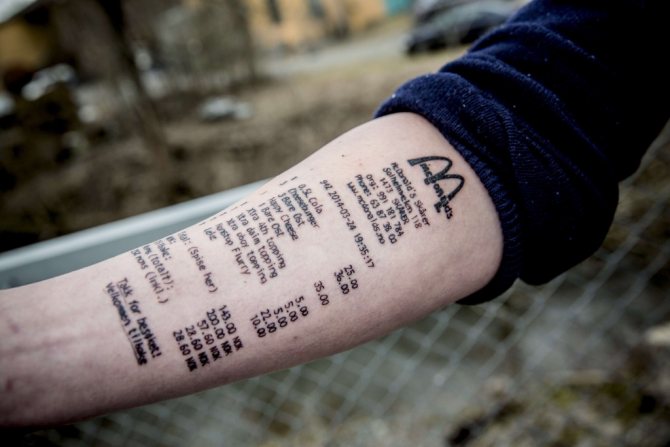
It's original, unconventional and safe. If you do not like the "sample" of your tattoo, you can always "try on" another . Want, draw chanterelles, pussycats, birds, dragons, hieroglyphs, inscriptions, figures, even a receipt from McDonalds, as one young Norwegian did...
Let it be pretentious, but individual. Even if you don't like the result it won't last forever - it will, you won't even notice it.
Patterns and their interpretation
Before applying the symbols to the body, in order not to get into trouble, it is better to know their meanings. Especially since there are female and male signs.
We present you the decipherment of the most common images.
- The flowers .
- The embodiment of femininity. They signal the rich inner world of their owner and exquisite taste. An ornament of flower bracelets is a symbol of happiness in family life. - Rose
- symbolizes beauty, inner and outer, passion and love. - Lotus
- A popular image that promises good luck and good fortune. - Butterfly
- Symbol of ease, health and good luck. - Owl
- A symbolic representation of wisdom, intelligence and power. - Birds
- Longing for dreams, thirst for freedom and life, quickness in decision making. - Feather
- A symbol of many meanings. Depending on the image, can be indicative of many things. Broken feather - the collapse of hope, flying over the palms - sadness and separation, pointing up the whole - strength of will, freedom and spirituality. - Triangle
- Protection from the three afflictions (worries, illness and natural disasters). - Octagon
- Complete protection in everything, from the eight sides of the world (north, south, west, east, and mixed directions). - Dragon
- A personification of strength, boldness, and power. - Wolf
- A symbol of confidence, fearlessness, and the ability to sacrifice for one's family. - Cat
- A sign of the divine essence. The image carries ancient Egyptian roots, the honor to wear the sign of a cat was awarded mainly priestesses. - The crown
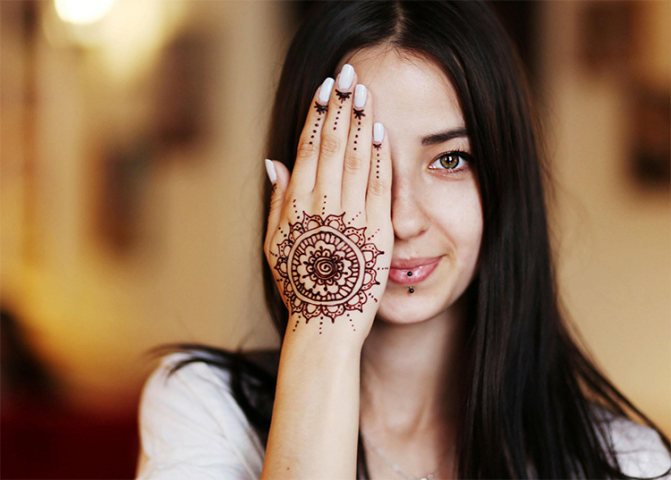
- Symbol of leadership, supremacy and power. - Mandala
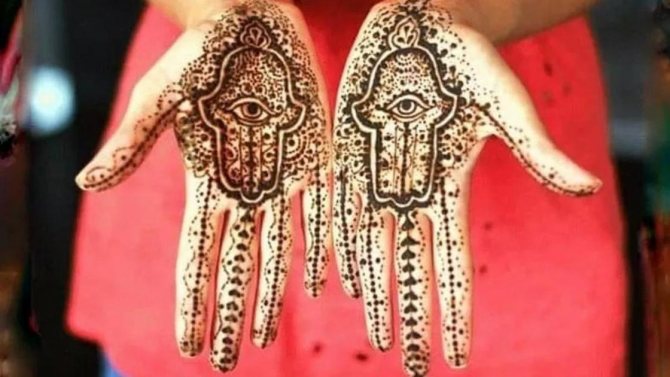
- Symbol with a deep sacred meaning. Its owner must remember that it contains wisdom and the ability to help achieve the desired. It is not just an image, but a schematic representation of the realm of the deities, a stylized model of the cosmos. - The Dreamcatcher
- can protect its owner from bad dreams, gloomy thoughts and evil spirits.
As for the representatives of fauna, most often both men and women choose an animal that they feel sympathy for or with whom they identify.
How to take care?
After applying the tattoo, it is necessary to dry it. The longer the better. Periodically, as the paint dries, dab the drawing area with a solution of lemon juice mixed with sugar (2 parts juice to one part sugar). The tattoo should dry in 6 hours. After that it is not necessary to wash off paint from the skin, remove the rest with a cotton swab. Lubricate the final version of the figure so it becomes much brighter. Before you take a shower, apply a generous layer of oil to the tattoo (this will allow the figure to stay in its original form as long as possible). Remember: the more often the tattoo will be in contact with water, the faster it will "go away" from your skin.
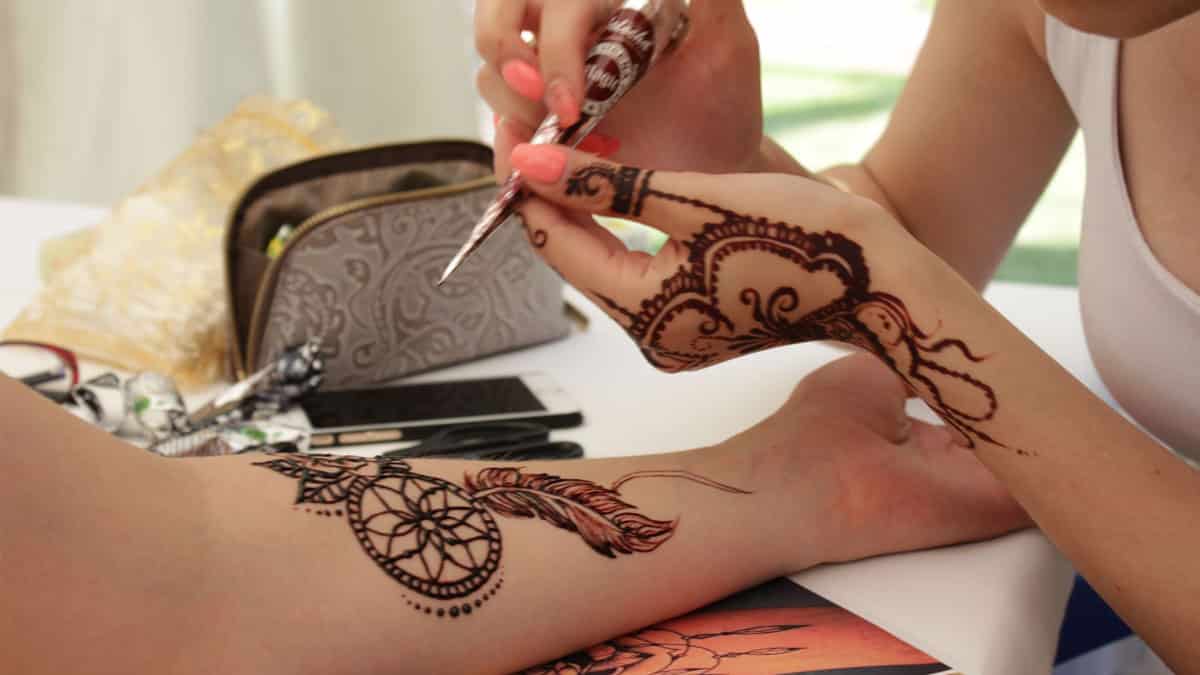
How to make a henna cone to create mehendi
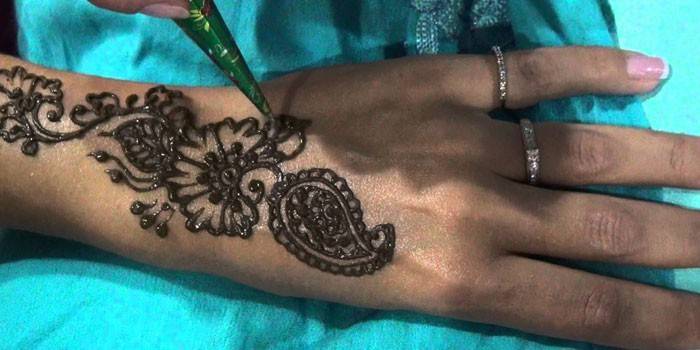
In order to apply henna drawings you can use different means, the main thing is to apply thin and smooth lines you were comfortable. So, for example, a soft and small bottle with a spout or a toothpick. Usually the henna solution is applied with cones. Such an option is very convenient to use. Such a cone can be made by your own hands at home, or you can just buy it in a store. To make such a cone for mehendi you need small bags for freezing (one bag makes two cones) or flower wrapping or film, scissors, tape and wire. You need to cut the bag diagonally and make a funnel out of the resulting pieces. At the very end of the cone you need to make a small hole, through which the ready solution will come out. Next, it is necessary to fix the cone with tape on the outer and inner side from the edge of the tip. That is all, the cone is ready to use, and if you have already prepared the mixture for mehendi at home, then you can safely use it. Using a small spoon, you need to pour a small amount of henna solution into the cone so that the cone does not break. It is much more convenient to work with a small amount of henna solution. In order for the mixture not to come out of the cone when you press it, you need to tie, twist or squeeze the top of the cone.

How to apply a henna pattern
The first thing you should do before applying the drawing is to check for allergic reactions to the henna solution. The surface of the skin must be degreased with alcohol. It is necessary to rub a couple of drops of eucalyptus oil, tea tree, lemon or other vegetable oil into the skin. The oil will protect the skin, and the tattoo will last much longer. Then according to the finished drawing, or using a stencil, use a cone to draw the pattern on the skin. For beginners, in order to get a hand, you should practice on the glass. If the line or pattern was applied incorrectly, they can be removed with a cotton swab pre-moistened in alcohol. When the entire pattern is applied and you have already made yourself a mehendi at home, it should dry for eight hours. After that, using a napkin or cloth, you can gently remove the paint. Next, you should mix two tablespoons of freshly squeezed lemon juice and one tablespoon of sugar. The resulting solution should be wiped several times with the resulting pattern. Such a procedure will help to preserve the pattern as long as possible. The resulting tattoo, it is necessary not to wet and not to use soapy means. If the need arises, it is possible to slightly rinse the water. The tattooed pattern will change its color shades, and in a day or two you will be able to assess it in its final color. Nowadays do tattoos not only with henna, but also other means are used that allow receiving wonderful patterns of colored mehendi. Now, knowing how to make mehendi at home, feel free to experiment!
Health and Safety
Most of all, people who visit beauty salons, providing services for tattooing with basma and henna, are afraid of possible allergies. It should be said that tattoos with basma and henna are the most harmless pictures that can be put on the body. They consist entirely of natural substances, which have hypoallergenic qualities. The risks are minimized. In addition, many claim that after dyeing the hair and body henna, the regeneration process is accelerated, this technology can even treat psoriasis, alopecia and other diseases.
The only thing that can alert, sometimes the mixture includes cosmetic oils, it can be orange, lemon, grapefruit, etc. They are used to make the mark after the henna darker and more contrasting. If low-quality oil is used, undiluted, or you overheat it, you can get a burn. But in most cases, the reviews are encouraging.
This technique is used both for "tattooing" adults and for decorating children.
This paint is natural and useful for the dermis of any age, in addition, such drawings look really beautiful and stylish (especially if the ethnic style is supported by accessories and appropriate makeup).
Advantages and disadvantages:
Video: how to make temporary tattoos on the hands henna https://www.youtube.com/watch?v=hhoajSpLon8
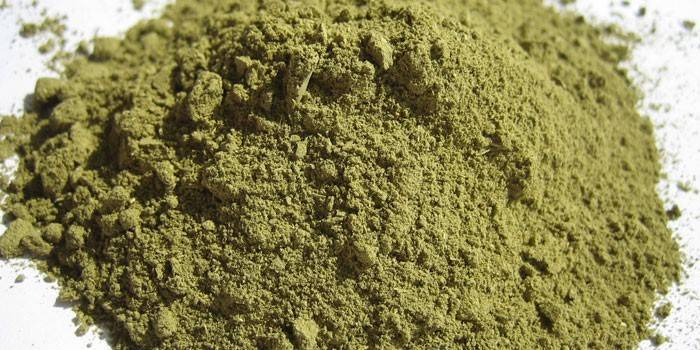
What is henna and where do you get it?
Recently, ethnic decorations are gaining in popularity, unusual drawings in such an exquisite style will perfectly decorate almost any part of the body. Since ancient times, women of the East have used various lace patterns not only for unusual decoration of their own bodies, but also in religious ceremonies.
Nowadays, such drawings are rarely used with a special deep meaning, but the coloring technique is successfully used to create an interesting and unusual image.
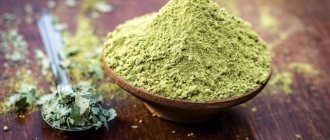
By henna is meant a special powder, which is made from the top, finely ground, henna leaves. By the way, it is important to know that the well-known hair dye and henna for painting on the body are not the same, the first of them has a coarser grind and a rich color.
If you decide to engage in such art at home, you will need some handy materials and tools, such as henna, which you can buy only in specialized stores or order over the Internet. You may also need an applicator, which will be used to apply the drawing, usually for this purpose use an ordinary medical syringe, of course, without a needle, a brush and a stick to create wide drawings.
It is important to remember that henna - a fairly strong dye, which is difficult to get rid of just a few minutes, so when drawing take care of clothes and other important things - if the paint on them, try to remove it immediately with a wet cotton swabs.
By the way, the same applies to the skin, if during the creation of the line went in the wrong direction, it is important to erase it as soon as possible, otherwise the picture will be spoiled. Usually, the temporary henna tattoo lasts from 7 to 14 days.